23
www.evolutionpowertools.com
4. Fuel Tank Filler Filter
Occasionally visually check the condition of the fuel tank
filler filter (when refuelling is ideal). If there is any sign of
deposit build up, remove the filter from the tank and clean.
• Cleanthelterwithenvironmentallyfriendlywater
based degreasing agent and if necessary blow the
fine mesh through with clean, dry compressed air.
• Allowtodrythoroughlybeforeretting.
• Whenretting,ensurethatthe2cutoutsonthe
top edge of the filter line up with the cut outs in the
fuel tank filler neck.
5. Checking the Drive Belt Tension
WARNING: Only attempt this procedure with
the machine cold and the engine switched ‘off’
and the spark plug cap removed.
Drive belt tension should be checked after the first
4 hours of use and then as specified in the Routine
Maintenance Schedule.
To check the Drive Belt Tension:
• Remove the Belt Guard by removing the three (3)
socket headed screws (Fig. 16) using a hex key and
spanner (not supplied) and store safely for future use.
Note: These three (3) socket headed screws are
position specific. Note the position of each of the
screws and its related accessories as it is removed
from the machine so that it can be replaced in its
original position.
• Deectionbylightngerpressureatthemid-pointof
the belt should be approximately 5/6 mm (1/4 inch).
Note: The engine unit of the Hulk is positioned over
four (4) slots on the Engine Mounting Plate. Four (4)
engine mounting bolts are positioned through these
four slots and are screwed from underneath up into the
base of the engine crankcase block. This arrangement
enables the engine to be repositioned on the plate.
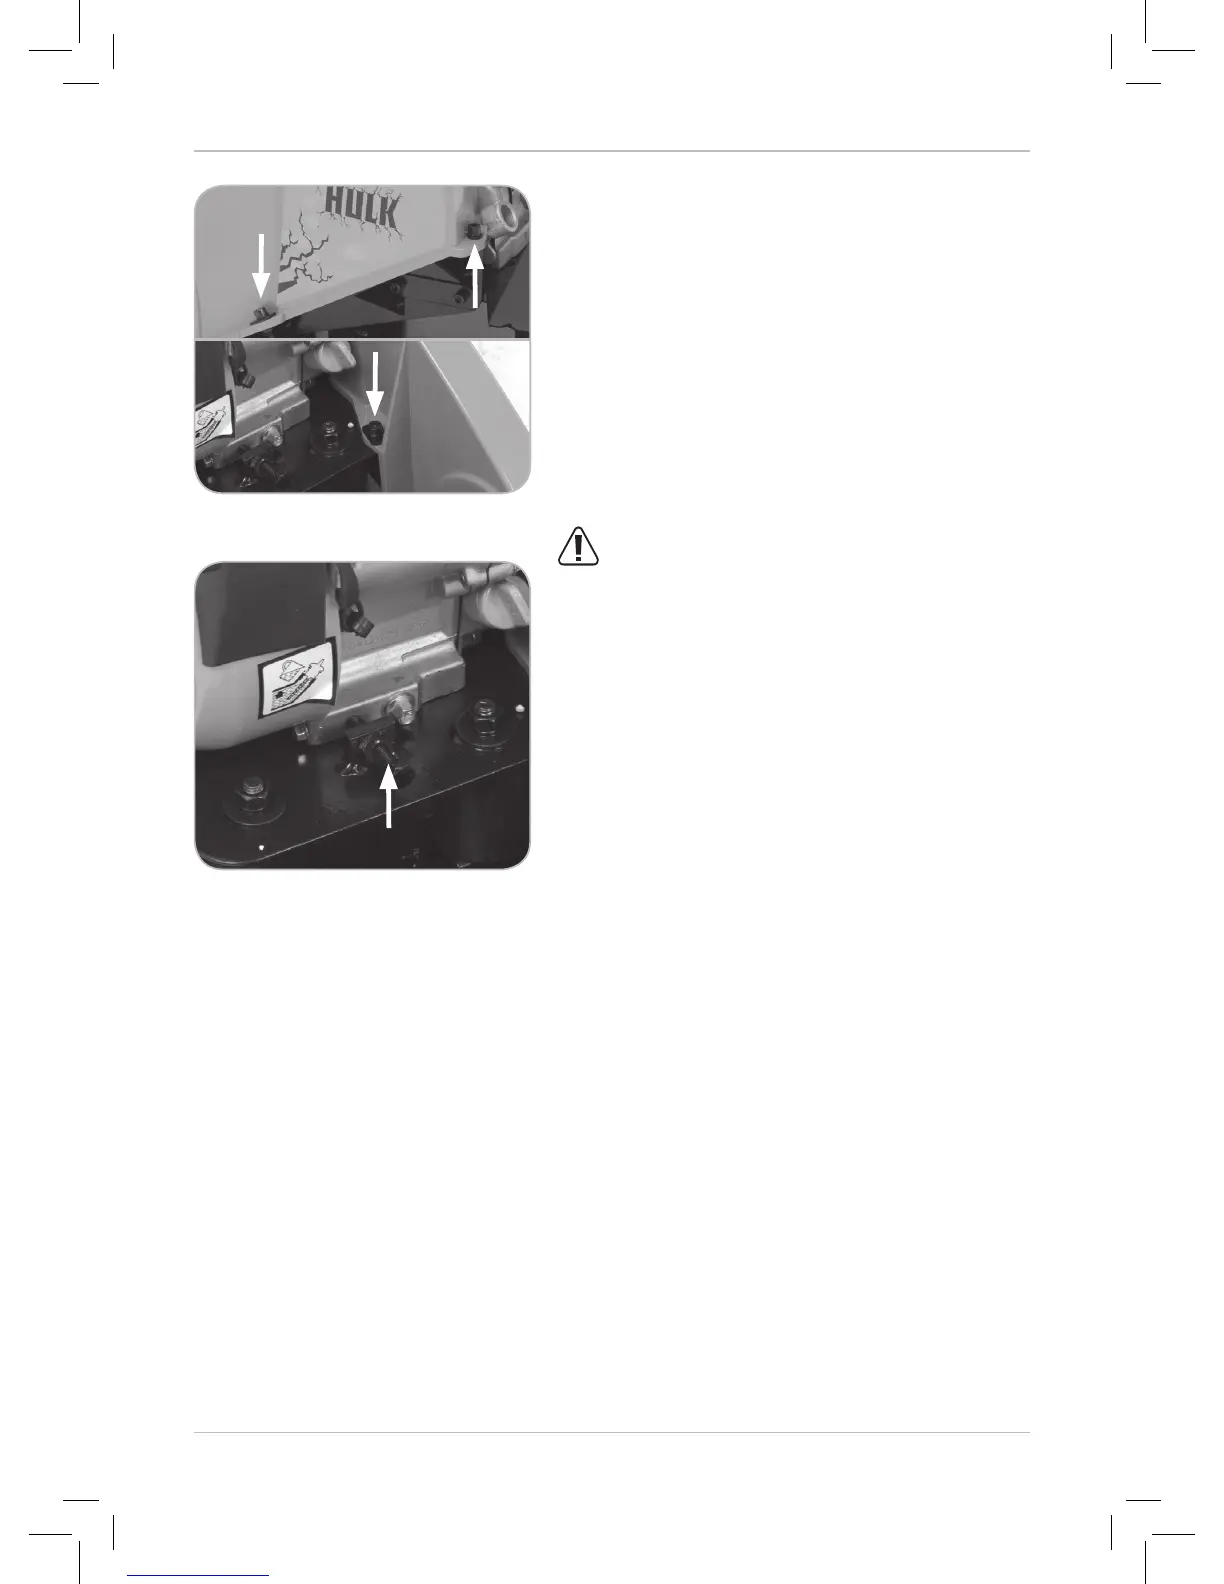
• Loosenthefour(4)hexagonalheadedboltsusinga
suitable spanner (not supplied).
• Slidetheenginebackwardsorforwardstoalter
the tension of the Drive Belt. An adjustment screw
(Fig. 17) is provided at the front of the engine to aid
precise positioning of the engine.
• Whencorrecttensionhasbeenachieved,
securely tighten the engine mounting bolts.
Fig. 16
Fig. 17