INSERTING THE CARRIAGE SLIDE
The carriage slides two (2) arms should be
inserted through the two linear bearings
contained within the bevel neck.
The carriage slide should be inserted from the
back ensuring that the ‘Evolution’ logo is the
correct way up. (Fig. 9)
• Slide the sliding carriage arms through
the bevel neck for approximately half of
their length.
• Screw the carriage slide locking screw into
the threaded hole above the right hand arm
of the carriage slide. (Fig. 10)
Note: Ensure that the anti-vibration spring is
fitted underneath the hand knob before fitting
the locking screw into its service position.
• Tighten the locking screw to lock the sliding
carriage into the desired position.
Note: If for any reason (transit damage,
unpacking error, operator mistake, etc.) the
locating lugs at the tip of the carriage slide
arms have been ‘tripped’, the sliding carriage
cannot be fitted into the bevel neck or onto
the cutting head.
The locating lugs (Fig. 11) must be reset,
if either or both have been ‘tripped’
prematurely.
RESETTING THE LOCATING LUGS
• Gently push the protruding lug into the
Carriage arm.
• Gently ease the locating lug deployment
plunger forward by using a flat bladed
screwdriver (not supplied) as a lever. (Fig. 12)
ATTACHING THE CUTTING HEAD
• Align the cutting head with the two (2)
sliding carriage arms. (Fig. 13a)
• Push the cutting head onto the Carriage
arms firmly until the ‘click’ of the Locating
Lugs deploying is heard. (Fig. 13b)
CHECKING THE INTEGRITY OF THE
ASSEMBLY
The deployed locating lugs must be fully
visible when viewed from the side of the
cutting head. (Figs. 14a, 14b, 14c)
Note: The Locating Lugs are coloured green to
help make identification and confirmation of
correct deployment straightforward.
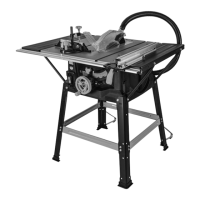
THE MACHINE TABLE EXTENSIONS (Fig. 15)
Note: Two (2) machine table extension pieces
are provided with this machine. They are
‘handed’, one being for the right hand side,
and one for the left hand side.
TO FIT THE TABLE EXTENSIONS:
• Carefully examine the table extension pieces to
determine which is for the right hand side and
which is for the left hand side.
• Use the socket headed screws provided, to
attach the Table Extensions to their service
positions. (Fig. 16)
• Position the relevant Extension piece onto
the table and secure it into its service
position using the socket headed screws.
• Repeat for the second Extension piece.
ROUTING THE POWER CABLE
WARNING: This machine is equipped with
a mains cable and a moulded plug which
satisfies the regulations of the receiving
country. This cable and plug, if damaged,
should only be replaced with genuine
Evolution replacement parts and be fitted
by a competent technician.
• Ensure that the cutting head is in the
uppermost position.
• Ensure that the carriage slide is in its most
forward position and locked. (Fig. 17)
From the motor the mains cable should gently
loop through the forward cable guide/clamp,
which should then be fastened into its service
position on the Cutting Head pivot casting
using the cross head screw provided. (Fig. 18)
The cable should then be routed rearwards.
The cable should be inserted into the rear
cable guide/clamp.
This guide/clamp should then be fastened
to the rear sliding carriage cross piece (right