DEPTH STOP (Fig. 9)
Use of the depth stop feature means that the blade will not cut completely
through the workpiece depending on the depth that it is set to. This allows
the operator to cut slots in the workpiece. NOTE: It is advisable that the
depth of cut is checked using a scrap piece of timber prior to undertaking
the workpiece. By making a cut in the workpiece and then slightly moving
the workpiece to the left or right before repeating, it is possible to perform
trenching cuts in the workpiece.
To use the depth stop feature follow these steps:
1. Loosen the wing nut.
2. Adjust the thumb knob to the required depth.
3. Once set to the desired depth, tighten the wing nut against the
retaining bracket to lock the depth stop and ensure that there is no
movement.
CLEARING JAMMED MATERIAL:
1. Turn mitre saw “OFF” by releasing trigger switch.
2. Wait for all moving parts to stop.
3. Unplug the mitre saw.
4. Remove jammed material from the unit.
OPERATING INSTRUCTION
DISCONNECT THE MITRE SAW AND INSPECT YOUR
SAW BEFORE EACH USE.
WARNING: To reduce the risk of injury, always unplug the saw before
changing or adjusting anything. Compare the direction of rotation arrow on
the guard to direction arrow on the blade. The blade teeth should always
point downward at the front of the saw. Tighten the arbor screw. Tighten
the cover plate screw.
PREPARING TO MAKE THE CUT
CAUTION: NEVER pull the saw toward you during a cut. The blade can
suddenly climb up on top of the workpiece and force itself toward you.
- Avoid awkward operations and hand positions where a sudden slip
could cause ngers or hand to move into the blade.
- Cut only one workpiece at a time.
- Clear everything except the workpiece and related support devices
away from the blade before turning the mitre saw on.
- Secure workpiece using clamps to hold the workpiece securely.
MAKING COMMON SLIDE COMPOUND CUTS
There are two types of cuts that can be made with the slide compound
mitre saw.
Slide Cutting
Loosen the side lock knob and move the cutting head towards the operator.
The saw blade is lowered into the workpiece and then pushed to the rear of
the saw to complete the cut. Used for cutting wide pieces. It should not be
used for cutting metal materials.
1. Put wood against fence and secure with clamp as appropriate.
2. Loosen the slide lock knob.
3. Grasp the saw handle and pull the carriage until the arbor (centre of
saw blade) is over the front edge of the workpiece.
4. Press the lower guard unlock lever for saw head release.
5. Switch on the saw and allow the saw to reach full speed.
6. Push the saw handle all the way down and cut through the leading
edge of the workpiece.
7. Gently push the saw handle towards the fence completing the cut.
8. Push power head to full rear position after each cut.
9. Release the trigger to switch off the saw and allow blade to come to
a complete stop before moving hands or remove the workpiece.
CHOP CUTTING
The slide lock knob is tightened and the saw handle is pushed down to cut
through the workpiece. This type of cut is used mainly for narrow pieces
and all metals.
1. Slide the cutting head to the rear as far as it will go.
2. Lock slide lock knob.
3. Place the workpiece on table and against fence and secure with
clamp as appropriate.
4. Grasp the saw handle.
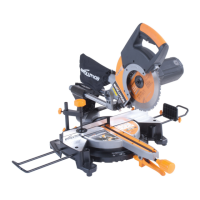
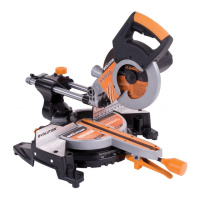
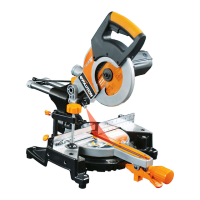
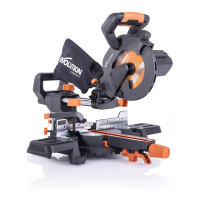
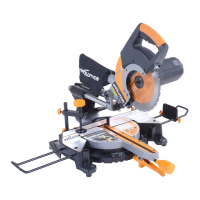
Standard Equipment Supplied With Unit: 1 MultiBlade, 1 Box Spanner, 1
Operating Instructions.
ASSEMBLY
MOUNTING THE MITRE SAW
WARNING: To reduce the risk of injury from unexpected saw movement,
place the saw in the desired location either on a workbench or other
recommended leg set. The base of the saw has four holes to mount the
mitre saw. If the saw is to be used in one location, permanently fasten it to
the workbench or leg set.
1. Tighten the sliding rail, mitre and bevel locks.
2. Place the saw so other people cannot stand behind it. Thrown debris
could injure people in its path.
3. Place the saw on a rm, level surface where there is plenty of room
for handing and properly supporting the workpiece.
4. Support the saw so the table is level and the saw does not rock.
5. Bolt or clamp the saw to its support.
INSTALLING OR REMOVING THE BLADE
WARNING: Only use genuine Evolution blades which are designed for
this machine.
1. Ensure cutting head is up.
2. Remove the guard screw. (Fig. 1)
3. Press safety lock button in and lift up the lower blade guard. (Fig. 2)
4. Press the black lock button to lock the arbor. (Fig. 3)
5. Using the supplied spanner, release the arbor screw to remove the
blade. (Fig. 4)
6. Install the new 255 mm (10”) blade. Make sure the rotation arrow on
the blade matches the clockwise rotation arrow on the upper guard.
The blade teeth should always point downward at the front of the
saw.
7. Install the blade washer and arbor screw.
8. Turn box spanner to secure the blade.
9. Tighten arbor screw using moderate force, but do not overtighten.
10. Replace the guard screw. (Fig. 1)
ADJUSTMENT OF THE CUTTING ANGLES.
MITRE ANGLE: (Fig. 5)
1. Loosen the sliding rail locking knob, push the saw handle back
as far as it will go and lock the handle.
2. Loosen the mitre angle lock knob.
3. Pull up the angle set lever and turn the table until the angle pointer
reach to the desired angle on angle mitre guide (g 5).
4. Tighten the mitre angle lock knob.
BEVEL ANGLE: (Fig. 6)
1. Lock the cutting head down with the cutting lock knob.
2. Loosen the bevel lock.
3. Adjust angle until the bevel angle point reaches the desired bevel
angle.
4. Tighten the bevel lock.
FITTING THE REPEAT STOP
1. Loosen the thumb screw to allow the arms of the workpiece
supports into the holes in the repeat stops.
2. Tighten the thumb screws rmly to minimize movement on the
workpiece support.
3. Attach the workpiece support as detailed below.
NOTE: By loosening the thumb screws the repeat stop can be
adjusted to required widths for each application.
FITTING THE WORKPIECE SUPPORT (Fig.7)
1. Loosen the support retaining screw located on the turntable.
2. Insert the workpiece support into the retaining holes in the base.
3. Tighten the retaining screw.
FITTING THE WORKPIECE CLAMP (Fig.8)
1. Fit the clamp to the retaining hole that best suits the cutting
application, ensuring that it is fully pushed down.
2. Tighten the thumbscrew to lock the pillar.
3. Put the workpiece to be cut onto the saw bed.
4. Adjust the clamp so that it securely holds the workpiece.
6 5
 Loading...


