OPERATION 4
3OPERATION
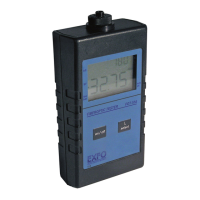
3.1 Deactivating the Auto-Off Function
Note: At power-up, the FOT automatically performs a self-test before the
measurement mode is displayed.
When the FOT is battery powered, it is automatically in auto-off mode (unit powers
off after 10 minutes of inactivity). To deactivate the auto-off function,
1. Power off the FOT.
2. Press and hold
λ select.
3. Press on/off, holding
λ select
until the unit enters measurement mode.
The auto-off marker should not be displayed.
Note: To reactivate the auto-off function, power on the unit with the AC adapter-
charger plugged in, then unplug the adapter. The auto-off marker should be
displayed.
3.2 Calibration
For optimum performance, the FOT should be calibrated before each test session as
follows:
1. Ensure that the detector port is capped.
2. Power on the FOT.
3. Press and hold
λ select until CAL is displayed. The running lines on the
display indicate the calibration is in progress. After calibration, a dashed line is
displayed.
Note: If
Err 1 is displayed, the calibration failed due to incident light on the detector.
Tighten detector cap, press any key to cancel the error message, then repeat
the calibration process.
3.3 Fiber Identification
To identify a fiber carrying a 2 kHz test signal,
1. Install the 2 kHz detection adapter on the detector port.
2. Place the fiber in the groove of the 2 kHz detection adapter and gently push
down the fiber. If the fiber carries a 2 kHz optical signal, the FOT beeps
2 seconds, and
2000 Hz is displayed.
3.4 Measuring Absolute Power
To measure absolute power,
1. If necessary, calibrate the FOT.
2. Install the appropriate connector adapter on the detector port, and connect the
fiber under test.
3. Press
λ select to match the FOT and source wavelengths.
OPERATION 4
3OPERATION
3.1 Deactivating the Auto-Off Function
Note: At power-up, the FOT automatically performs a self-test before the
measurement mode is displayed.
When the FOT is battery powered, it is automatically in auto-off mode (unit powers
off after 10 minutes of inactivity). To deactivate the auto-off function,
1. Power off the FOT.
2. Press and hold
λ select.
3. Press on/off, holding
λ select
until the unit enters measurement mode.
The auto-off marker should not be displayed.
Note: To reactivate the auto-off function, power on the unit with the AC adapter-
charger plugged in, then unplug the adapter. The auto-off marker should be
displayed.
3.2 Calibration
For optimum performance, the FOT should be calibrated before each test session as
follows:
1. Ensure that the detector port is capped.
2. Power on the FOT.
3. Press and hold
λ select until CAL is displayed. The running lines on the
display indicate the calibration is in progress. After calibration, a dashed line is
displayed.
Note: If
Err 1 is displayed, the calibration failed due to incident light on the detector.
Tighten detector cap, press any key to cancel the error message, then repeat
the calibration process.
3.3 Fiber Identification
To identify a fiber carrying a 2 kHz test signal,
1. Install the 2 kHz detection adapter on the detector port.
2. Place the fiber in the groove of the 2 kHz detection adapter and gently push
down the fiber. If the fiber carries a 2 kHz optical signal, the FOT beeps
2 seconds, and
2000 Hz is displayed.
3.4 Measuring Absolute Power
To measure absolute power,
1. If necessary, calibrate the FOT.
2. Install the appropriate connector adapter on the detector port, and connect the
fiber under test.
3. Press
λ select to match the FOT and source wavelengths.
Artisan Technology Group - Quality Instrumentation ... Guaranteed | (888) 88-SOURCE | www.artisantg.com
 Loading...