PH100/PH110-en-GB_v3.1 3/15
4
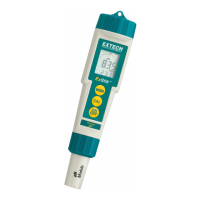
Overview
pH Overview
pH is a unit of measure (ranging from 0 to 14pH) indicating the degree of acidity or alkalinity of a
solution. pH tests are the most commonly performed measurements in water analysis and reports
the negative log of the hydrogen ion activity of a solution which is an indicator of acidity or alkalinity.
Solutions with a pH less than 7 are considered acidic, solutions with a pH higher than 7 are known
as bases, and solutions with a pH of exactly 7 are neutral.
The pH scale is logarithmic so, for example, if sample A is 1 pH less than Sample B, this means that
Sample A is 10 times more acidic then Sample B. A difference of 1 pH represents a ten-fold
difference in acidity.
Getting Started
For new meters, remove the battery cap and then remove the battery insulating strip.
Remove the cap from the bottom of the ExStik
TM
to expose the electrode glass surface and
reference junction
Before first use or after extended storage, soak the electrode (with its cap removed) in a pH 4
solution for about 10 minutes
White KCL crystals may be present in the cap. These crystals will dissolve in the soak or they can
be simply rinsed with tap water
Always calibrate close to the expected measurement value
A sponge is located in the electrode protective cap. Keep this sponge soaked with a pH 4 solution
to preserve Electrode life during storage
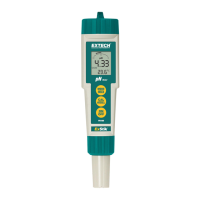
Replacing Electrodes
The ExStik
TM
is shipped with an electrode attached. Electrode life is limited and is dependent on
(among other factors) frequency of use and care. If the electrode needs to be replaced, follow these
steps for removing and connecting electrodes. Note that the PH110 has a refillable electrode.
1. To remove an electrode, unscrew and completely remove the electrode retaining collar.
2. Gently rock the electrode from side to side, pulling it away from the meter, until it disconnects.
3. To attach an electrode, carefully plug the electrode into the meter socket (note that the
electrode connector is keyed, ensuring proper connection).
4. Secure the electrode in place by tightly turning the collar in place. (a rubber gasket seals the
electrode with the meter).
Automatic Electrode Recognition
When the ExStik
TM
is turned on, it recognizes the type of electrode that is connected and displays
the appropriate unit of measure. Attach electrode before turning the ExStik
TM
on.
Powering the ExStik™
If the batteries are weak, the ‘BAT’ indicator appears on the LCD. Press the ON/OFF key to turn the
ExStik
TM
on or off. The auto power off feature shuts the ExStik
TM
off automatically after 10 minutes
of inactivity to preserve battery life.