- 31 -
FIG. 6.4
6.1.3.
Cut the 1-1/2″ diameter round tube to the length measured (FIG. 6.2).
6.1.4.
Using a metal file, smooth any sharp edges from the cutting.
6.1.5.
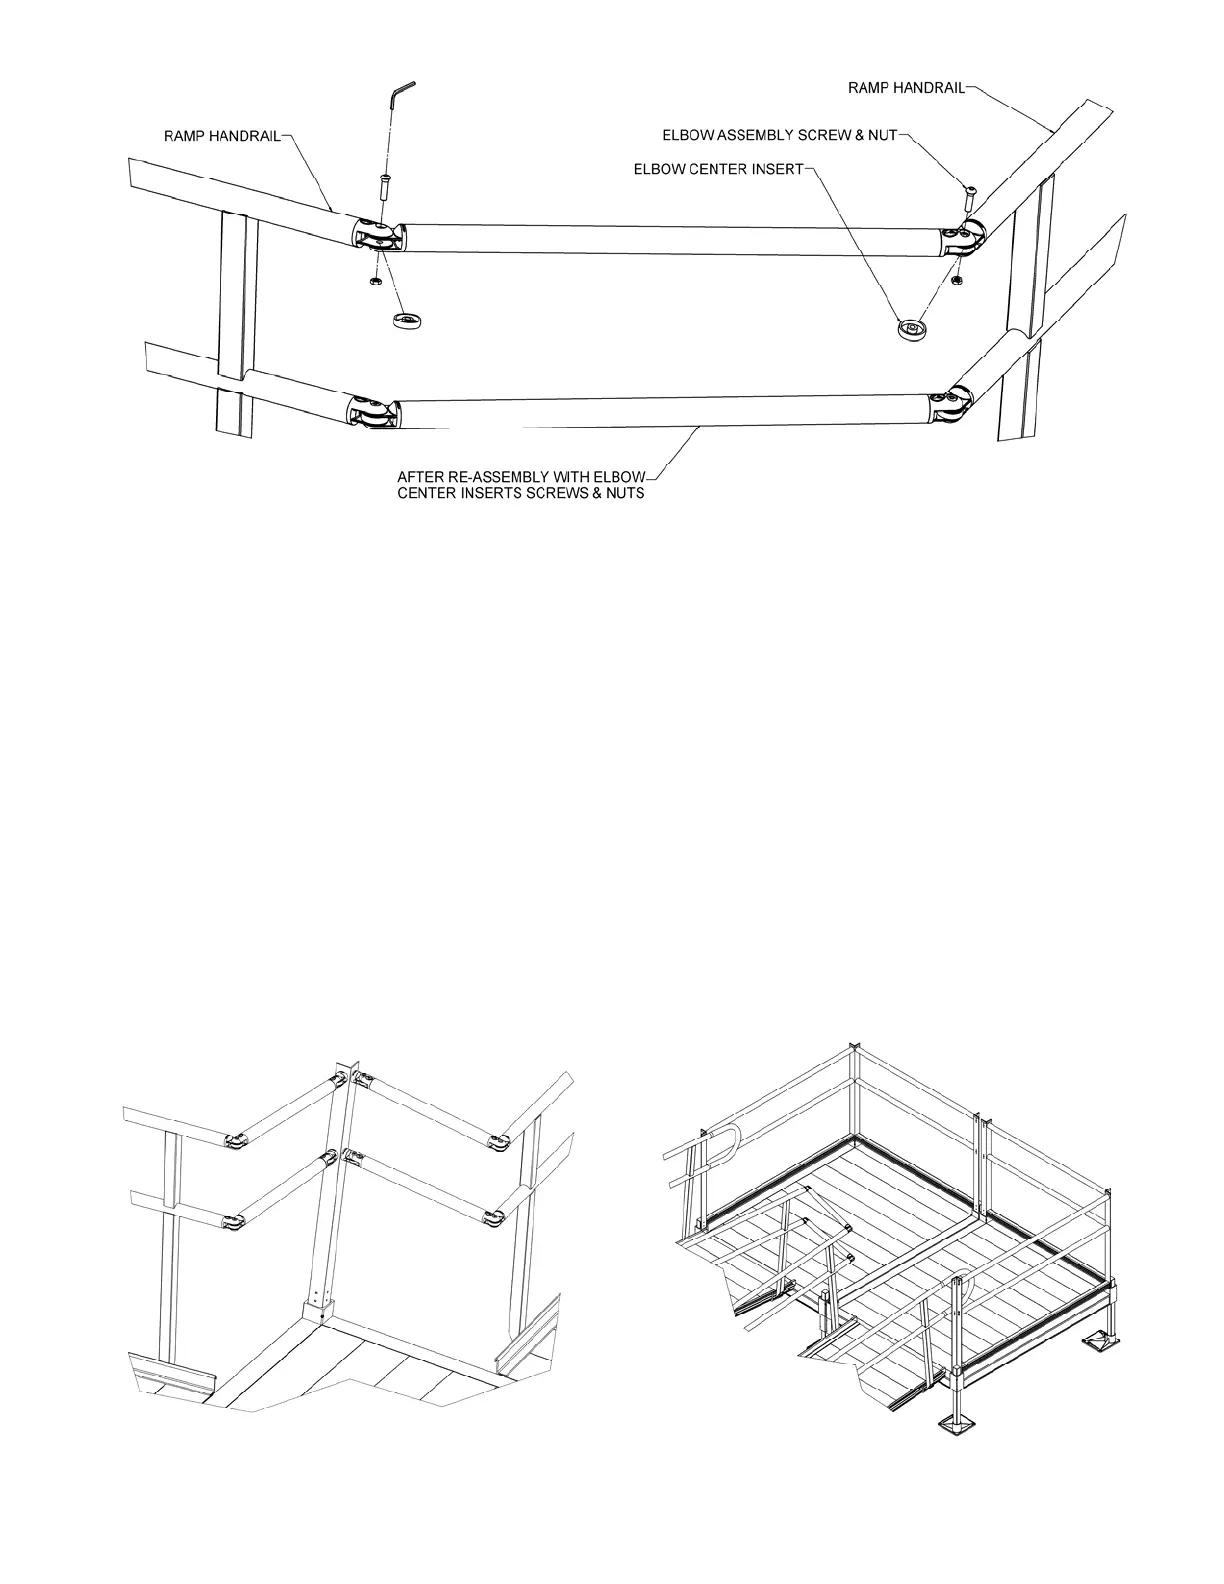
Disassemble adjustable elbow by removing the screw and nut (FIG. 6.3).
6.1.6.
Install an elbow half into each end of the cut tube (FIG. 6.3).
6.1.7.
Tighten internal set screws with supplied Allen wrench using pliers to get
additional torque on the Allen wrench. (FIG. 6.3).
6.1.8.
Reassemble elbow by replacing center insert and securing with the screw and
nut, then tighten all fasteners securely (FIG. 6.4).
6.1.9.
Test to ensure elbows are properly secured and attached. If needed, tighten
internal set screws to secure more rigidly.
6.1.10.
For platforms over 5’ wide, use two MHRPRC (CONNECTOR – PLATFORM
HR TO RAMP HR) to connect ramp handrails instead of the MHRRRC (FIG.
6.5).
6.1.11.
Handrails for the inside of turn back platforms (two platforms connected) are
connected using the MHRRRC (CONNECTOR – RAMP HR TO RAMP HR)
(FIG. 6.6). A minimum of distance of 8” is required between the ramp side
rails in order to install the connectors.
FIG. 6.5 FIG. 6.6