4
4� Add camera to EZVIZ
1. When the LED indicator is fast-ashing blue, indicates the camera is ready for Wi-Fi conguration.
2. Log in to your account using the EZVIZ app.
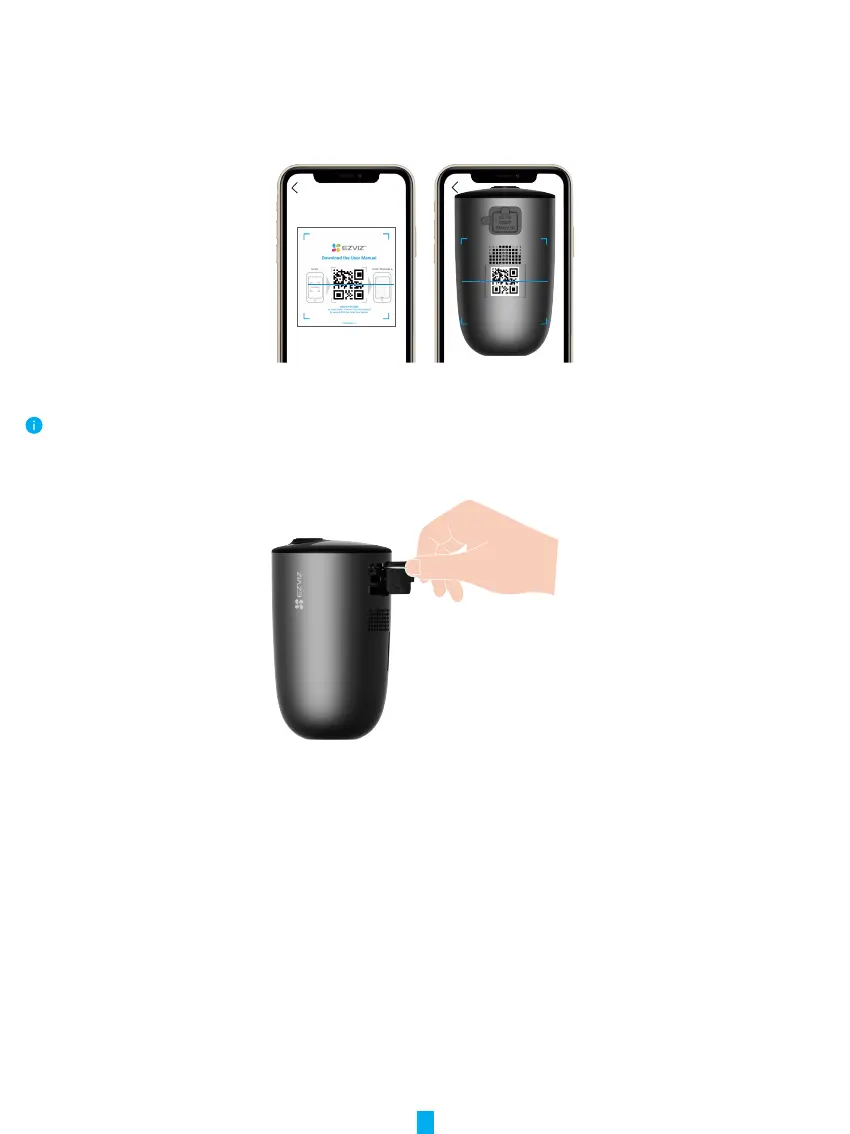
3. On the Home screen, tap “+” on the upper-right corner to go to the Scan QR Code interface.
4. Scan the QR code on the Quick Start Guide cover or on the body of the camera.
5. Follow the EZVIZ app wizard to nish Wi-Fi conguration.
If you want to change your camera's Wi-Fi, try to reset your camera as follows and repeat the steps above.
1. Open the silicone cover on the camera.
2. Insert the pin provided to the RESET hole for 4seconds, when the LED indicator ashes blue quickly, indicates that the camera is
ready for Wi-Fi conguration.
Camera Installation
1� Installation Location
Choose a location with a clear, unblocked eld of view and with a good wireless signal to the camera. Please keep the following
tips in mind:
• Make sure the wall is strong enough to withstand three times the weight of the camera.
• Recommended installation height: 7-10 ft (2-3 m) above the ground.
• Recommended installation angle: Tilt down 20 degrees.
• Make sure that side-to-side trafc crosses camera’s eld of view. The camera’s motion sensor is much more sensitive to side-
to-side movement across its eld of view than to movement directly toward or away from the camera.