Installing an IP Application Switch Using an Optional Rail-Mount Kit
Platform Guide: 8400 and 8800 A - 3
Attaching the inner rails and stops
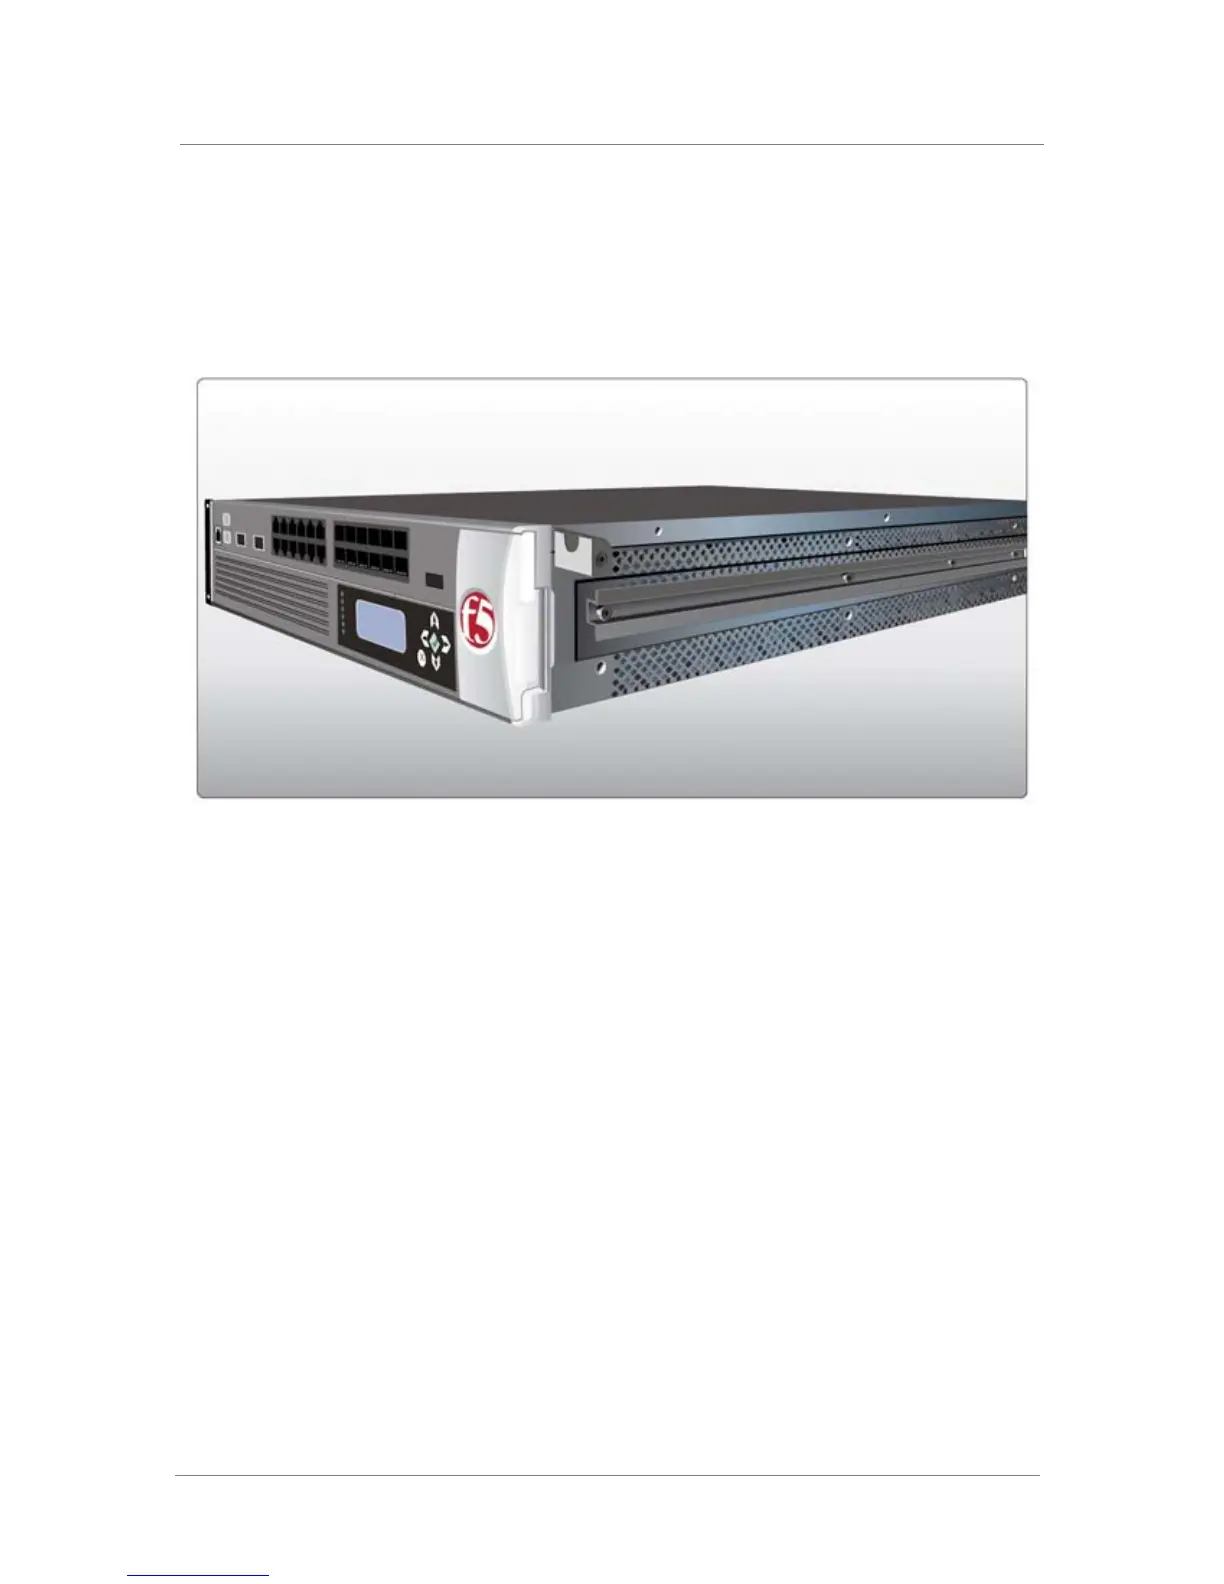
The first task in installing the optional rail-mount kit is to attach an inner rail
and a stop to each side of the unit. Figure A.3 shows the unit with an inner
rail and stop attached to one side.
Figure A.3 An inner rail with stop installed
To attach the inner rails and stops to the unit
1. Attach an inner rail to each side of the unit, as shown in Figure A.3,
using the four screws that you removed from each rack-mount ear.
Note that each side requires four screws.
2. Attach a stop to each side of the unit, near the front, as shown in
Figure A.3, using the screws provided in the kit.
Attaching the outer rails
Once you have installed the inner rails and stops to the unit, you can attach
the two outer rails to the rack. One outer rail is made specifically for the left
side of the rack, while the other outer rail is made specifically for the right
side of the rack.
Each outer rail includes a bracket on the front, with a square hole and a
round hole. Figure A.4 shows a bracket with the square and the round holes.