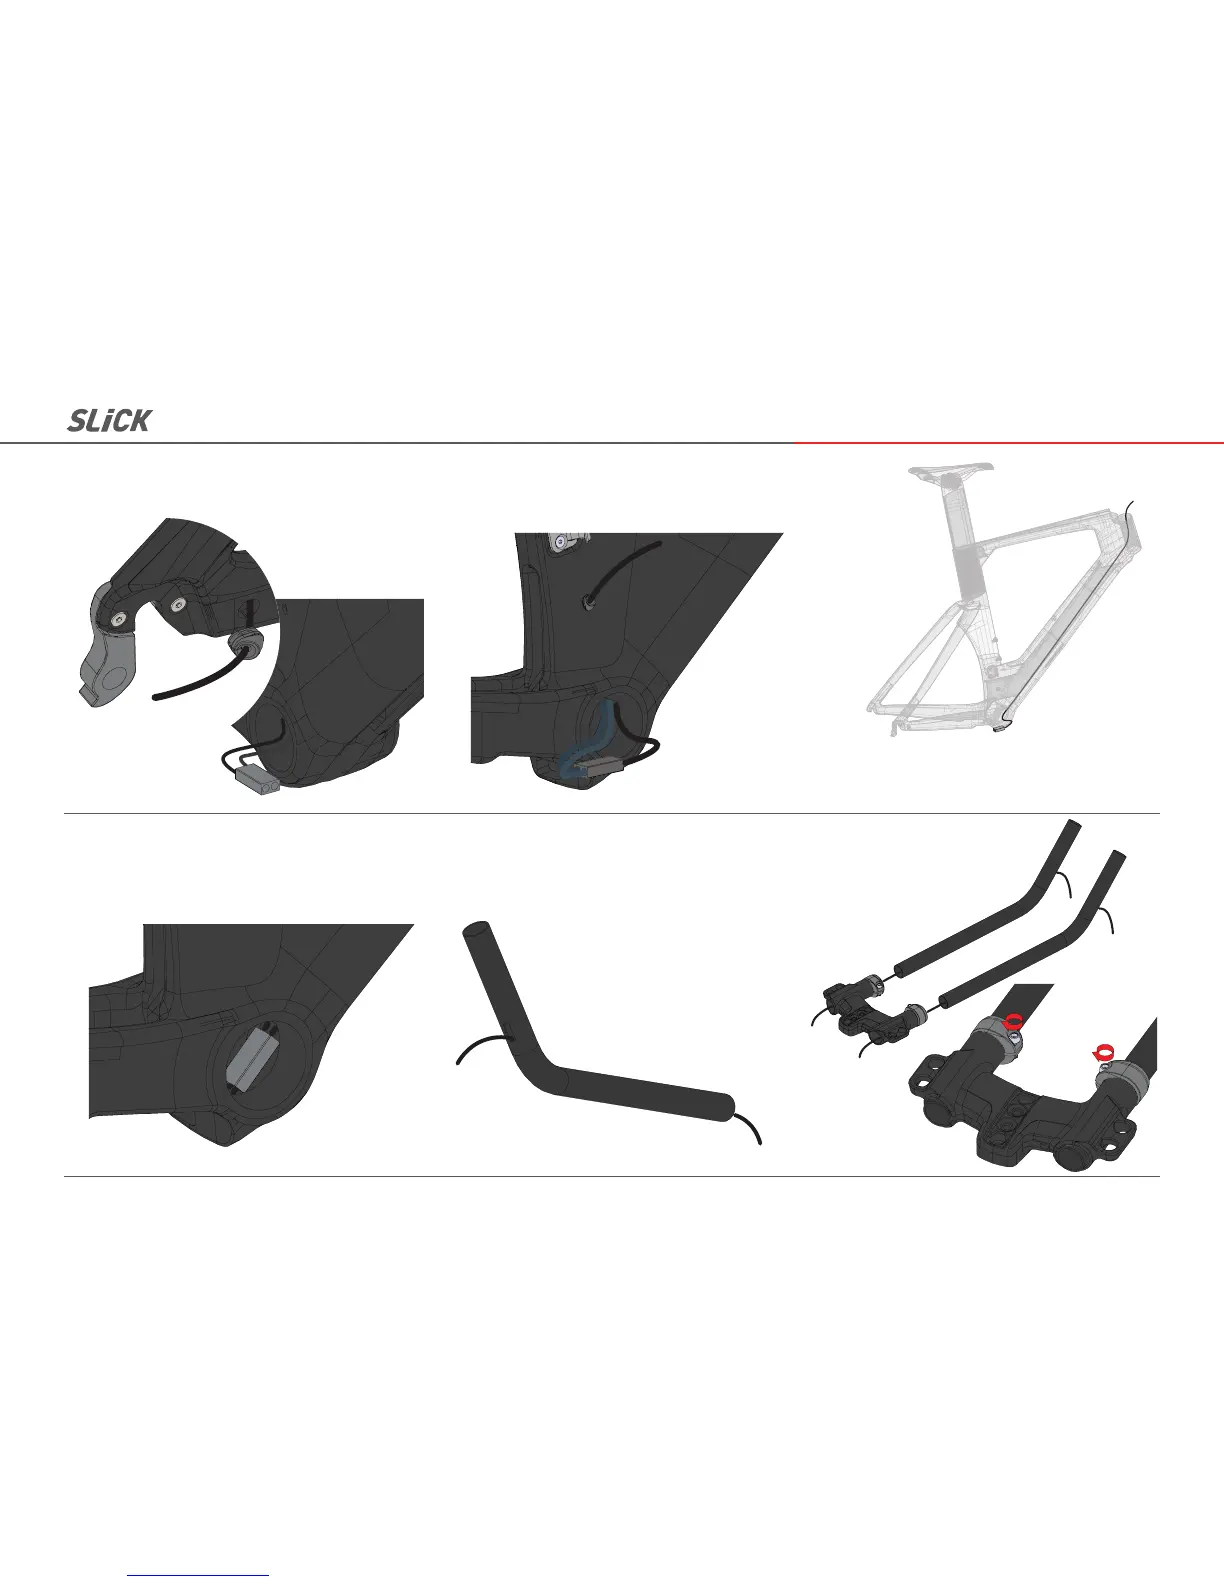
Route the front derailleur Di2 cable through the seat
tube hole to the bottom bracket exit window. Connect
to the Di2 Junction B.
Carefully insert Junction B and all cables through the
bottom bracket shell window.
Route the Di2 cable from the Junction A to the Junction B
through the down tube (as pictured) to the bottom bracket
shell exit window.
3-5
3-4
2-3
Assembly Manual 06
3-3
Route Di2 cables through extensions and install shifters.
Install extensions through the
extension tower and secure by
tightening the M5x16L bolts to
5 Nm
4-1
4-2
Route the rear derailleur Di2 cable through the
chainstay. Install Di2 cable grommet. Connect to the
Di2 junction B.
3-2
Aerobar Assembly
Note: It is much easier to fully assemble the aerobar, base bar,
shifters, brake levers and route all cables before installing the
assembly onto the stem as a single unit.