EasyManua.ls Logo

Fanimation KUTE 52 FPD8534 Series User Manual

Fanimation KUTE 52 FPD8534 Series
45 pages
To Next Page IconTo Next Page
Page #1 background imageLoading...
Page #1 background image
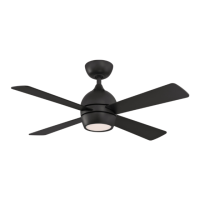
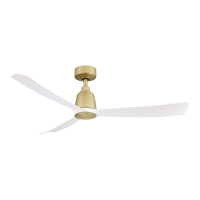
KUTE 52 CEILING FAN
MODEL #FPD8534**
Español p. 23
Questions, problems, missing parts? Before returning to your retailer, call our customer
service department at 1-888-567-2055, 8 a.m.-5 p.m., EST, Monday-Friday.
Date Code
Purchase Date
ATTACH YOUR RECEIPT HERE AND REGISTER YOUR FAN AT FANIMATION.COM
READ AND SAVE THESE INSTRUCTIONS
For best and quick service please provide date code. You can find the date code on the Carton,
Handheld Remote (inside of the battery compartment), Receiver or top of Fan Housing.
Net Weight 12.30 lbs (5.58 kgs)
Questions and Answers:

Fanimation KUTE 52 FPD8534 Series Specifications

General IconGeneral
Blade Size52 inches
Motor TypeAC Motor
FinishBrushed Nickel
ReversibleYes
TypeCeiling Fan
Blade ColorWalnut
Blade FinishWalnut
Light Kit IncludedNo

Summary

Customer Service and Support

Important Safety Instructions

General Safety Precautions

Follow safety information and assembly diagrams before installation and servicing. Turn off power during servicing.

Additional Safety Instructions

Electrical and Installation Safety

Ensure proper wiring, grounding, and mounting. Use licensed electrician for complex tasks and follow codes.

Tools and Materials for Assembly

Unpacking and Parts Check

Electrical and Structural Requirements

Power Supply Requirements

Fan requires 120V AC, 60Hz, 15 Amp circuit. Use fan-rated outlet box supporting at least 35 lbs.

Outlet Box Mounting Configurations

Illustrations and descriptions of low profile, deep, and deep box with brace outlet box mounting methods.

Deep Box with Brace Mounting

Details on using a deep box with a brace for mounting between joists, ensuring structural support.

Outlet Box and Mounting Screw Requirements

Warning to mount to an outlet box rated for fan support and use provided screws; consult electrician if unsure.

Wiring Safety Precautions

Emphasizes turning off power at the main fuse box and following all wiring instructions carefully.

Ceiling Fan Assembly Steps

WARNING on Clevis Pin and Set Screws

Critical warning about proper installation and tightening of clevis pin, set screws, and nuts to prevent fan falling.

Hanging the Ceiling Fan

Main Fuse Box Power Off

Warning to ensure electricity is turned off at the main fuse box before hanging the fan.

Minimum Ceiling Clearance

Requirement for fan blades to have at least 7 feet of clearance from the floor for safety.

Attaching Hanger Bracket to Outlet Box

Securely attach the hanger bracket to the outlet box using provided screws and washers.

Securing Safety Cable

Instructions for drilling pilot holes, attaching safety cable with lag bolt, and feeding it through the ceiling support cable.

WARNING on Outlet Box and Bracket Security

Warning that the outlet box and hanger bracket must be securely anchored to prevent wobble or falling.

WARNING on Wire Pinching

Caution to avoid pinching wires between the hanger ball assembly and the hanger bracket.

Attaching Safety Cable to Support Cable

Detailed steps for attaching the safety cable to the ceiling support cable using a cable clamp and screw.

Wiring the Ceiling Fan

WARNING on Electrical Shock

Warning to ensure power is off at the main fuse box before wiring and to check grounding.

Receiver Installation

Guide for sliding the receiver into the hanger bracket before making wire connections.

Wire Connections

Instructions for connecting wires using connectors as shown in diagrams for AC power and DC motor.

WARNING on Wire Connections

Check all connections are tight, no bare wire visible. Do not operate until blades are in place.

Final Wire Connections and Outlet Box Routing

Guide for making final wire connections and routing leads into the outlet box, separating grounded and ungrounded conductors.

Installing Canopy Housing

Assembling Fan Blades and Cap

Operating the Ceiling Fan

Controller Type Warning

Warning against using variable (Rheostat) wall controllers or dimmer switches to avoid damage to the remote control unit.

Setting Remote Control Code

Guide for setting the remote control code by sliding dip switches up or down with a small screwdriver.

Installing the Remote Control Wall Holder

Troubleshooting Common Issues

Related product manuals