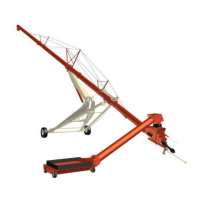
Maintenance - Teleswing
45
STORAGE AND RETURN TO SERVICE
Storage
Sometimes it may be necessary to store the
equipment for an extended period of time. Below
is a list of items to perform before storage.
IMPORTANT
DO NOT permit children to play on or around
the stored machine.
• Thoroughly wash the machine with a pressure
washer or water hose to remove all dirt, mud, debris
or residue.
• Lubricate all bushings to remove any water residue
from washing.
• Remove any material that has become entangled
around any moving part.
• Inspect the hitch and all welds on the equipment for
wear and damage.
• Check for loose hardware, missing guards, or
damaged parts.
• Check for damaged or missing safety signs (decals).
Replace if necessary.
• Replace worn or damaged parts.
• Touch up all paint nicks and scratches to prevent
rusting.
• Place the equipment in a dry protected shelter.
NOTE: If a dry protected shelter is not available,
cover with a waterproof tarp and tie down
securely.
• Support the jack / frame with planks if required.
Return To Service
After the equipment has been in storage, it is
necessary to follow a list of items to return the
equipment to service.
• Be sure all shields and guards are in place.
• Lubricate the equipment.
• Connect to a tractor and operate equipment, verify
all functions operate correctly.
• Check for leaks. Repair as needed.
SAFETY SIGN (DECAL) INSTALLATION
IMPORTANT
When replacing safety signs (decals), the
temperature must be above 10° C (50° F).
• Remove all portions of the damaged safety sign
(decal).
• Thoroughly clean the area with adhesive remover
and glass cleaner. Remove all adhesive residue.
• Allow the area to dry completely before installing the
new safety sign (decal).
• Position the safety sign (decal) in the correct location.
• Remove a small portion of the backing paper on the
safety sign (decal).
• Press on the safety sign (decal) where the backing
paper has been removed.
• Slowly remove the remaining backing paper,
pressing on the safety sign (decal) as the backing
paper is removed.
• Using the backing paper, pressing firmly, move the
backing paper over the entire safety sign (decal) area.
NOTE: Small air pockets can be pierced with a pin
and smoothed out using the piece of the
backing paper.