FCI WATERMAKERS, INC. 28Installation
3/ INSTALLATION
Refer to the outline below for an overview of the
installation process and the structure of this chapter.
Each system has its unique environment. To allow for this, the instructions
are presented in part by discussion rather than by procedure. Start by reading
through this chapter completely, matching the tasks to your environment.
DTS INSTALLATION (optional)
If you are installing the DTS, additional considerations to those
presented in this manual will be required. Refer to the instructions
provided with the DTS to mount, plumb, and wire the DTS.
COMPONENTS SUPPLIED BY INSTALLER
e rst section lists the items not included with the system
that you may need to supply for the installation.
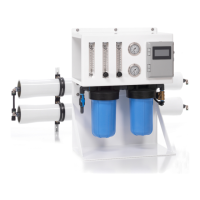
DIAGRAMS SHOWING THE COMPONENTS AND LAYOUT
e pages that follow the rst section contain diagrams of the system components
with their dimensions and footprints. e system layout is also shown in plumbing
diagram. e diagrams are used to become familiar with how the parts t together.
SYSTEM INSTALLATION / MOUNTING
Instructions on mounting the components follow the diagrams. e
footprint and layout diagrams of the previous section are available
for reference when mounting the system components.
SYSTEM INSTALLATION / PLUMBING
Aer the mounting instructions, the installation focuses on plumbing. e plumbing
connections are listed, referring to the tubes and hoses by letter. e plumbing
diagram presented earlier illustrates the tubes and hoses and calls out their letters.
A chart within the plumbing diagram describes the connections, tubes, and hoses.
e plumbing diagram is available for reference when connecting the plumbing.
SYSTEM INSTALLATION / ELECTRICAL CONNECTIONS
e next task is connecting the electrical wiring. is includes wiring power from the
main source to the frame's electrical enclosure contactor blocks, and wiring power
from the frame's contactor blocks to the low pressure pump. If installing the optional
remote control panel or inlet actuated valve, wiring is routed though a cable grip (on
system's le panel) to the PC board located on the back of the enclosure's cover.
WIRING SCHEMATICS
Wiring diagrams and schematics are available for reference when connecting the wiring.
FINAL INSTALLATION CHECKLIST
Aer completing the installation, a checklist is provided to help you check your work.
 Loading...