21
26
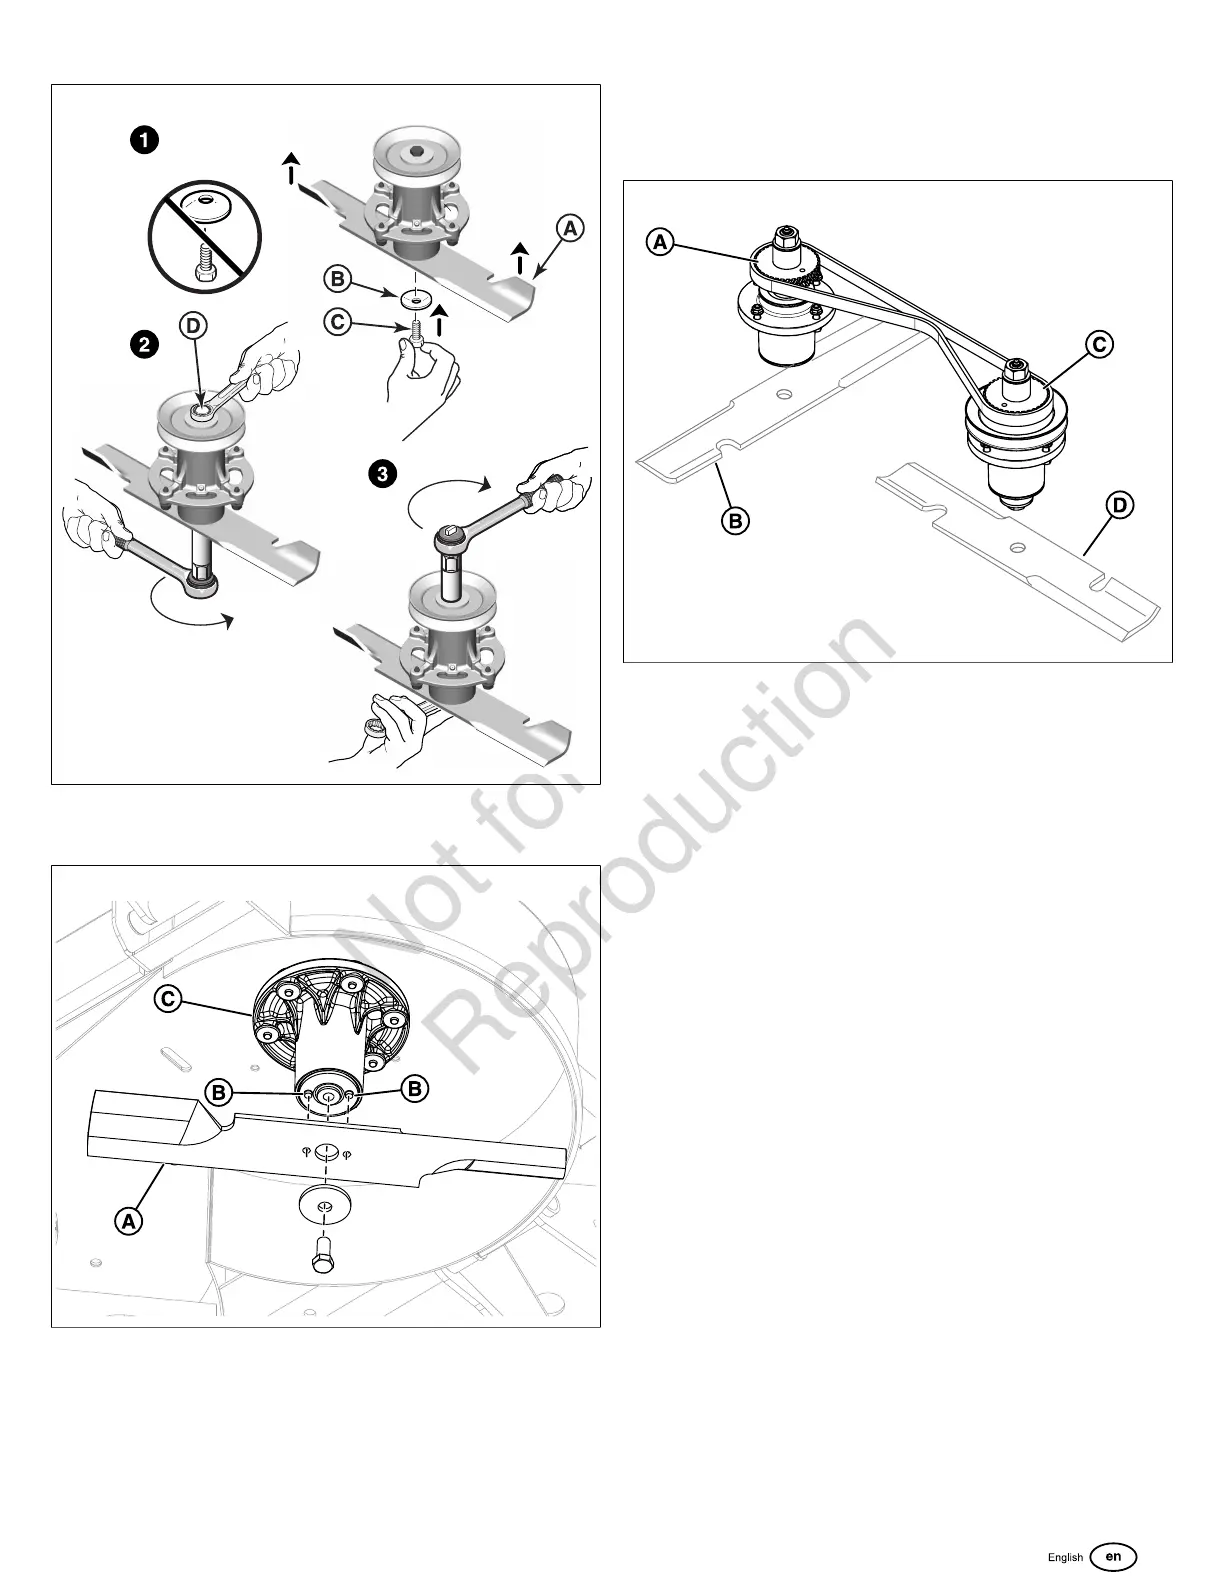
2. Align the two holes in the blade (A, Figure27) with the
two (2) alignment pins (B) on the spindles (C).
27
3. Install the concave side of the washer (B, Figure26)
towards the blade.
4. Install the blade mounting bolt (C) hand tight to hold the
washer and blade onto the shaft (make sure the blade
is fully seated onto the shaft and installed on alignment
pins).
5. Check that the blades are installed so that the left blade
(D, Figure28) that is installed to the trim side spindle
(C) is aligned perpendicular to the right blade (B) that is
installed to the discharge side spindle (A).
28
6. Tighten the blade mounting bolt (C, Figure26) to 50 -
60 ft. lbs. (68 - 81 Nm) or torque while holding onto the
appropriate pulley bolt (D) with a wrench.
7. Tighten the pulley bolt to 50 - 60 ft. lbs. (68 - 81 Nm) or
torque while holding onto the appropriate blade mounting
bolt (D) with a wrench.
Adjusting the Height of the Handle Bars
The handle bars can be adjusted in four (4) different positions
to accommodate the height preference of the operator.
1. Loosen, but do not remove, the lower handle bar
mounting bolts (A, Figure29).
 Loading...