24 ferrismowers.com
5. From underneath the handle bar observe the forward
speed control mechanism (C) as an assistant sets the
forward speed control lever in each numbered position
and then presses the forward motion control lever down
and forward. There are four (4) positions (labelled as D,
E, F, and G in Figure33) on the forward speed control
mechanism that the forward motion lever stop (H) can
press against. If it is not contacting each position then the
linkage rod (I) will need to be adjusted to allow it.
6. Loosen the jam nuts (J) that are tightened against the ball
joints (K) on each end of the adjustment rod.
7. Turn the linkage rod to lengthen the rod until the lever
stop can press each of the four (4) positions.
8. Tighten the jam nuts against the ball joints.
Deck Lift Assist Springs
This model is equipped with deck lift assist springs (A,
Figure34) that assist the operator in raising the mower deck.
The deck lift assist springs are factory set to provide optimal
lifting performance.
34
Although it is fastened with a multi-position anchor, this isnot
an adjustment point.
Do NOT attempt to adjust the spring length or lifting
performance will be compromised.
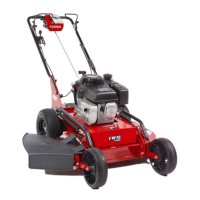
Changing the Mower Deck Belts
1. Release the blade engagement lever to stop the blades
and move the throttle control and engine shut down lever
to the OFF position to stop the engine.
2. Remove the spark plug wire(s) from the spark plug(s).
3. Remove the mower deck guards to gain access to the
belts.
4. With the blade engagement lever released the mower
deck drive belt (A, Figure35) will not be under tension by
the tensioning pulley (B).
35
5. Slide the mower deck drive belt off of the trim side spindle
pulley (C) and then remove the belt from the crankshaft
pulley (D).
6. While holding the blade mounting bolt with a wrench,
remove the bolt (A, Figure36), washer (B), and pulley
(C) from the top of the spindle shaft (D) of the trim side
spindle pulley (C, Figure35).
36
7. Loosen the hardware (E)that secures the front idler
pulley (F) and then slide it towards the front of the unit to
relieve the pressure on the spindle drive belt (G).
8. Using a spring puller tool carefully remove the spring (H)
from the front spring mounting hardware (I).
9. Remove the front spring mounting hardware from the
bracket (J).
 Loading...