CLR
8 Festo – CLR – 2017-05e English
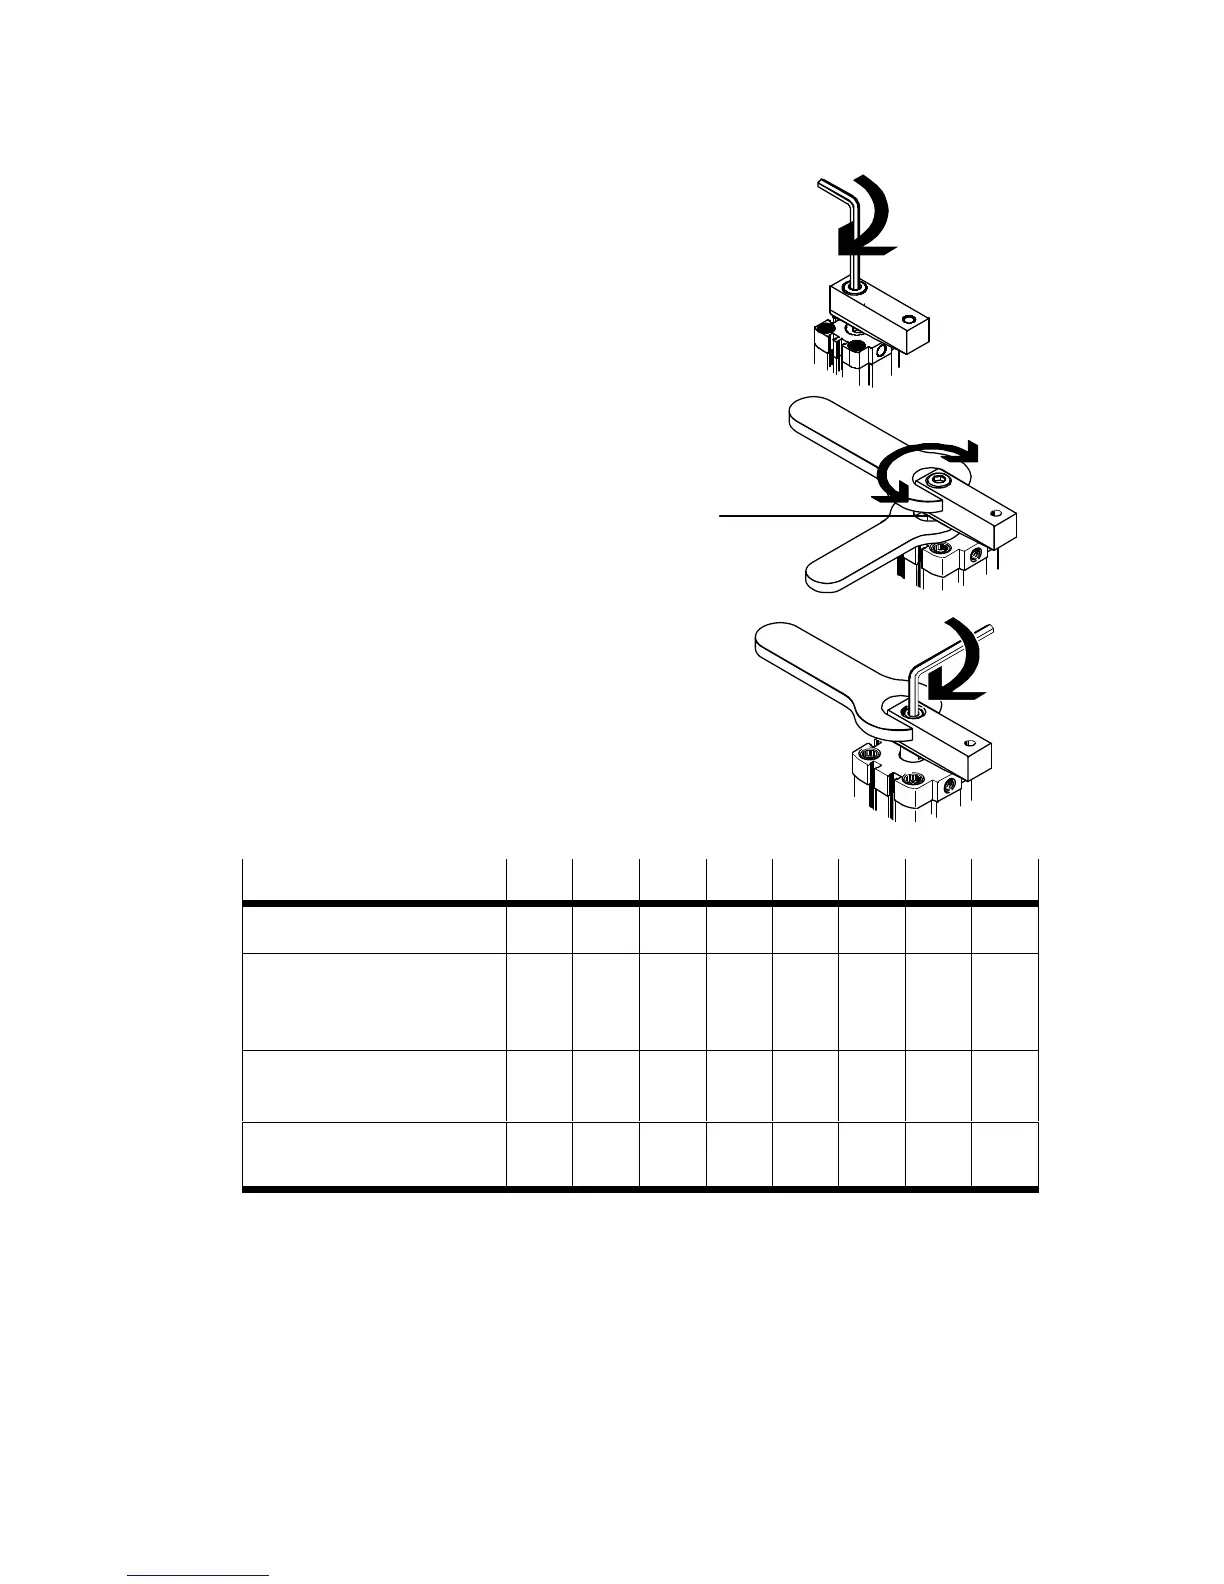
1. Place the clamping finger on the cone of
the piston rod.
2. Screw the fastening screw into the
threaded hole of the piston rod until the
clamping finger can still just be turned.
3. Fix the piston rod at the spanner flat 6
with a spanner wrench (see Bild 8).
4. Turn the clamping finger with a second
spanner wrench until the alignment
corresponds to the individual application.
5. Tighten the fastening screw with the
following torque:
For counter holding, the maximum
permitted torque on the guide sleeve
must not be exceeded.
CLR-...
12 16 20 25 32 40 50 63
Thread M3 M4 M6 M6 M8 M8 M10 M10
Width across flats (A/F)
– clamping finger screw
– piston rod
2.5
5
3
7
5
10
5
10
6
13
6
13
8
17
8
17
Tightening torque of clam
ping finger screw [Nm]
1.2 3 12 12 24 24 47 47
Maximum permitted torque
on the guide sleeve [Nm]
2 3 6 10 20 20 30 50
Bild 10
Bild 7
Bild 8
6
Bild 9