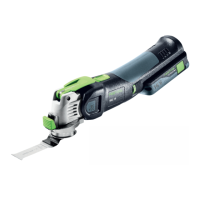
14 Vecturo OS 400 EQ Multi-Tool
Motor Brush Replacement
Motor brushes provide electricity to the spinning motor
armature, and will wear over time. The copper strips on the
armature that the brushes connect to is called the com-
mutator, and these connect to the windings in the armature.
Because these electrical connections are constantly con-
nected and disconnected as the motor turns, it is perfectly
normal for there to be sparks at the brushes during normal
use. The brushes are designed to disconnect power to the
motor when they have warn beyond their usable life. If your
Vecturo stops working, it is likely that the brushes have
warn and need replacement. Contact Festool for replace-
ment brushes.
WARNING! To avoid the risk of electrical shock,
make sure the tool is unplugged from power.
1. Unplug the tool from power.
2. Using a T15 Torx driver, remove the 3 screws that secure
the brush cover to the main body. Two screws are self-
tapping and 1 is a machine screw.
3. Lift the brush cover off the main body, rst at the front
and then the rear (plug-it port). During reinstallation,
reverse this to engage the rear alignment tabs rst.
Mounting
Screws
4. Using a tweezer or needle nose pliers, carefully remove
the motor and brush terminals from the brush holders.
5. Using a T15 Torx driver, loosen the brush holder mount-
ing screw, and remove the brush holder with the screw
together. Note: As you lift the left brush holder out of the
motor, make note of how the blue wire is routed to the
side of the mounting screw, but below the brass holder.
Motor Terminals
Brush Terminals
Mounting Screws
Wire:
See Note
6. Lift the coil spring off the brush and rest it behind the
brass brush holder body to keep it in place. Take care to
not let the spring loose or uncoil.
NOTE: If the coil spring does come loose, it is ½ a
revolution to put it back in place.
7. Slide the brush out of the brush holder and insert the
new brush with the wire and terminal furthest from the
coil spring.
8. Move the coil spring back to pressing against the brush.
However, if you have difculty reinstalling the brush hold-
ers with the spring engaged, you may consider leaving
them loose until after the holders are in place.
Brush
Holder Body
Coil Spring Set
to the Side.
Brush
Terminal
Spades
Wire and
Terminal
Alignment
Pin
9. While compressing the brush into the holder, place the
holder into the motor housing, with the alignment pin in
the alignment hole. (See images above and below).
10. Tighten the mounting screws and reconnect the wire
terminals.
NOTE: The new brushes may spark more than
normal until they get seated and form to the shape of
the commutator. This should be expected.
Mounting Hole
Alignment Hole