10. WELDING PROCESS
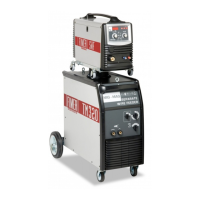
The TM230 and 260 welding machines have 11 regulating positions (13 of Fig. 1), the TM300, 350,
320W and 360W machines have 20 regulating positions (13 and 14 of Fig. 1) and the TM420W, 500W
and 650W welding machines have 30 regulating positions (13 and 14 of Fig. 1). The choice of the best
current is determined by the thickness of the material to weld. Refer to the following table for setting
the correct welding current.
11. HOW TO OBTAIN THE BEST
WELDING RESULTS
1. During welding, keep the torch at a 45° angle
from the workpiece. Keep the gas nozzle (Fig.
3A) at around 6 mm from the workpiece.
2. Continuously move the torch.
3. Do not weld in the presence of strong wind.
Strong wind could carry away the gas from the
weld pool and lead to porous welding.
4. Keep the wire clean: never use rusty wires.
5. Do not fold or twist the torch cable.
6. When changing the wire spool, clean the wire-
guide tube with compressed air.
7. Periodically remove any dust from the air
inlets using low-pressure compressed air.
Always direct the jet of air from the inside
of the machine towards the outside in order
to prevent dirt from being pushed inside the
welding machine.
12. REGULATING THE WELDING
MACHINE
Once the welding current has been set
according to the instructions in paragraph
9, keep the length of the electrical arc
between 5 and 10 mm and adjust the wire
speed to obtain the best welding result.
Carry out some test welds on a metallic
sheet that has been cleaned of any coating,
rust or paint.
NOTE: When the torch button is pressed, the fol-
lowing three functions are performed:
- gas flow;
- wire feed;
- welding current.
Start welding at a high wire speed and then grad-
ually reduce the speed via the potentiometer (9
of Fig. 1).
Continue to reduce the wire speed and listen to
the sound produced. The sound will go from a
crackling noise to a strong and regular buzzing
noise (similar to the sound of oil being fried).
This buzzing sound indicates that the correct
wire speed has been reached for the work-
piece. Each time the current is adjusted, reset
the wire speed.
Always start from the highest wire speed. This
operation prevents damaging the tip of the torch
during welding.
SPESSORE DEL PEZZO DIAMETRO FILO CORRENTE DI SALDATURA ARCO
mm mm A
0.8 - 1.0 0.6 - 0.8 60 - 100
Short - Arc
1.5 - 2.0 0.8 - 1.0 80 - 120
Short - Arc
2.0 - 3.0 1.0 - 1.2 100 - 130
Short - Arc
3.0 - 4.0 1.2 - 1.6 120 - 200
Short - Arc
> 4.0 1 150 ÷ 200
Spray - Arc
> 4.0 1.2 200 ÷ 300
Spray - Arc
> 4.0 1.6 300 ÷ 400
Spray - Arc
24