Tank Filling and Water Treatment
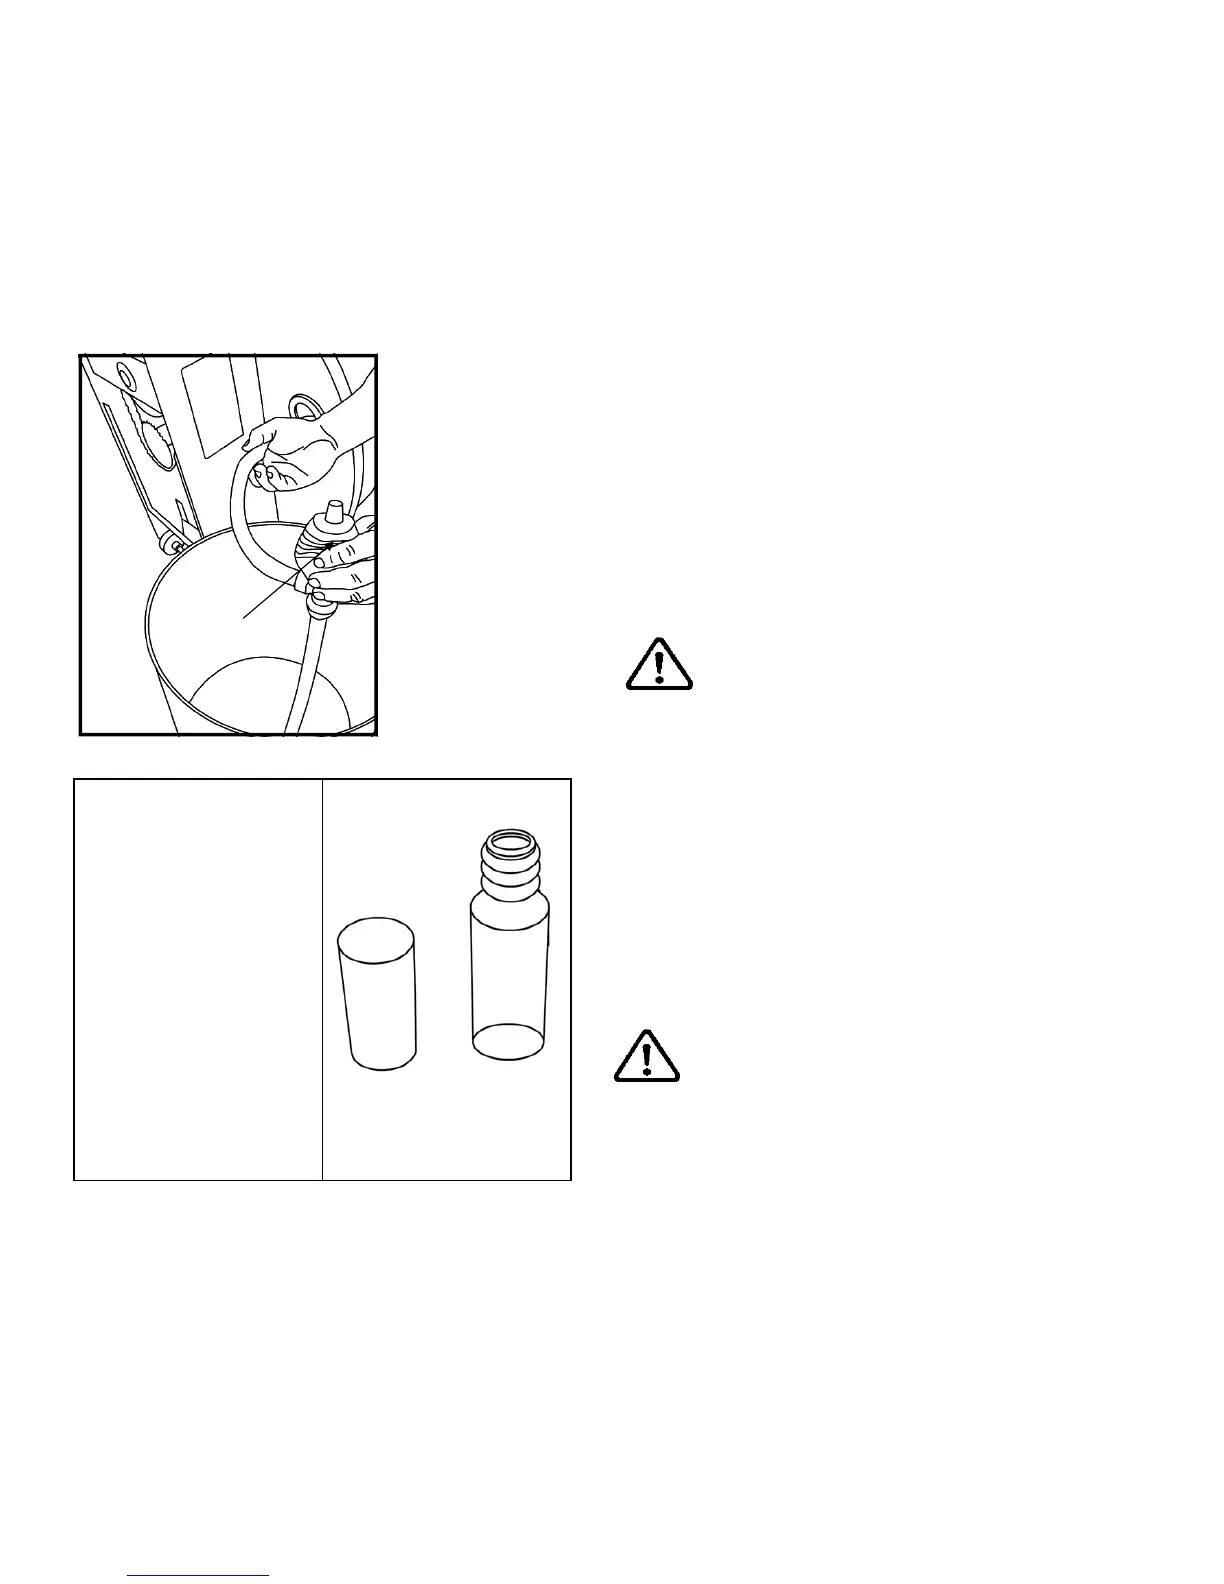
1. Filling requires a large bucket (not supplied) and the Fluid
Rower siphon (included). Filling will take approximately 7.6
liters of water.
2. Unscrew the right tank plug on the rear of the fluid tank and
insert the flexible tube into the rear of the tank while keeping
the rigid hose in the bucket. Note: The siphon tube may be
impeded by one of the impeller blades. Use the siphon only to
push the impeller down slightly.
Warning:
Do not insert fingers into tank.
3. Move the adjuster handle to level 16, and begin filling.
Note:
The siphon valve must be closed to allow siphoning action
to occur. Tip: Placing the bucket in an elevated position will
allow the siphon to continually pump water into the tank.
Do not fill past the calibration mark indicated on the tank!
Note: Opening the siphon valve will stop the pumping
action. Use this feature to avoid water spillage when
nearing filling completion.
4. Once filling is complete (to the proper calibration level as
indicated on the tank), follow water treatment schedule as
Shown left.
Caution: Use a drop cloth under the tank both when
filling the tank and adding blue dye to avoid
staining floor or carpet.
Water Treatment
Procedures:
1. Add Chlorine tablet.
2. Wait a minimum of 72
hours. Then add very small
amount of blue dye and
check for desired color. Im-
portant! Do not add blue
dye for at least 72 hours
following Chlorine treat-
ment. The blue dye adds
visual appeal as well as
cutting down the amount of
light affecting the tank wa-
ter, thus extending the
amount of time between
water treatments.
Blue dye
Siphon
valve
Fill tank as shown
left. Use the right
plug only for fill-
ing.
Fill with adjuster
handle at level 16
only.
Once filling is
complete, use a
coin or large
blade screwdriver
to tighten tank
plug into place.