STEP 2: Scroll through menu allowing for 1 parking light flash and/or siren chirp per step.
STEP 3: Once finished scrolling through the menu wait for the parking lights and/or siren chirp to confirm
the option number. i.e. option 2-04 will flash 4 times. Then use one of the table selections to select the
option corresponding to your desired setting.
Resetting to Factory Defaults: To reset the options in a particular menu group, enter the menu shown
in the above tables. To reset options with a 2 Way remote tap button 3 three times. To reset options with
a 1 Way remote tap the Key/Start button 3 times. Wait for the siren to chip and parking lights to flash
between each tap. After the third tap, the option menu will reset and the siren will chirp three times. This
must be done for each option group that needs to be reset.
Troubleshooting
Remote Start Error Codes
If the remote start fails to start the vehicle, the parking lights will flash three times immediately. Following
those three flashes the parking lights will flash again corresponding to the error table below:
Number of
Parking Light Remote Start Error
Flashes
st
Motor running or must program tach before 1
remote start
1
2 Key in ignition on position
3 Door open (manual transmission only)
4 Trunk open
5 Foot brake on
6 Hood open
7 Reservation off (manual transmission only)
8 Tach or voltage sensing failure
*Pro 2 Way remotes will display the error number “Strt Er##” on the LCD.
Alarm LED Diagnostics (CM5000 Only)
When the alarm is triggered the LED on the RPS (if installed), Secure Valet (if installed) and the LED (if
installed) will flash a certain amount of times as shown in the table below. This is intended for users with
1 Way remotes.
Priority Trigger LED Flash Diagnostic
Door/Hood/Trunk/Ign
Triggered
2 flashes, rest, then repeat
1
Frequently Asked Questions
I have everything hooked up and the system will not respond.
2 2
nd
Shock Triggered 3 flashes, rest, then repeat
nd
2
Auxiliary Input
Triggered
4 flashes, rest, then repeat
3
4 Panic with remote 5 flashes, rest, then repeat
24
Remote Programming Routine
IMPORTANT: Any and all remotes must be coded to the control module prior to performing any and all
operations.
Remotes excluding P2WSSR
STEP 1: Activate programming mode by manually turning the vehicle’s key between the Ign On and Off
(or the Acc & On positions) five times within 7 seconds. The vehicle’s parking lights will flash once with
the successful completion of this step. (Note: this step also places the control module into Valet Mode)
th
STEP 2: Within a 2 second period after the 5
ignition cycle tap Button I on two way remotes or the
Lock button on one-way remotes for 0.5 seconds. The parking lights will flash once to confirm the
transmitter has been coded. Repeat for additional remotes, up to three.
Exiting Programming: Programming is a timed sequence. After 2
seconds the parking lights will flash twice signaling the end of
programming mode.
Programming Multiple Remotes: After the confirmation flash given in
STEP 2, code additional remotes by tapping Button I on two way
remotes or the Lock button on one way remotes. The parking lights
will flash once confirming each additional remote. All systems (except
the P2WSSR), can recognize up to three remotes.
Note: If you program only 1 Way remotes to a 2 Way antenna you will
receive 3 parking light flashes and/or siren chirps when you turn the
ignition on. This will be alleviated by programming a 2 Way remote.
Pro P2WSSR
STEP 1: Remove the AA battery from the remote.
STEP 2: Activate programming mode by manually turning the vehicle’s key between the Ign On and Off
(or the Acc & On positions) five times within 7 seconds. The vehicle’s parking lights will flash once with
the successful completion of this step. (Note: this step also places the control module into Valet Mode)
th
STEP 3: Within a 2 second period after the 5
ignition cycle, insert the AA battery into the remote. The
parking lights will flash once to confirm this step. If you have an additional 1 Way remote tap the Lock
button after inserting the AA battery into the 2 Way remote.
STEP 4: Wait several seconds for the parking lights to flash twice and the remote LCD to receive a page
back. The transmitter has now been coded.
Programming Multiple Remotes: After the confirmation flash given in step 3, program the optional 1
Way remote by tapping the Lock button for 0.5 seconds. The parking lights will flash once confirming
that the 1 Way this remote has been learned. The P2WSSR can recognize (1) 2 Way remote and (1) 1
Way remote.
5
A: This usually means that the engine sensing mode is not working correctly. If you are using a coil,
change to an injector or try alternator mode.
The vehicle will lock and unlock, but will not remote start or flash the parking lights.
A: The system is in valet mode. Tap buttons (I) + (III) for 0.5 seconds while the key is in the on position.
Whenever I try to arm the vehicle, it chirps the siren 3 times and will not arm.
A: Check the hood and trunk trigger inputs.
When I turn the ignition on the parking lights flash 3 times and/or siren chirps 3 times. What is
the problem?
A: When you program only 1 Way remotes to a 2 Way antenna and no 2 Way remotes the control
module reminds you of this situation each time you turn the ignition on. It does not affect the operation of
the system but will continue to do so until you program both 2 and 1 Way remotes to the 2 Way antenna.
Do the door locks flip flop in polarity?
A: No. You can use the CompuPack (relay pack) for high current positive (+) locks, or the DM600
harness used for low current 600mA positive (+) locks.
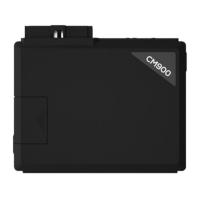
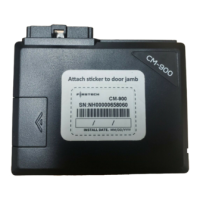
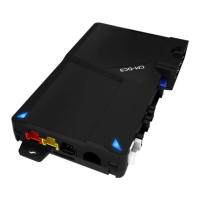
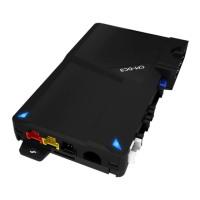
What is this cartridge slot on the rear of the CM5000 and CM5200?
A: This is the slot for the Blade cartridge system by ADS. This slot is for the Idatalink Blade remote start
bypass modules. For more information on the compatibility and install information please visit
www.idatalink.com/fitguide. Using this system eliminates many connections between your standard
control module and bypass module. IMPORTANT: If you are not using the Blade then you will not have
or use the 20 pin connector next to the back up battery port.
26
Introduction
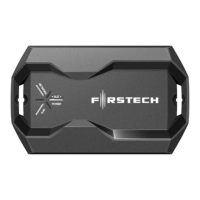
Thank you for purchasing this Firstech system for your vehicle. The following installation manual is
intended for experienced and authorized Firstech technicians. We highly recommend that you contact
your local Firstech dealer and seek professional installation. Call 888-820-3690 or visit our websites at
www.compustar.com or www.firstechllc.com to locate your nearest dealer.
This installation manual is for Version Simplified Firmware (V.SF) of the CM5200 and CM5000 control
modules.
Some functions and features are not described in this install manual. Please see the remote’s user
manual(s) for detailed descriptions on those features.
Caution: The Manufacture’s warranty will be void if this product is installed by anyone other than an
authorized Firstech dealer. Firstech reserves installation support services to authorized dealers only.
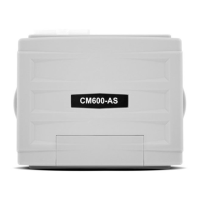
Kit Contents
All Firstech CM5200 control modules include the following:
- CM5200 main control module
- Main ignition wiring harness with two relays
- Wiring harnesses
- Hood pin
- Thermistor temperature sensor (2 Way remote LCD systems only)
All Firstech CM5000 control modules include the following:
- CM5000 main control module
- Main ignition wiring harness with two relays
- Wiring harnesses
- Hood pin
- Mountable bright blue LED
- Thermistor temperature sensor (2 Way remote LCD systems only)
- Firstech dual stage shock sensor
The following sensor is available but not included with every system:
- Remote pager sensor (RPS-II) (Optional on 2 Way remote LCD systems only)
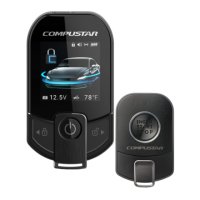
The remote(s) and antenna are modular and are not specific to the control modules. You have the ability
to pair almost any Firstech remote(s) and antenna receiver to the CM5200 or CM5000.
3
 Loading...