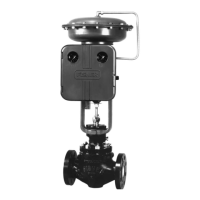
4150K and 4160K Series
17
dial. Rotate the pointer clockwise to increase or coun-
terclockwise to decrease the output depending on
transmitter action and desired setting.
For direct-acting transmitters, zero adjustment deter-
mines the process pressure at which the transmitter
output signal will be at its lower range limit.
The dial (key 38) graduations are approximate indica-
tions of the transmitter zero setting. When making ad-
justments, do not rely solely on the dial setting. Moni-
tor the process pressure and output pressure to be
sure the desired settings are attained.
Adjustment: Span
The span adjustment dial is graduated from 0 to 10. A
setting of 10 on the dial represents a span setting of
100 percent of the process sensing element range.
The transmitter achieves the highest accuracy when
the span is 100 percent.
The transmitter span adjustment shown in figure 12 is
the same as the controller proportional band adjust-
ment.
Calibration: Transmitters
The output of each transmitter is checked at the facto-
ry before the unit is shipped. The transmitter provides
an output signal that is proportional to the pressure
applied to the sensing element. The output pressure
has no direct effect on the process pressure.
The transmitter is calibrated at the factory and should
not need additional adjustment. Use the following cal-
ibration procedures when the sensing element has
been changed or other maintenance procedures have
altered the calibration of the transmitter. The following
procedures use a 3 to 15 psig (0.1 to 1.0 bar) output
pressure range as an example. For other output pres-
sure ranges [such as 6 to 30 psig (0.2 to 2.0 bar)] ad-
just the values to match the application.
Provide a process pressure source capable of simulat-
ing the process pressure range of the transmitter. If an
output pressure gauge is not provided, install a suit-
able pressure gauge for calibration purposes
(1)
. Con-
nect a pressure source to the supply pressure regula-
tor and be sure the regulator is delivering the correct
supply pressure to the transmitter.
Unless otherwise indicated, key number locations are
shown in figure 12.
1. Complete the above connections and provide a
process pressure equal to the sensing element range.
2. Rotate the span adjustment knob to 10 on the dial
(100 percent span).
3. Verify that the calibration adjuster screws (key 43)
are at mid-position in the calibration adjuster (key 41)
slots.
Depending upon the transmitter action, perform one or
the other of the following procedures.
For direct-acting transmitters:
4. Rotate the zero adjustment knob to zero.
5. Set the input pressure to zero.
6. Adjust the nozzle (key 57) until the transmitter out-
put pressure is at 3 psig (0.1 bar).
7. Apply an input pressure equal to the sensing ele-
ment upper range value.
Note
When performing the span adjustment
in step 8, loosen one screw only on the
calibration adjuster and move the cal-
ibration adjuster a small amount using
the tight screw as a pivot and retighten
the screw. If the adjustment is repeated
several times, alternate the loosening of
the two screws to prevent the nozzle
from being misaligned with the flapper.
During calibration, always be sure the
nozzle remains perpendicular to the
flapper.
8. If the output pressure is not 15 psig, adjust the
span by loosening one of the two adjusting screws
(key 43) and move the calibration adjuster (key 41) a
small distance as indicated in figure 13.
9. Repeat steps 4 through 8 until no further adjust-
ment is necessary.
10. Proceed to the startup procedure for transmitters.
For reverse-acting transmitters:
4. Rotate the zero adjustment knob to zero.
5. Apply an input pressure equal to the sensing element
upper range limit.
6. Adjust the nozzle (key 57) until the transmitter output
pressure is at 3 psig (0.1 bar).
7. Set the input pressure equal to zero.
Note
When performing the span adjustment
in step 8, loosen one screw only on the
calibration adjuster and move the cal-
ibration adjuster a small amount using
the tight screw as a pivot and retighten
the screw. If the adjustment is repeated
several times, alternate the loosening of
the two screws to prevent the nozzle
1. For stability, some transmitter applications will require additional volume than just the
gauge. Provide a minimum volume of approximately 1.5 in
3
(25 cm
3
) or greater if stability
is a problem.