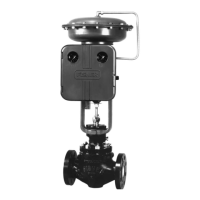
4150K and 4160K Series
21
pressure connection (key 107) for a process pressure
gauge. If a supply pressure gauge is required, a gauge
with a 1/4-inch connecting stem (key 14) must be
mounted on the supply pressure regulator.
CAUTION
Before performing this procedure, be
sure the replacement gauges are the
correct range so they are not damaged
by overpressure.
Note
One gauge type (key 13) is used for ei-
ther supply pressure indication or out-
put pressure indication when both
gauges are installed inside the control-
ler case.
1. Shut off the supply pressure and process lines to
the controller or transmitter.
2. Remove the gauge to be replaced:
D Unscrew the output or supply gauge (key 13)
from the relay base.
D Unscrew the process pressure gauge (key 106)
from the process connection (key 107).
D Unscrew the supply gauge (key 14) from the sup-
ply pressure regulator.
3. Coat the threads of the replacement gauge with a
sealant.
4. Screw the replacement gauge into the relay base,
process connection, or supply pressure regulator.
5. Check for leaks by applying the correct supply
pressure with the nozzle capped to produce full output
pressure.
Replacing Bourdon Tube
Refer to figure 21 for key number locations unless
otherwise directed.
1. Shut off the supply pressure and process lines to
the controller or transmitter.
2. Unscrew the machine screw (key 63) to disconnect
the link (key 64) and bearing (key 65) from the beam
(key 44). Be careful to avoid losing the bearing (key
65). Washer(s) (key 370) for the machine screw (key
63) are at times furnished for insertion at the beam
(key 44) connection to ensure alignment of the con-
necting link (key 64).
3. Disconnect the control tubing (key 132). Unscrew
two screws (key 77) and washers (key 76), and re-
move the Bourdon tube (key 62).
4. Unscrew the machine screw (key 63), and remove
the link and bearing (keys 64 and 65) from the Bour-
don tube. Be careful to avoid losing the bearing (key
65).
5. Attach the link and bearing to the replacement
Bourdon tube.
6. Attach the Bourdon tube with two machine screws
and washers (keys 77 and 76).
7. Connect the link and bearing to the beam (key 44).
8. After connecting the link to the beam, make sure
the nozzle is centered in the slot in the beam. If not,
carefully loosen the machine screw (key 63) enough
so that you can slip a washer (key 370) between the
bearing (key 65) and beam (key 44). Retighten the
machine screw and check the nozzle and beam align-
ment.
9. Check to be sure that the beam is parallel with the
bottom of the case and that the link (key 64) is in ten-
sion. If the beam is not parallel with the case, loosen
the machine screws (key 77), reposition the Bourdon
tube to get the beam parallel, and retighten the
screws.
10. If a Bourdon tube with a different range was
installed, remove the machine screw and washer
(keys 40 and 39) and dial (key 38). Install a new dial
having an adjustment range corresponding to the
range of the Bourdon tube. If an optional process
pressure gauge (key 106, figure 19) is being used,
install a new gauge with the appropriate measurement
capability.
11. Check all tubing connections for leaks and the
Bourdon tube machine screws, tighten as necessary.
Perform the appropriate calibration procedures.
Replacing Bellows Sensing Element
Refer to figure 22 for key number locations unless
otherwise directed.
1. Shut off the supply pressure and process lines to
the controller or transmitter.
2. Disconnect the tubing from the mounting base (key
30) and calibration adjuster (key 41). Disconnect the
tubing that connects the pressure block (key 8, figure
19) to the bellows assembly (key 71), at the pressure
block end.
3. Unscrew the four machine screws (key 28, figure
19 or 20), and remove the pressure sensing subas-
sembly from the case.
4. Remove the bellows yoke machine screws and
washers (keys 75 and 76), and move the bellows yoke
to the right to permit access to the link screw.