Instruction Manual
D100714X012
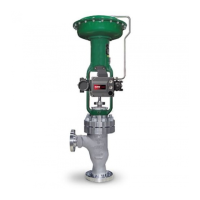
461 Valve
June 2017
12
Table 4. Recommended Torque for Valve Body to Bonnet Nuts
VALVE SIZE, NPS PRESSURE RATING
STUD DIAMETER,
INCHES
TORQUE
B7/2H S20910
NSm lbfSft NSm lbfSft
2x3
CL300
7/8
373 275 339 250
CL600 373 275 339 250
CL900 373 275 339 250
CL1500 373 275 339 250
CL2500 1-1/8 522 385 522 385
3x4
CL300
7/8
373 275 339 250
CL600 373 275 339 250
CL900
1
522 385 502 370
CL1500 522 385 502 370
CL2500 1-1/2 1247 920 1247 920
4x6
CL300
1
522 385 502 370
CL600 522 385 502 370
CL900
1-1/4
942 695 942 695
CL1500 942 695 942 695
CL2500 1-3/4 2670 1970 2670 1970
6x8
CL300
1
522 385 502 370
CL600 522 385 502 370
CL900
1-1/2
1247 920 1247 920
CL1500 1247 920 1247 920
Assembly
1. When assembling, use a new bonnet gasket (key 6), and wipe all sealing surfaces (valve body, bonnet, and gaskets)
with a clean cloth. If the seat ring (key 2) was removed, install it in the valve body (key 1), and then torque the seat
ring retainer (key 4) into the valve body. Since there is no gasket between the seat ring and the valve body, make
sure that the mating surfaces are clean and free of nicks and scratches.
2. Replace the liner (key 5). Then, slide the valve plug and stem assembly (keys 3 and 10) into the valve body (key 1).
3. Mount the bonnet (key 14) onto the valve body (key 1), being careful not to damage the gasket.
Note
If the seating surfaces of the valve plug and seat ring require lapping, refer to the Lapping Seating Surfaces section before
continuing to assemble the valve.
CAUTION
Avoid product damage in the following step by taking care not to damage the packing while installing the bonnet.
4. If it is necessary to replace the packing, perform steps 10 through 16 of the Replacing Packing section. However, if it
is not necessary to replace the packing, make sure to install the bonnet carefully on the valve body to avoid
damaging the packing with the valve stem threads.
5. Lubricate the valve body studs and nuts (key 7) with anti-seize lubricant, and install the nuts (key 8) on the bolts.
Tighten the nuts in a crisscross pattern to no more than 1/4 of the nominal torque value specified in table 4 to
ensure a positive seal and even pressure on the bonnet.