Instruction Manual
D103198X012
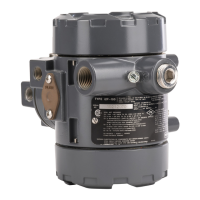
i2P-100 Transducer
July 2014
19
D Remove electrical power before removing either housing cap. Personal injury or property damage from fire or
explosion may result if power is not disconnected before removing either cap.
D Remove electrical power before disconnecting any of the pneumatic connections or removing the external removable
filter/restriction.
When disconnecting any of the pneumatic connections or the external removable filter/restriction, natural gas will seep
from the unit and any connected equipment into the surrounding atmosphere. Personal injury or property damage may
result from fire or explosion if preventative measures are not taken, such as adequate ventilation and the removal of any
ignition sources.
CAUTION
Do not attempt to remove either of the housing caps if the locking set screws (key 8) are engaged. Removing housing caps
without disengaging the set screws can cause damage to the housing caps.
CAUTION
When replacing components, use only components specified by the factory. Always use proper component replacement
techniques, as presented in this manual. Improper techniques or component selection may invalidate the approvals and
the product specifications, as indicated in table 1. It may also impair operations and the intended function of the device.
The converter module and the electronics module are non‐repairable. If troubleshooting or alignment attempts indicate a
faulty converter or electronics module, replace the module or return the transducer to your Emerson Process Management
sales office for repair.
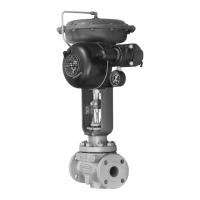
Troubleshooting
The following procedures require taking the control valve/actuator assembly out of service. Provide some temporary
means of process control before taking the control valve out of service.
Electrical
1. Ensure terminal lug connections from the control device to the transducer are of the correct polarity (refer to the
electrical connection procedures in the Installation section of this manual).
2. At the transducer, ensure that the mA DC signal is applied, and ensure that it is within the 4 to 20 mA range.
3. Check switches and ensure that they are properly set. Refer to figure 10.
4. If the problem has not been resolved, see Electronics Module Replacement in this manual.
Pneumatic
Provide a 4‐30 mA DC current source, supply pressure, and a gauge to monitor the output pressure when checking
transducer operation. Refer to figure 13 for key number locations.
1. Ensure that supply pressure to the transducer meets your requirements [0.3 bar (5 psi) higher than upper range
limit of output signal, with a maximum of 3.4 bar (50 psi)].
2. Ensure that the filter (key 11) and restrictor (key 10) are open and clean. Remove the two screws (key 14), the filter
cap (key 13) and the O‐ring (key 12) to access the filter and restrictor.
 Loading...