Instruction Manual
D102178X012
V260 Valve
July 2017
11
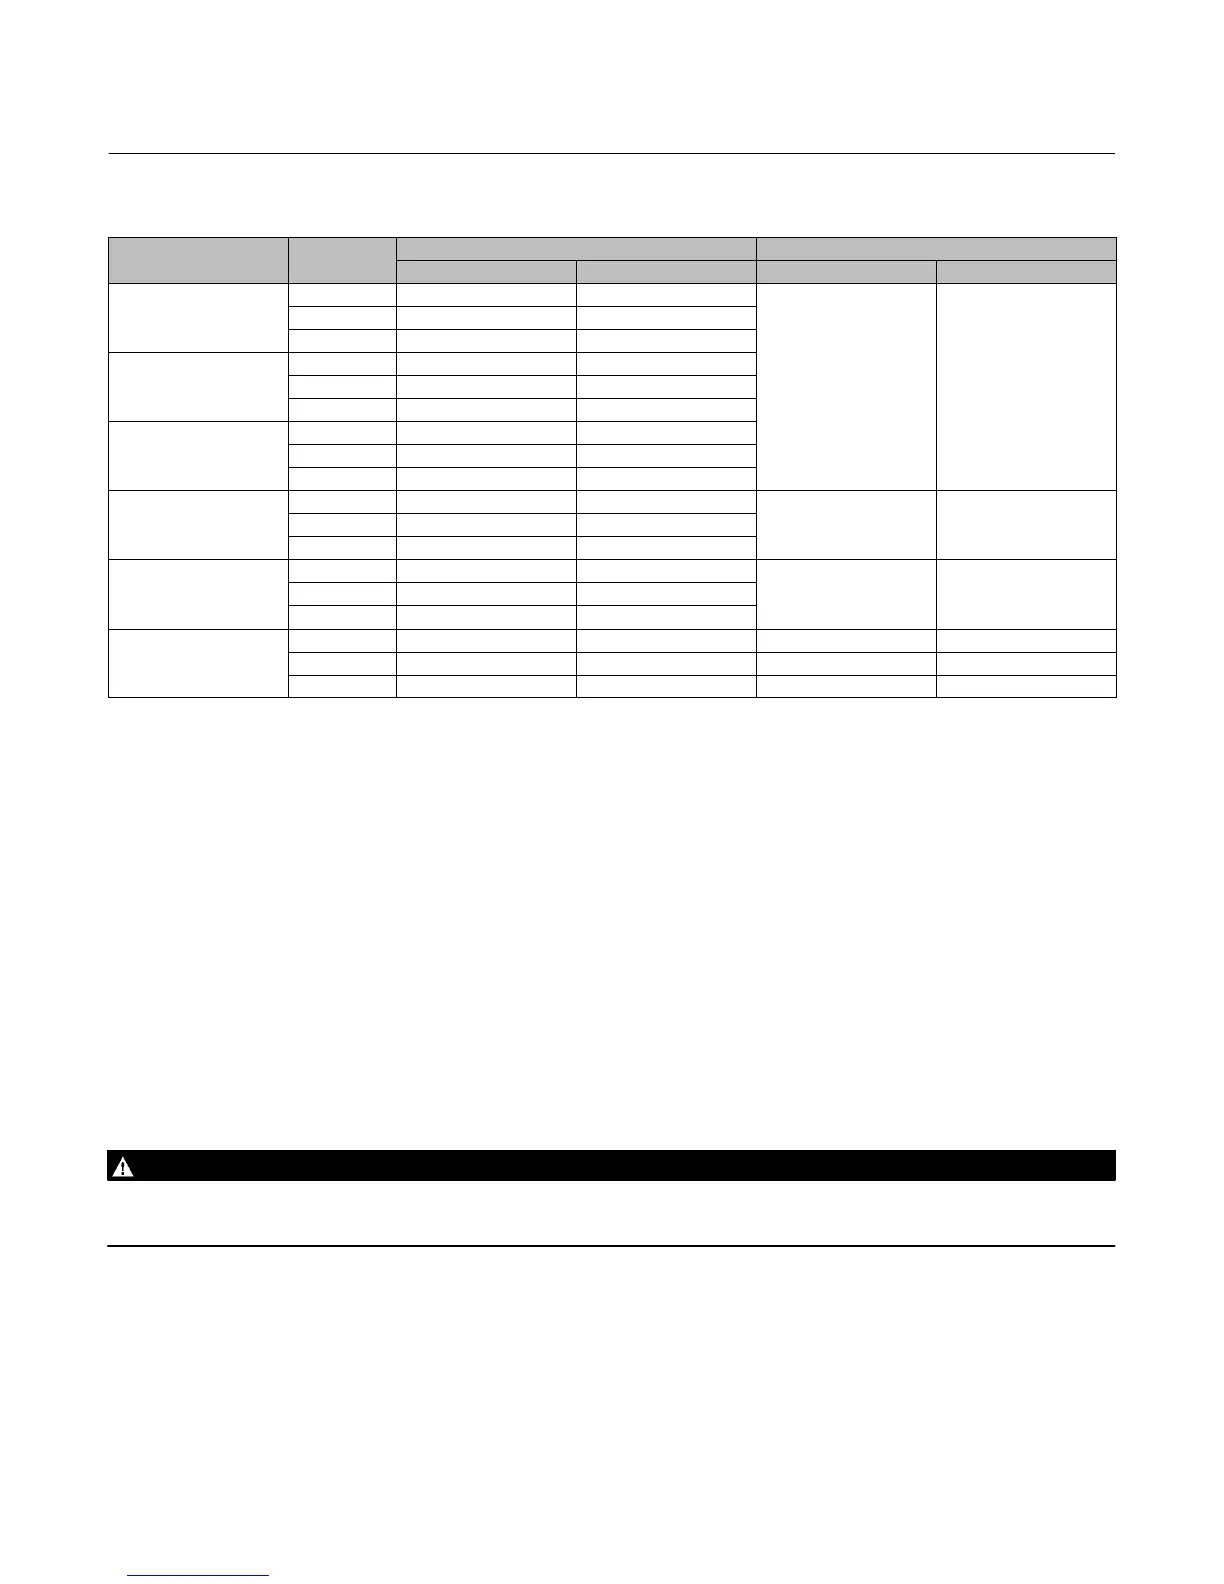
Table 3. Torque Values
VALVE SIZE, NPS
PRESSURE
RATING
VALVE BODY HEX NUT (KEY 19) MOUNTING FLANGE HEX NUT (KEY 23)
NSm lbf‐ft NSm lbf‐ft
8
CL150 393 290
271 200
CL300 549 405
CL600 746 550
10
CL150 549 405
CL300 746 550
CL600 990 730
12
CL150 549 405
CL300 990 730
CL600 990 730
16
CL150 746 550
746 550
CL300 1750 1290
CL600 1750 1290
20
CL150 990 730
990 730
CL300 2237 1650
CL600 3470 2560
24
CL150 1749 1290 990 730
CL300 3470 2560 990 730
CL600 6088 4490 1749 1290
19. Assemble the seal and install the second tailpiece using the following steps.
For dual seal and dual dome constructions, it is easier to lay the valve assembly on its side while installing the second
tailpiece.
20. Install the dome, dome spacer, and alignment groove pins (if a characterized attenuator is used) in the tailpiece.
21. Lubricate and install the seal assembly O‐ring (key 7) in the groove of the seal as shown in figure 6.
22. Install the wave spring (key 8) over the end of the seal (key 17 or 9). Note that the spring is not required with the
attenuator dome (key 28, figure 6).
23. For single seal constructions, place the seal ring assembly into the tailpiece, taking care not to damage the O‐ring
(key 7) while sliding it into the tailpiece. Also, be careful to protect all sealing surfaces.
For dual seal constructions, place the seal assembly (key 17) into the dome, dome spacer and tailpiece.
24. Lift the second tailpiece assembly and align it with the valve body studs and pins. Slide the tailpiece onto the studs
and bearing plate pins. The groove pins in the valve body should be guided into the pin holes in the tailpiece. Pull it
up tightly, taking care not to damage the tailpiece O‐ring as it is pulled into the valve body.
25. Install the hex nuts (key 19) on the studs (key 3) and hand‐tighten them. Torque all the hex nuts evenly.
WARNING
Refer to table 3 for bolt torque requirements. Exceeding any torque requirements could damage the valve and impair safe
operation.
26. Refer to the Packing Maintenance section to install the packing parts.
 Loading...