Do not adjust canopy frame with fabric attached. When
the bolts are loose or removed, a sudden wind could
cause the entire frame structure to blow off the lift and
damage it.
1. Place fabric over the
frame system and
adjust where necessary
for a uniform fit.
2. Attach canopy ends to
frame by wrapping the
Velcro around the
bottom of the end hoops
as shown in
Fig. 51.
3. Use a 9/16” socket with either a wrench or a
cordless drill, spin main rail adjustment bolts
counterclockwise to extend each side until the
As you can see in Figs. 45, 46
& 47, the watercraft are
completely covered from front
to back and the fabric hangs
down vertically over the boat’s
side walls. This is the optimum
canopy placement.
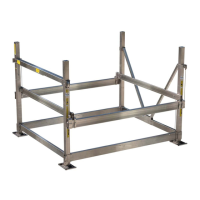
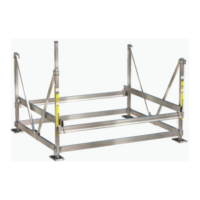
To adjust
horizontally, remove
bolts located here
and slide into
position. Tighten to
45 ft. lbs.
To adjust vertically,
loosen but do not
remove bolts
located here and
slide into position.
Tighten to 45 ft. lbs.
Fig. 48
Entire frame adjusts horizontally
Entire
frame
adjusts
vertically
See Fig. 50
See Fig. 49
Fig. 51
End-
hoop
Optional
canopy
support
bracket
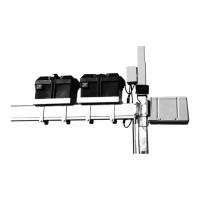
If the canopy frame extends
more than 11 ft. from the end of
the lift, a canopy frame support
is needed. This will add rigidity
to the frame for up to an
additional 2’ of overhang and
reduce the potential for wind
damage.
WARNING
Do not adjust canopy frame with boat on lift. If lift
failure were to occur, there is potential for serious
bodily injury or even death. Damage may also result
from the loosened framework making contact with the
boat.
WARNING
Fig. 47
Do not attempt to install or remove canopy fabrics in
windy conditions. Strong winds or wind gusts can make
fabric handling extremely difficult and can cause a
potentially dangerous situation.
END FRAME ADJUSTMENT
All canopy frames are equipped with the adjustable
end frame feature. This feature makes installation
and removal easier and pulls the canopy fabric tight
for a great looking fit.
To adjust prior to installing or removing fabric:
1. Loosen center rail adjustment knob by turning it
counterclockwise (See Fig. 49). This will allow the
center rail to retract.
2. Using a 9/16” socket with either a wrench or a
cordless drill, spin main rail adjustment bolts
clockwise to retract each side (See Fig. 50).
3. Follow canopy fabric installation instructions.
Fig. 50 - Canopy main rail
adjustment bolt.
End-Hoop
CANOPY FABRIC INSTALLATION
WARNING
Screw Auger
with Tether
WARNING
The 26’, 28’, and
30’ canopy systems
come standard
with the canopy
support system.
Fig. 49 - Center rail
adjustment knob.
21