Limitorque B320 Series FCD LMENIM3201-02 – 01/15
16
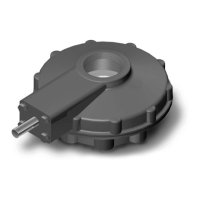
6.1 Disassembly and Reassembly of B320-10
through -80
6.1.1 Disassembly
(Piece numbers refer to Figures 6.1, 6.2, 6.3, and 6.4).
1. Remove Thrust Ring (piece #5). Pull out Stem Nut (piece #4), Washers (piece #7) and Bearings
(piece #6).
2. Remove Endcover (piece #20).
3. Slide out Bevel Pinion Shaft/Bearing Subassembly (piece #21, 22, and 23) together with Shims
(piece #25).
4. Remove Housing (piece #1) from Base (piece #2).
5. Remove Bevel Gear (piece #3) and Ball Bearings (piece #8).
NOTE: Please note the number and position of each shim.
6.1.2 Reassembly
(Piece numbers refer to Figures 6.1, 6.2, 6.3, and 6.4).
1. Install Ball Bearings (piece #8) and Bevel Gear (piece #3) on Base (piece #2).
2. Attach Housing (piece #1) to Base (piece #2).
3. Slide in Bevel Pinion Shaft/Bearing Subassembly (piece #21, 22, and 23) together with Shims
(piece #25).
4. Attach Endcover (piece #20).
5. Insert Thrust Washer (piece #7), Needle Bearing (piece #6) and another Thrust Washer (piece #7).
6. Insert Stem Nut (piece #4)
7. Insert Thrust Washer (piece #7), Needle Bearing (piece #6) and another Thrust Washer (piece #7).
8. Attach Thrust Ring (piece #5).
NOTE: Gasket compound is to be used on all metal/metal faces.