150X Series
Calibration Manual
10
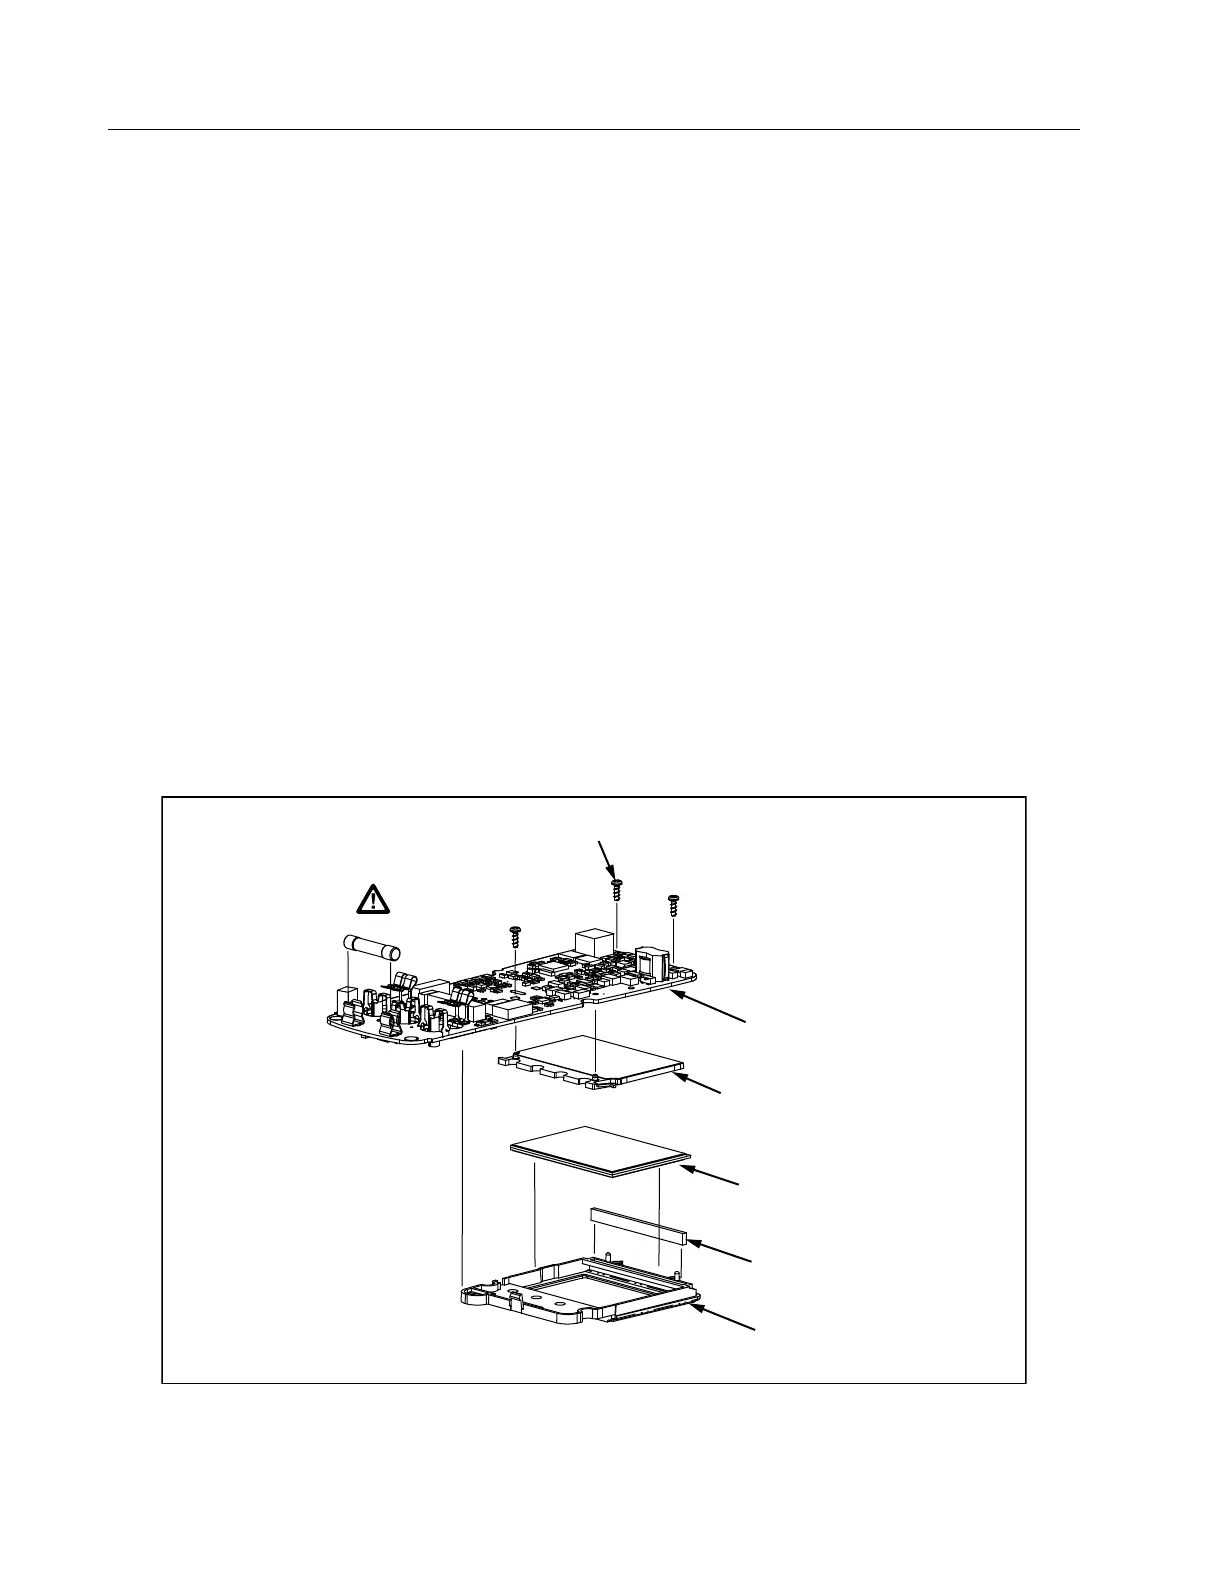
Remove the Display
With the PCA removed, the final step to disassemble the Tester is to remove the display
assembly from the PCA. Refer to Figure 5 and use this procedure to remove the display
assembly:
1. Remove the two screws from the display end of the PCA.
2. Hold the PCA face down with the fuse-end of the PCA toward you. Locate the screw-hole
near the center of the assembly. This hole is the one used to attach (with a screw) the PCA
to the top case.
3. Locate the gray plastic tab just above and to the left of the hole. Use your thumbnail to
press the tab down and toward the display end of the PCA. This releases the LCD assembly
from the PCA.
WCaution
To prevent damage to the plastic guide pins on the display assembly, keep the
display assembly parallel to the PCA when you separate the two parts.
4. Without tilting the PCA, lift it straight up and away from the display assembly.
5. To keep loose parts from falling away from the display assembly, keep it face-down, and
set it in a safe place.
Figure 5. Access the LCD
Light-dispersing
Back Panel
Elastomeric
Strip
PCA Screws
Fuse
Gray Plastic
Bezel
Glass LCD
Display
PCA
 Loading...