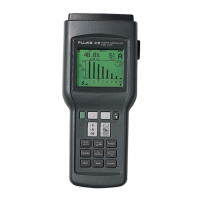
39/41B
Service Manual
4-16
4-17. Making Calibration Adjustments
The calibration step being performed is identified by an arrow on the left side of the
display. Each step calls for either a connection to be made or a known voltage applied to
the input of the Tester. Pressing Enter will either move to the next step (in the case of an
instruction) or store the displayed calibration factor for that specific test. By pressing the
arrow key more than once, you can bypass a step in the calibration menu. When this
happens you must restart the Calibration routine.
Note
Make sure each calibration step is complete before pressing enter. Press
enter only once for each calibration step or instruction. There will be a
slight delay before the arrow moves to the next prompt or instruction on
the display after pressing enter.
Upon completion of all calibration steps, you are instructed to accept the Tester’s new
calibration factors by pressing E, or cancel the calibration by turning the Tester off.
All other button operations are ignored.
To capture usable calibration factors, the calibration source output must be stable and the
Tester factor readings must settle to their final value. Once the factor reading has
stabilized, press E to move to the next calibration step or instruction.
If all of the calibration steps are completed and ACCEPT CALIBRATION is performed
by pressing E, the new calibration factors are stored in nonvolatile calibration
memory. At this point, calibration is complete and the Tester exits the calibration mode.
While in the calibration mode, the Tester prompts you through the following steps:
Warning
During calibration, dangerous voltages are present in the
instrument. To avoid shock, you must make sure the battery
cover is installed.
1. Connect the calibrator HI and LO outputs to the Clamp Probe BNC connector on the
Tester. Press E. (A voltage source is used to calibrate the current input, DO NOT
APPLY A CURRENT SOURCE TO THE BNC CONNECTOR.)
2. Apply 14 mV rms at 60 Hz. After allowing the reading to settle, press E on the
Tester.
3. Apply 140 mV rms at 60 Hz. After allowing the reading to settle, press E on the
Tester.
4. Apply 1.4V rms at 60 Hz. After allowing the reading to settle, press E on the
Tester.
5. Press E to start gain factor calibration.
6. Apply 14 mV rms at 60 Hz. After allowing the reading to settle, press E on the
Tester.
7. Apply 140 mV rms at 60 Hz. After allowing the reading to settle, press E on the
Tester.
8. Apply 1.4V rms at 60 Hz. After allowing the reading to settle, press E on the
Tester.
9. Press E to switch to the Voltage calibration display (The Tester displays “CAL
VOLTS INPUT” for voltage calibration).