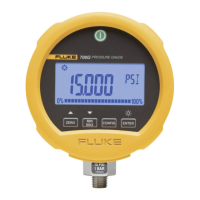
Pressure Gauge
Performance Verification Tests
9
Performance Verification Tests
Fluke recommends certification each year. To re-certify, do the verification procedure. If
test points are out of tolerance, calibrate the Product and then re-verify. Use the
subsequent tests to make sure that the Product is in its specification limits.
Required Equipment
The equipment necessary for verification of the Product is shown in Table 2. If these
instruments are not available, you can replace them with other instruments that have the
same minimal specification requirements.
Table 2. Equipment Required for Verification
Equipment Minimum Specification Recommended Model
Dead Weight Tester
300 to 10,000 psig
Accuracy: 0.01 % of Reading
Pressurement P3000, P3100
Low Pressure
Controller/Calibrator
100 inH2O
Accuracy: 0.02 % of Range
Ruska 7250LP
Absolute Pressure
Controller/Calibrator
300 psia
Accuracy: 0.01 % of Reading
Ruska 7250xi
How to Verify Pressure
For each procedure there is a table of test points and permitted Product indications. If the
result of the test is not in the range shown, the Unit Under Test (UUT) is out of tolerance
and must be calibrated or repaired. For Product support, see the “How to Contact Fluke”
section. The 700G01 and 700G02 require a low-pressure standard such as the Ruska
7250LP. Because absolute pressure of deadweight can be complex, a
Controller/Calibrator is recommended for the 700GA Gauges.
Follow these general instructions for all the tests:
• Make sure the batteries are fully charged.
• Let the verification equipment warm-up for its specified time.
• For each test, make sure the verification equipment is stable and that the “unsettled”
annunciator on the UUT is not shown.
1. Carefully attach the pressure fitting of the pressure standard to the pressure port of
the UUT.
Note
Use plenty of PFTE tape when you attach the pressure fitting.
The display reads 0.00 PSI with the pressure standard opened to ambient air. If it does
not, push until the display shows 0.00 PSI.
2. Set up the pressure standard for the sequence of psi inputs from Table 3. These inputs
will be put into the pressure port of the UUT.
3. Make sure the pressure has become stable at each input before you verify the display
indication.
4. Apply the inputs from Table 3.
5. Carefully vent all pressure and disconnect the UUT from the pressure standard.

 Loading...