718 30G/100G
Users Manual
20
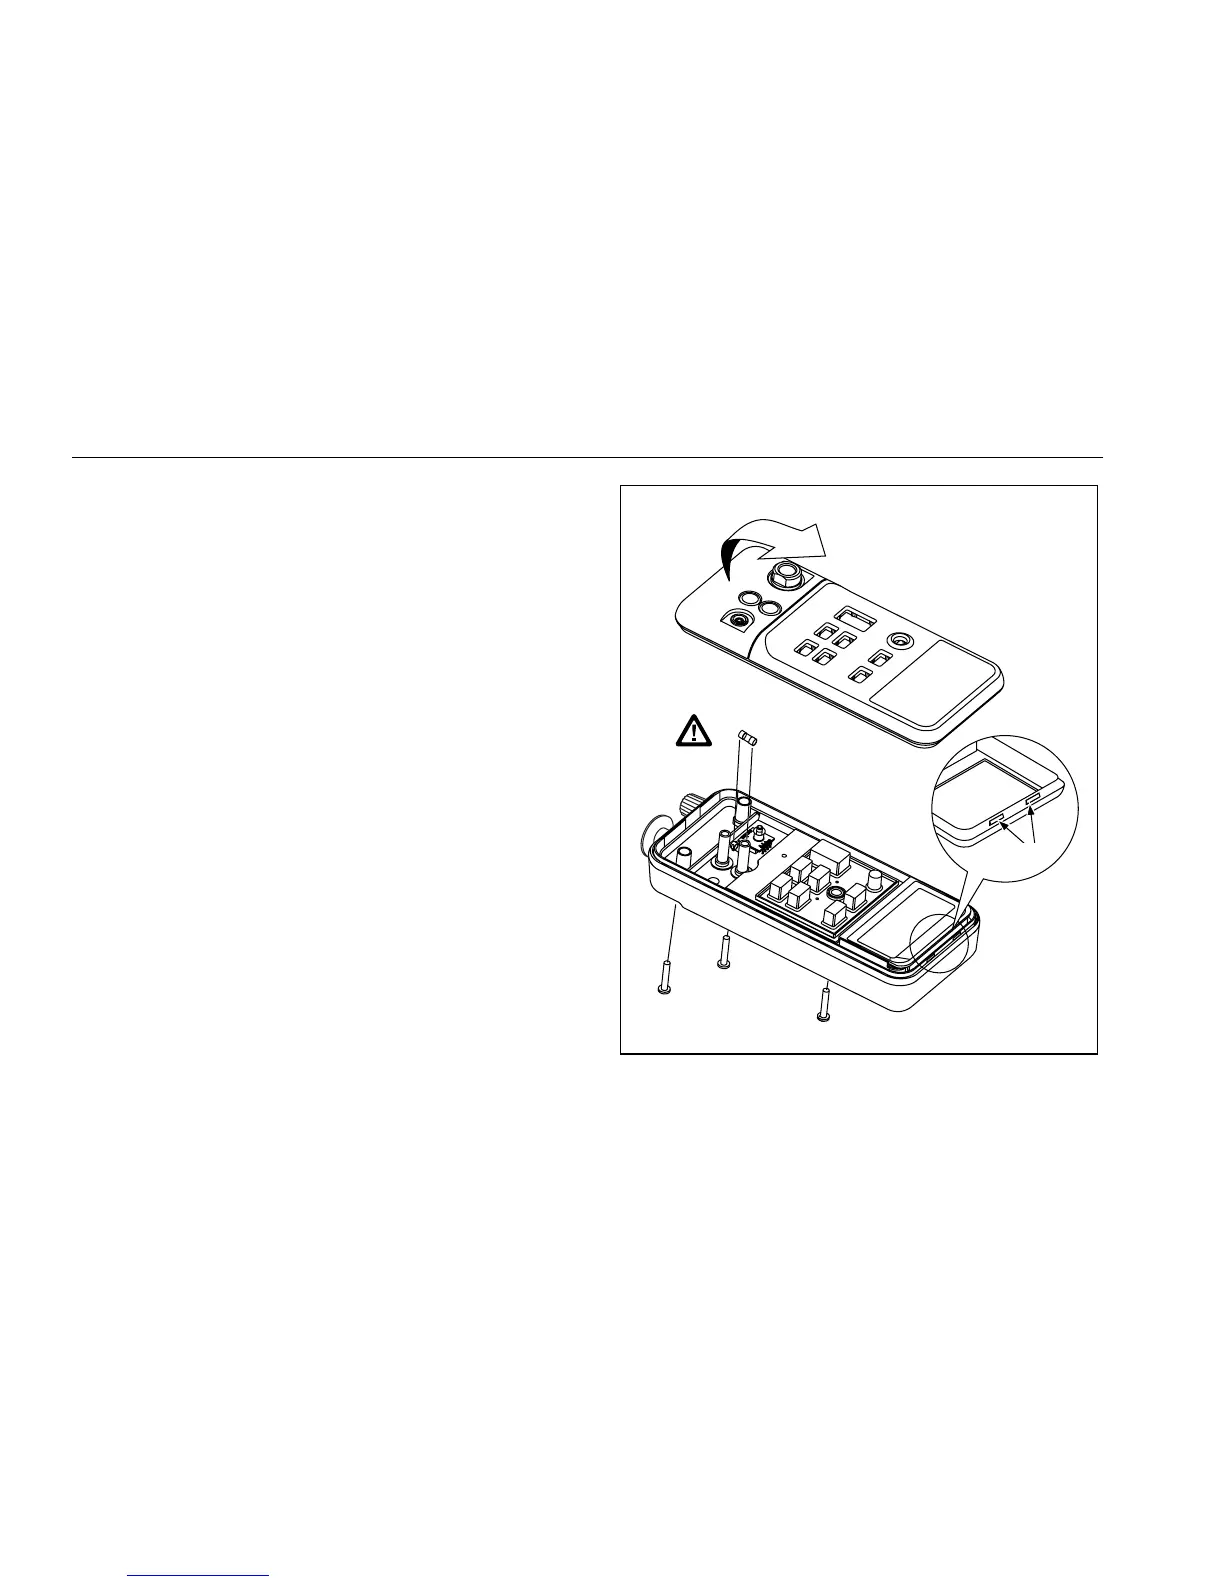
Replacing the Fuse
W Warning
To avoid personal injury or damage to the
Calibrator, use only a 0.125A 250 V fast fuse,
Littelfuse
2AG.
Fuse F1 is probably blown if the mA display reading does
not respond to current applied to the current (mA) inputs.
Refer to Figure 9. Replace the fuse as follows:
1. Remove the test leads and turn the Calibrator off.
2. Remove the battery door.
3. Remove the three Phillips-head screws from the case
bottom and turn the case over.
4. Gently lift the top cover from the end nearest the mA
inputs until it unsnaps from the bottom cover.
5. Replace the fuse with a 0.125 A 250 V fast fuse,
Littelfuse
type 2AG.
6. Carefully fit the case top and circuit board assembly
together, making sure that the O-ring is properly
seated between the pressure sensor and the
pressure fitting on the case top. Fit the case bottom
onto the case top, engaging the two snaps near the
display end of the case. Reinstall the three screws.
7. Replace the battery door.
Snaps
F1
wh003f.eps
Figure 9. Fuse Replacement

 Loading...