EQUIPMENT NOMENCLATURE
SPECIFICATIONS RECOMMENDED INSTRUMENT
AC
calibration
Source
Lo distortion,
1 mv to 1000 vac,
20 Hz
to
100 kHz,
with an ac-
curacy of
. 02%
Hewlett Packard
Model
745
with
Com-
panion 1000
Volt Am-
plifier
DC Calibration
Source
0-1000
volts dc with an accuracy
of 0. 002%
Fluke Model
332B
Oscilloscope
Sweep range; 50 usec/cm
Vertical sensitivity: 5 mv/cm
Tektronix 531 with
Type
L Plug-In Unit
Probe
Passive 10:1
P6007
Multimeter
Ranges:
AC’O to 100 ma
0 to 300 vac
DC-0 to 100 ma
0
to 1000
vdc
OHMS
-
0 to 100 megohms
Accuracy:
AC-±1%
DC-±0.
1%
Fluke Model
853A
Differential
Voltmeter
Range
-
0 to 1000 vdc
Accuracy -iO.
06%
Input
Impedance
-
Infinite
at null
Fluke Model
895A
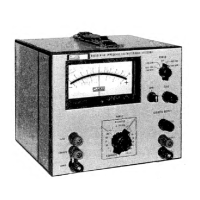
Figure
4-1.
REQUIRED TEST EQUIPMENT
4-8.
DISASSEMBLY INSTRUCTIONS
4-9. THE MODEL 893A
DISASSEMBLY
INSTRUCTIONS
4-10.
The foUowir^ procedure is to be used to gain ac-
cess to various parts of
the Model 893A:
a.
Remove the eight top dust cover
attaching screws
and remove
the dust cover from the
instrument.
b.
Remove the two screws from
the circuit board re-
taining strap
attached
access
the center of the instru-
ment and remove the strap.
This allows access
to
the
Null
Detector, Reference Amplifier,
Reference
hiverter, AC Converter, and
NULL
SENS
switch S3,
Ensure
that the retainer str^
insulators are
kept in a clean
condition.
c.
Remove the tc^ front and
rear trim strip
attaching
screws and remove
the trim strips from tte
instru-
ment.
This allows access to the front panel
binding
posts,
corrponents on the POWER switch S2,
and (if
the
-01
cption is installed) DSl.
The
printed circuit boards are inserted in
slide holders and will protrude approximately
three
inches when the instrument is inverted.
Place a strip of
tape across the chassis of
the instrument
to hold the printed circuit
boards in place if the instrument is to be
inverted.
d.
Remove the eight
lower dust cover
attachii^ screws.
This
allows access to the
Kelvin-Varley
Divider
Assembly.
e.
Remove
the lower front
and rear trim str^
attaching
screws
and remove the trip
strips from the instru-
ment.
This allows
access to the Kelvin-Varley
switches
S6 through S8
and potentiometer R37.
f. Remove the
left and right
knurled knobs from the
handle
assembly and
remove the handle
from the
instrument,
g.
Remove the
eight left and right
rear panel attaching
screws
and
slitte the
rear panel
free from the instru-
ment. This
allows access to tte
power transformer
Tl, CRl,
CR2 and any option
components.
h. Loosen
the front panel control
knob alien set screws
and remove the
knobs from the front panel. Loosen
the two screws
securing the shutter cablir^ to the
front panel and
then remove the nuts
on the front
panel
binding posts and
remove the terminal clips
from the binding posts. Remove
the left and right
front panel
attaching screws and
slide the front
panel
forward until free
of
the
instrument. This
4-2
893A