allcfws
access to
the front panel
meter and ail switch
linkages.
i.
Remove
the
right or
left side
panel attaching
screws
and
remove
the
panel from
the instrument.
This
allows
access
to the
respective
MODE or
RANGE
switch.
CAUTIONl
Do not remove
both side
panels from
the
instrument at
the same
time or
the struc-
tural-strength
of the
instrument
will be
impaired.
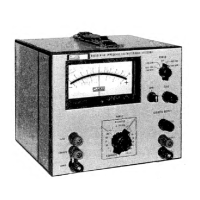
4-11. THE
MODEL
893AR DISASSEMBLY
INSTRU::TXO)^S
4-12. The
following
procedure is to be used
to gain ac-
cess to
various
parts of
the Model 893AR:
a.
Remove the
six top
dust cover
attaching screws and
remove the
dust
cover from the instrument.
This
allows access
to the
mounting screws of
the Kelvin-
Varley Divider,
Reference
Inverter, and Null
Detector
printed
circuit boards.
b.
Remove the top
front
and rear trim strip
attaching
screws and
remove
the trim strips from
the instru-
ment.
This allows
access to the
front and rear
panel
components.
c.
Remove
the six
lower dust cover
attaching screws
and
remove the
dust
cover from the
instrument.
This
allows access
to the
Reference Inverter
and AC
Con-
verter printed
circuit
board mounting
screws, all
of the
switches used
in the
instrument, and
potentio-
meter R37.
d.
Remove
the lower
front and rear
trim strip
attacliing
screws
and remove
the
trim strips from the
instru-
ment.
This
allows further access
to the front
and
rear
panel
components.
e.
Remove
the left
and right rear
panel attacliing
screws
and slide
the rear
panel free from
the instrument.
This allows
access
to the power
transformer
Tl,
CRi, CR2,
and any
option components.
f.
Loosen the
front panel
control knob set
screws and
remove
all of the
knots from
the front
panel. Loosen
the two
screws
securing the
shutter cabling
to the
front
panel.
Remove the
nuts
from
the front
panel
binding
posts and
remove the
terminal clips from
the
binding posts. Remove
the left
and right front
panel
attaching screws and
slide the
front panel for-
ward until free
of the
instrument.
This allows ac-
cess to the
front panel
meter and
all switch linkages.
4-13.
GENERAL
MAINTENANCE
4-14.
PERIODIC
CLEANING
4-15.
Ihis
instrument is
completely
enclosed,
therefore
no entry for
dirt.,
dust, or
lint is provided.
Consequently,
it
is usually
only
necessary to
clean the exterior
of the
instrument.
To clean the
exterior, use a
cloth moistened
with
anhyndrous ethyl
alcohol or Freon
T.
F.
Degreaser
(iVK
180
Miller-Stephenson
Chemical Co.
,
Inc.
).
If
eitlier
of
these cleaning
agents are
not readily available, soap
and
water, applied
sparingly to a
cloth can be used to
clean the
exterior of
the instrument.
4-16. If it
becomes
necessary
to
clean the
interior
of
the
instrument,
a
hot
deionized or
distilled water rinse
followed by a
thorough
drying should be used.
Drying
temperatures
in excess
of
160°
should be
avoided.
CAUTIONl
The use of
solvents,
particularly keytones,
is not
recommended because of
possible
damage
to the
dielectric materials used
in
the instrument.
4-17. FUSE
REPLACEMENT
4-18.
Input line power
to the
Model 893 instruments
is
fused
to
i/8
ampere
by FI.
This fuse is
located on
the rear
panel assembly
of the instrument in a
bayonet
fuseholder.
When replacing
this fuse use a l/8A,
250
volt, slo-blo, type fuse.
4-19. BATTERY
REPLACEMENT
4-20. Battery
replacement on instruments containing
the
-01
option is
necessary when 16 continuous
hours
of
battery charging will
no longer result in a satisfactory
battery check.
To replace
the
batteries, proceed as
follows:
a.
Obtain access
to the battery pack installed on the
rear panel using
the disassembly procedures for
your
particular instrument that are described in
paragraphs
4-8
through
4-12.
b.
Unsolder red (or white) and black
battery pack wires
from
their
respective circuit connections and wrap
the exposed ends of
the wires with electricians tape.
c.
Remove
the four nuts
and screws that
attach the
battery pack
to the rear
panel and lift the
battery
pack
free
from the instrument.
d.
Locate and
replace the
defective batteries
observing
proper
polarities of
connections.
e.
Mount the
battery pack on
the rear panel
assembly
using
the screws
and nuts
removed in
step c.
f.
Remove
the tape from
the black
battery pack
wire
and
solder this
wire to the
terminal on
the power
transformer
from
which it
was
removed in step
b.
g.
Remove
the tape from
the red (or
white)
battery
pack
wire
and solder
this wire to the
end of the
resistor from
which it was
removed
in step b.
n. Reassemble
the
instrument and
check the
batteries
as
described in
Section II
paragraph
2-9
and
2-l0.
4-3
8 9.3 A
 Loading...