ah. Connect the oscilloscope signal
input
and
ground
to A3 terminals 10 and
9,
respectively. A 3
kHz
drive signal having a maximum amplitude of 13.
5
volts
peak-to-peak should be observed on the oscil-
loscope
trace.
10
megohm
1%
resistor. Circuit
waveforms are illus-
trated in
Figure
4-6.
To
perform
the
checks, apply
ac power to
the instrument
and proceed
as follows;
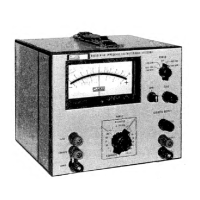
a. Place the Model 893 controls
as follows:
4-27.
When
the results of
these checks agree
with the
information given, the
Reference
Amplifier/Reference
Inverter Assemblies are
functioning
properly
and the
test
equipment can be
disconnected from
the
instrument.
4-28.
NULL
DETECTOR/DIVIDER CHECKS
4-29. The Null
Detector
/Divider
Checks require
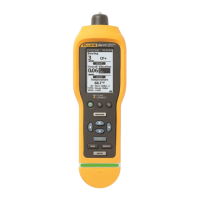
a dc
voltage calibrator, a dc
differential voltmeter and
a
POWER
RANGE
NULL SENS
MODE
Readout dials
ON/LINE OPR
1
.001
+
.00100
b. Connect the dc
differential voltmeter
input to TP16
and the common lead
to
terminal 7
of the Null
Detector Assembly. 'The voltmeter should
indicate
+6. 8 ±0.
4 volts
dc.
A2
REFERENCE AMPLIFIER WAVEFORMS
S
j
!
—
—
1
u
rs ft, ft
A
i rr
U-)
o
O
f
n
I
10 MSEC/CM 0.2
MSEC/CM
A2
TERMINAL 3
A2TP9
0.2
MSECyCM
A2TP14
A3 REFERENCE INVERTER WAVEFORMS
0.2 MSEC/CM
A3TP16
0.2
MSEC/CM
A3TP17
Model 893A S/N 123 thru 508
Model 893A S/N 1 23 thru
254
A3TP19
1
-• •>
K
**
r'
ri
0.2 MSEC/CM
JUNCTION OF
A3CR4 AND A3CR6
0.2 MSEC/CM
JUNCTION OF
A3CR5
AND A3C7
33M III
L_
0.2 MSEC/CM
JUNCTION OF
A3R8 AND
A3C9
Figure
4-4.
REFERENCE AMPLiFIER/REFERENCE
INVERTER WAVEFORMS
c. Connect
the
dc
differential voltmeter
input to TP17,
observing that the voltmeter indicates
-6.
8 ±0.4
volts dc.
d.
Disconnect the dc
differential voltmeter
from the
Model 893.
e.
Connect a shorting
jumper
between
the
LO and HI
INPUT terminals and rotate A4R27
and
A4R31 fully
counter-clockwise.
f.
Adjust A4R27 clockwise until a full-scale negative
meter
indication
(-1)
is
obtained
and
then
rotate
the control an additional
10°
clockwise.
g.
Remove
the shorting jumper
and adjust A4R31 for
an
exact zero-center meter
indicaticC^^id then
repeat steps f and
g
as
necessary.
h. Connect the shorting jumper
between the LO and HI
INPUT terminals and adjust
A4R5 to each available
limit. The meter pointer should
deflect above and
below the minus
1
indication.
i. Adjust
A4R5 for a full-scale
(-1)
indication
on the
meter.
j.
Remove the shorting jumper between the
INPUT ter-
minals and replace with
a
10
megohm
1
%
resistor.
k. Place the
Readout
dials to
.
002M and adjust
A4R17
to each available
limit,
observing that the
meter
pointer deflects above and below the
minus
1
indi-
cation.
1. Adjust A4R17 for
a
full-scale
(-1)
indication on the
meter.
m.
Remove the 10 megohm resistor
from
between
the
INPUT
terminals
of the instrument
and place
the
Model
893
controls
as follows:
POWER
RANGE
NULL SENS
MODE
Readout dials
ON/LINE OPR
1
.001
+
.00000
9/22/71
4-9
893A