MODEL
893 AC RANGE
A7Q6 EMITTER
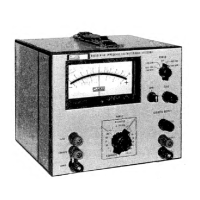
MODEL 893 METER
A7 ADJUSTMENT
INPUT VOLTAGE
WAVEFORM
INDICATION
10
10
FULL-SCALE 0
±0.
5
m. d.
R33
100
100
FULL-SCALE
0 ±0.
5
m. d.
R31
500 1000*
50% OF THE
FULL-SCALE
WAVEFORM
AMPLITUDE
0
±1
m. d.
R29
Set the Readout dials to 500. OQ
Figure 4-9. AC
CONVERTER
RANGE
CHECKS
400HZ FULL-SCALE INPUT
0
X
V,/
r
V-
L/
t
/
/
N
5
u
A7Q6 EMITTER
1
MSEC/CM
400HZ 1/10 SCALE INPUT
r
, L
\
: ^
~r
[ST'
\
X.
)
\
/
V.
S
lO
o
A7Q6
EMITTER
1 MSEC/CM
400HZ
FULL-SCALE INPUT
dt
1
r
s
CR4/R24 IMSEC/CM
400H2
FULL-SCALE
INPUT
CR3/R21
IMSEC/CM
400HZ
FULL-SCALE INPUT
Q
/
\m
!
T
/
\ /
r
\
[
\ j
V 7
2
u
CN
o
R23/C15 IMSEC/CM
Figure
4-10.
AC
CONVERTER WAVEFORMS
4-39.
When the results of these
checks agree with
the
information given, the AC Converter
is functioning
prop-
erly
and
the test equipment
can be disconnected
from the
instrument.
4-40.
CALIBRATION
PROCEDURES
4-41. INTRODUCTION
4-42.
The Model 893 should be checked
for
calibration
every 90 days. Before attempting to calibrate your
instrument, it is recommended that the
major portions
of the instrument circuitry
be checked using the methods
described in
the
preceding
Precalibration and Trouble-
shooting paragraphs.
4-48,
It will be necessary to apply ac and dc voltages
from a known accurate source to the input of the instru-
ment during the calibration process. An ac calibration
source such
as
the H.P. Model 745A can be used to obtain
the accurate ac voltages, and
a
John Fluke Model 332B
can
be used
to obtain
the required dc voltages.
4-44. Calibration of the instrument shoxild
be performed
on line power with
the
top and bottom dust covers removed
from tte instrument. An ambient room ten^erature
from
2l°C to 25'’C, in
a
draft free area, should
be maintained
during the
calibration
process.
Adjustment
and testpoint
locations are illustrated in Figure
4-2.
Figure
4-11
contains a list of the calibration adjustments and their
effects.
4-45.
METER MECHANICAL
ZERO ADJUST
4-46. With
the power removed
from the Model
893,
proceed as follows:
a.
Position the instrument
horizontally (normal
pos-
ition) on the bench.
b. Adjust the meter mechanical zero
screw, acces-
sible from
the
front panel, until the meter pointer
indicates zero-center.
Back-off the
screw
adjust-
ment just enough to
disengage the cam once the
center-zero indication
is obtained.
4-12
893A