METER
INDICATION
JUMPER WIRE
0
to ±0. 6
NONE
-0.
6 to
-1.
8
B
-
1
. 8 to
-3.
0
A
-3.
0 and above BOTH
Figure
4-14. JUMPER WIRE
SELECTION
f.
Adjust A2R26
for an
exact
zero-center meter
indication,
g.
Reduce the
calibration voltage to
100 ±0. 002%
volts
dc and
place the RANGE switch
to
100,
h. With
the
NULL
SENS switch to 0.
01,
adjust A3R14
for an
exact zero-center
meter pointer indication,
i. Reduce
the calibration voltage to 10 ±0,
002%
volts
dc and
place the RANGE switch to 10.
j.
With
the
NULL
SENS switch to
.
001,
adjust A2R33
for
an exact center-zero meter
pointer indication,
k.
Reduce the
calibration voltage to 1
±0. 002%
volts
dc and
place the RANGE switch
to
1.
l. With the NULL
SENS switch
to
.
001,
adjust
A2R35
for
an
exact zero-center meter pointer
indication.
m.
Reduce the
calibration voltage to 80 millivolts ±0.
1%
and place
the RANGE switch
to
100.
n. Place the
Readout dials to
00. OSQ,
observing
that
a
zero-center meter
indication is obtained within
±1/2
of
a
small
division on the vernier Readout dial.
0
.
If
the results of
step n
are
not obtained, adjust
the
vernier
Readout dial for an
exact zero-center meter
indication and
loosen the set screw
that
secures
the
vernier dial
indicator to the potentiometer
shaft. Refer
to Figure
4-15
for
location of the set
screw.
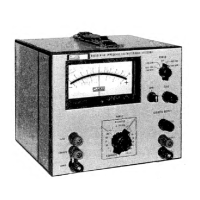
MODEL
893AR
MODEL
893A
SET
Figure 4-15,
VERNIER DIAL SET SCREW
LOCATION
4-55.
AC
CONVERTER CALIBRATION
p.
Position the
vernier dial
indicator
for a
front panel
indication of
80 and securely
tighten the set screw.
4-56. To calibrate the
AC Converter,
apply ac power
to
the instrument and proceed as
follows:
q.
Remove the
calibration voltage
from the Model 893
and place a
shorting
jumper between the LO and HI
INPUT
terminals.
r. Place the Model 893
controls as follows:
POWER
RANGE
NULL
SENS
MODE
Readout dials
ON/LINE OPR
10
.
001
+
00. 000
s.
Rotate
the vernier Readout dial until a full-scale
(-1)
meter pointer indication is obtained, observing
that the vernier Readout dial indication is between
9 and 11.
a.
Place the
Model 893 controls
as
follows:
POWER
RANGE
NULL SENS
MODE
Readout dials
ON/LINE OPR
100
0.
1
AC
100.
0
00
b. Apply
a
calibrated 100
volts ac signal at 400
Hz
between the HIGH
and
LD INPUT
terminals and ad-
just
A7R31
for a meter indication of zero-center
±1/2
major division.
c.
Apply
a calibrated 100 volt ac signal at 50 kHz
between the HI and LO INPUT terminals and adjust
the stray capacity compensator
slightly,
using
4-16
9/22/71
893A