Acoustic Imager
Before You Start
5
The battery has an indicator with four LEDs (25 %, 50 %, 75 %,
and 100 % charge) and a test button. To check the battery charge,
push
. The LEDs light to show the battery charge level. If all four
LEDs are on, the battery charge is at 100 % of available capacity.
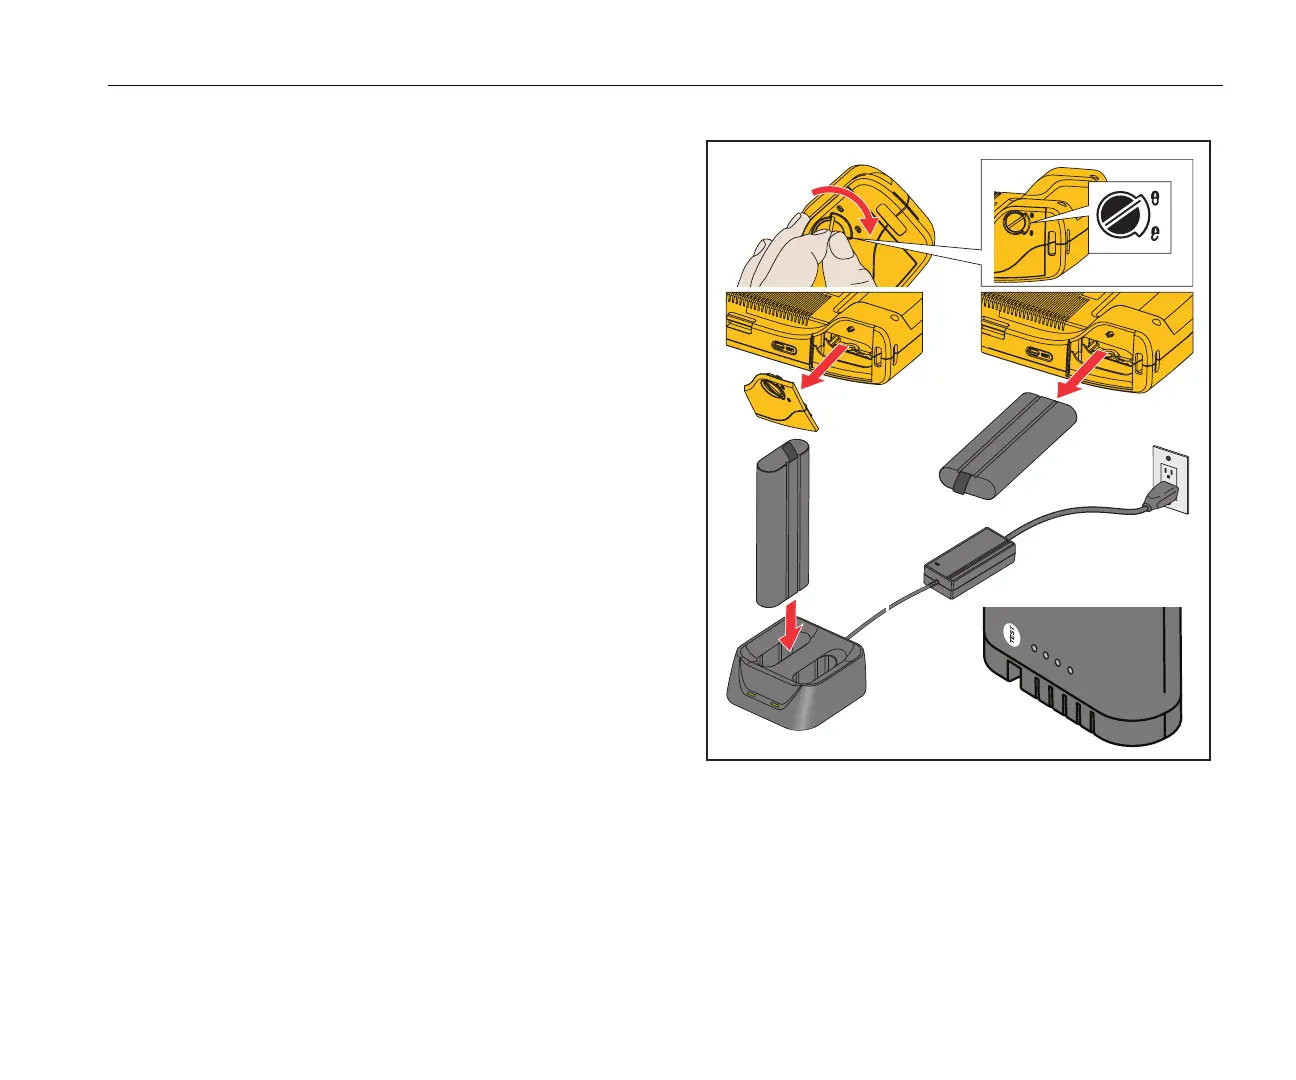
To charge the battery:
1. Connect the ac power supply to the ac wall outlet and connect
the dc output to the charger base. See Figure 1.
2. Put one or two batteries into bay of charger base.
3. Charge battery.
4. Remove battery and push
to check the status.
Note
The charger base automatically charges one battery at
a time.
To install the battery:
1. Open the battery door. See Figure 1.
2. Insert the battery with the contact side first.
3. Replace the battery door. Make sure that the battery tab does
not interfere with the lock and the door is firmly closed.
Figure 1. Battery
2
5%
5
0
%
75
%
10
0
%
T
-
D
C
+