Do you have a question about the Fluke TiS20+ and is the answer not in the manual?
Provides contact information for Fluke technical support and other services worldwide via phone and web.
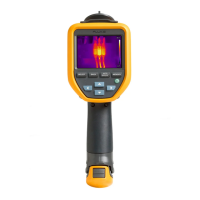
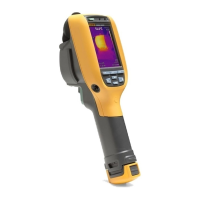
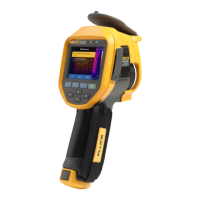
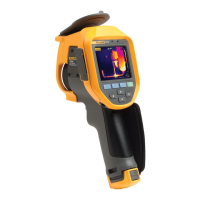
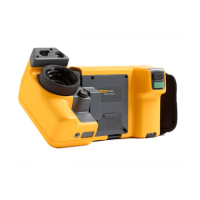
Identifies and describes the front components of the thermal imager, including lenses and triggers.
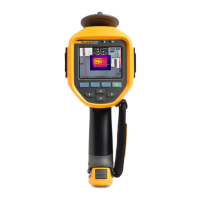
Identifies and describes the back components of the thermal imager, including the display, ports, and connections.
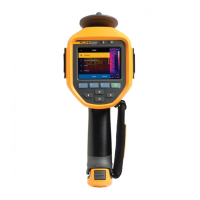
Explains the thermal imager's touch screen interface and the default information displayed during operation.
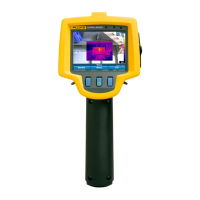
Details the functions of the buttons on the thermal imager's control panel for navigation and operation.
Describes the function and use of the primary and secondary triggers for capturing images and accessing features.
Instructions for powering the thermal imager on, off, and performing sensor calibration (NUC).
Steps on how to focus on a target and capture a thermal image using the primary trigger or display.
Guides on transferring captured thermal images from the imager to a personal computer via USB connection.
Explains how to navigate and interact with the imager's menus and settings using touch controls.
Outlines the primary menu structure and the functions of its main categories like Measurement, Image, and Display.
Adjusts the temperature range and level displayed for accurate thermal analysis.
Guides on setting emissivity values for accurate temperature measurements based on material properties.
Explains how to compensate for reflected background temperature to improve measurement accuracy.
Describes adjusting transmissivity for accurate measurements through IR windows.
Provides detailed information on emissivity, its impact on measurements, and warnings for reflective objects.
How to blend visible light and infrared images for enhanced detail and context using the IR-Fusion slider.
Explains how to change color palettes for optimal thermal image visualization and detail.
Details how to configure display features such as spot temperatures, markers, and status bars.
How to set and position a marker to indicate temperature at a specific point on an image.
How to define and adjust a measurement zone (spot box) for analyzing temperature variations.
Covers settings like backlight, file format, units, distance, and filename configuration.
Details settings for auto-off, date/time, Fluke logo, language, storage, and system information.
Instructions for scanning QR codes or barcodes to tag images with asset information.
Steps to sign into the Fluke Connect Cloud for automatic image uploading via WiFi.
How to pair the device with the Fluke Connect app via a wireless hotspot.
Guides on connecting to a shared network folder for image storage.
Procedures for manually entering unique asset identification tags for images.
How to remove or exit an assigned asset ID tag from an image.
Steps to remove an existing asset ID and assign a new one to an image.
Explains various icons indicating WiFi and Fluke Connect status for network connectivity.
Steps to connect the imager to a WiFi network to access Fluke Connect services.
Detailed instructions for signing into your Fluke Connect account using WiFi credentials.
Procedure for signing out of the Fluke Connect account on the device.
Overview of the Fluke Connect system for wirelessly connecting the imager to mobile devices.
Instructions for pairing the thermal imager with a mobile device via the Fluke Connect app.
Steps to connect to a shared network folder using WiFi for image storage.
Procedure for disconnecting from a shared network folder.
Detailed steps for signing into and saving images to a shared network folder.
How to view, edit, and delete images stored in the imager's internal memory.
Instructions for opening and viewing captured images in fullscreen mode.
Procedures for managing text notes associated with captured thermal images.
Steps for deleting single or multiple images from the imager's memory.
Procedure to erase all captured images from the device's memory.
How to flag an image for later review or follow-up.
Adding or removing asset identification tags from saved images.
Instructions on how to download and install the Fluke Connect desktop application.
Steps for updating the thermal imager's firmware using the desktop software.
Lists available accessories for the thermal imager, including model numbers and part numbers.
Guidelines for cleaning the exterior casing of the thermal imager safely and effectively.
Procedures for safely cleaning the imager's delicate infrared lens and its anti-reflective coating.
Recommendations for optimal performance and longevity of the lithium-ion battery.
Instructions and precautions for charging the imager's battery using the base charger.
How to charge the battery using the AC power adapter connected directly to the imager.
Instructions for charging the battery using the optional 12V vehicle charger.
Information on accessing digital copies of Certificate IDs and viewing RF data sheets.
Information on where to find complete technical specifications for the TiS20+.
| charging temperature specification | room temperature |
|---|---|
| vehicle charger voltage | 12 V |
| ac power adapter voltage | AC |