Issue/Rev. 0.5 (6/11)
MN01029 • Page 13
Blade Slot
This clearance check may be made with the rotor
assembly either in or out of the meter housing.
1.WithbladepositionedasshowninFigure50,check
clearances and record in “As Found” column of Meter
Clearance Record Chart, Page 19.
2. Compare readings with Clearance Guide Table 2,
Page 12. If slots are too wide, replace rotor. Refer to
appropriate parts list for appropriate part number of
rotor.
•Recordclearancein“AsAssembled”columnofMe-
ter Clearance Record, Page 19, when acceptable
clearances are obtained.
3. Repeat above procedure on other slots.
Rotor to Block
1. Check rotor to block clearance as shown in Figure
42 and record finding in “As Found” column of Meter
Clearance Record Chart, Page 19.
•Clearanceshouldbemaintainedthefulllengthof
the rotor.
2. Compare readings with Clearance Guide Table 2, Page
12. If readings are over maximum allowable clearance,
replace block. If below minimum clearance, dress
block faces with emery cloth until desired clearance is
obtained. Record this new clearance in “As Assem-
bled” column of Meter Clearance Record.
T-20 or I-150 Meter
Method No. 1:
Attach a spider to top of meter housing. Turn adjusting
screw in center of spider clockwise to force rotor as-
sembly down until it bottoms on the base of the housing.
Then turn adjusting screw counterclockwise until the rotor
assembly is raised just enough for it to rotate freely.
Method No. 2:
If a spider is not available, lift rotor assembly from me-
ter housing and remove adjusting spring from base of
housing. Replace rotor assembly. Be sure that locking
arm pin is fitted into the slot of the locking arm (see
Figure 20). At this point, the rotor is resting on bottom
shelf of housing.
Withtherotorassemblyinthebottomedposition,the
following clearance checks can now be made.
Table 2 — Clearance Guide
This clearance guide lists the recommended minimum
and maximum fitting clearances for repair meters.
Clearances may exceed the maximum shown, provided
the meter proves within acceptable accuracy.
Blade Tip Toward Housing
1. Rotate rotor until a blade is in measuring chamber,
Figure 47.
•Ifthespiderisnotused,therotorassemblymay
be hard to turn.
2.Withthebladeinposition,pushbladetowardwall,
Figure 47, and check blade tip to housing clearance
from top to bottom.
• Record readings in“As Found” column of Meter
Clearance Record Chart, Page 19.
3. Compare readings with Clearance Guide Table 2,
Page 12. If readings are over maximum allowable
clearance, replace blade assembly. If below minimum
clearance, the rotor assembly must be removed and
the blade end dressed down (see Page 17).
4. After desired clearance has been obtained, record
measurements under “As Assembled” column of
Meter Clearance Record Chart, Page 19.
5. Repeat above clearance checks (Steps 1 through 4)
on remaining blades.
Section 2 – Clearance Checks (continued)
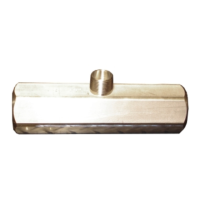
Figure 49
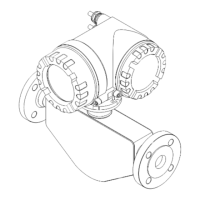
Figure 50
Attach a spider, Figure 47, to top of meter housing so
that the rotor assembly is centered in the housing and
free to rotate. See Suggested Tools, Pages 2 and 3.
Method No. 2:
If spider is not available, turn the adjusting screw on
bottom of housing clockwise until rotor assembly meets
friction and is hard to turn. At this point, the rotor is rest-
ing on bottom shelf of housing.