Programmed via the 4 buttons “S”, “P”, “+”
and “-“. Key “S” stores remotes. Key “P” is an
enter button. The display shows the programme
step number. The “+” and “-“keys are used to
set the parameter. On power up the lamp comes
on, there’s a beep, then display shows a
circulating pattern.
1. Set open position
2. Set closed position
3. Force learning
4. Force setting Default = 4
5. Remote channel Default = 2
6. Alarm setting Default = OFF
7. Auto-closing Default = OFF
8. Service alarm Default = OFF
A flashing display means the parameter is waiting to be
set, or the motor is still running. Programming must be
finalised in correctly, or settings will not be saved.
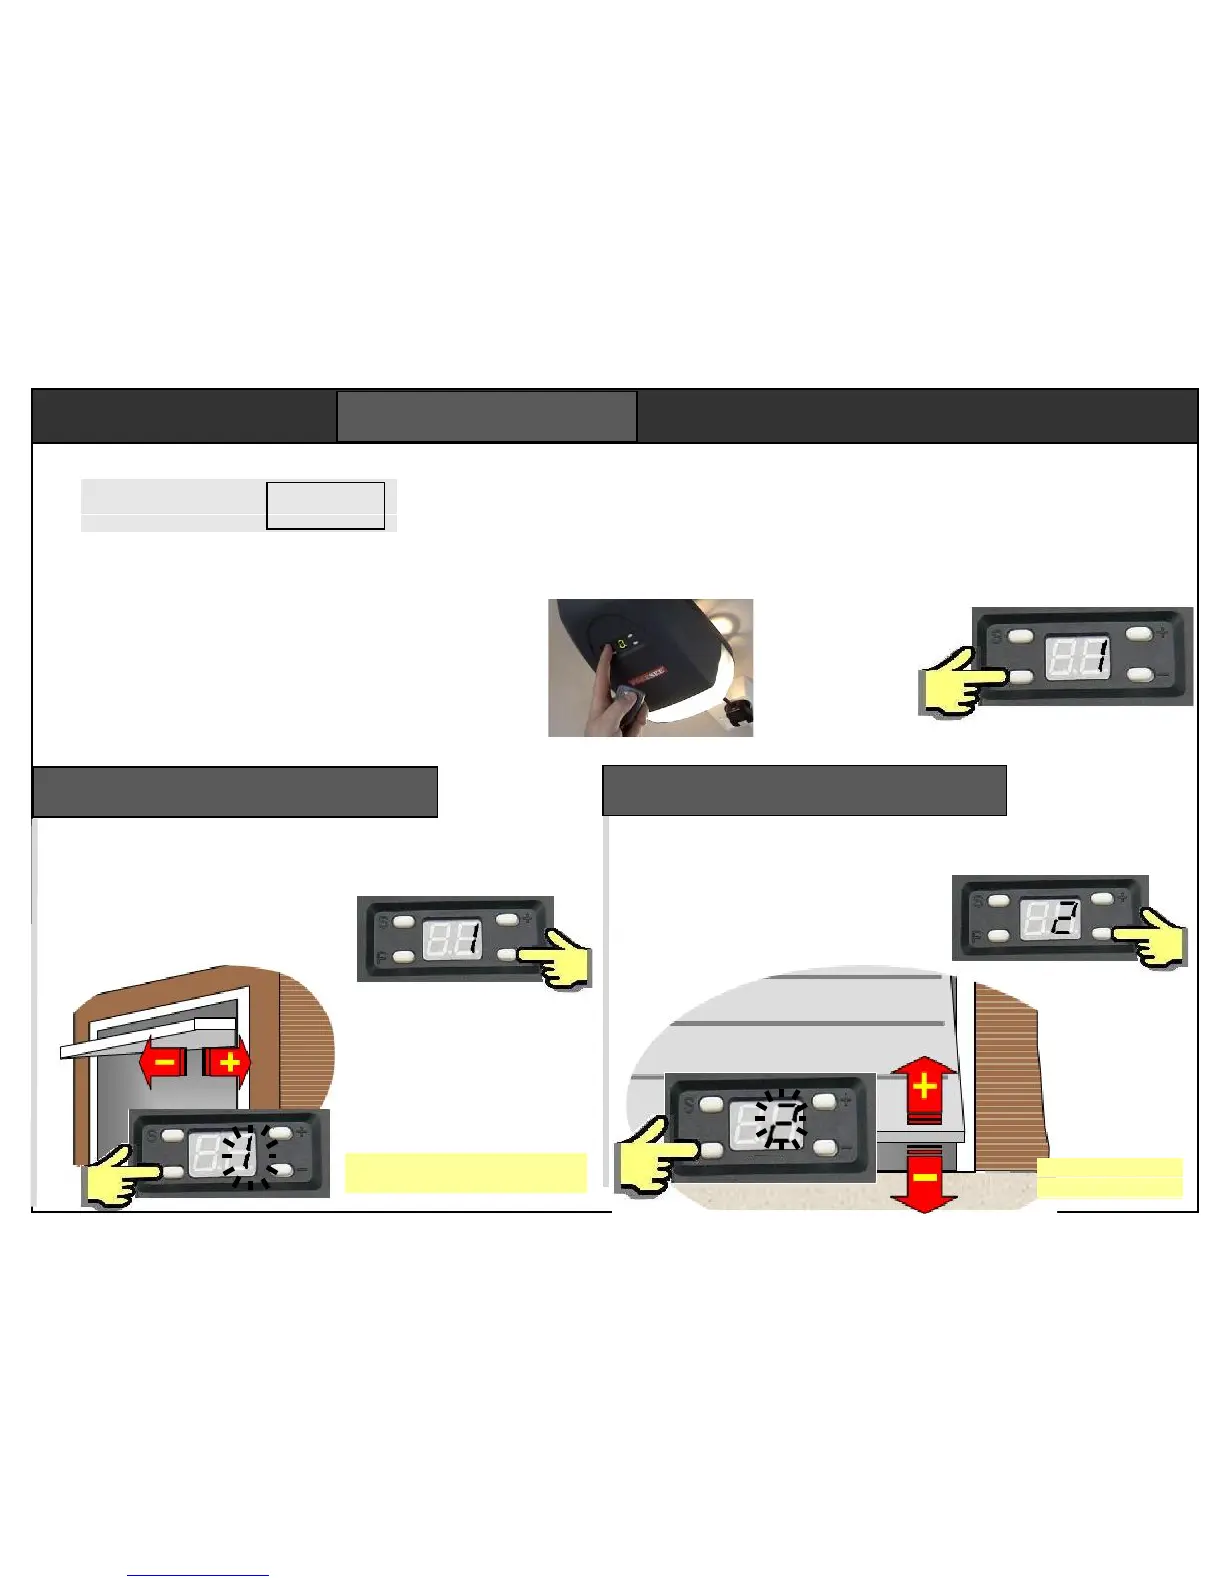
Use + and – to select
step “1” then press “P”.
The “1” begins to flash.
Use + and – buttons to set
the “door open” position. The
door closes with the – button
and opens with the + button
Press “P” to save
the open setting.
Step 1 – set open position
First step sets the “door open”
position. Take care, it is the first
time a motor has lifted the door.
The open position is not critical. It
is not necessary to set the door
to the very furthest position.
Programming teaches the opener about a door.
The opener will not function until the first three
programming steps are complete. The next five
steps have default settings that are typical of
most installations. Remotes are supplied pre-
programmed to the opener.
To start, press
and hold “P”
for 5 seconds.
The display
shows step 1.
Do not set the “door closed” position
too tight or the door frame will be seen
as an obstacle. Set closed point 10mm
before the door touches the frame.
You can switch between the open and
close settings but press “P” each time.
Step 2 – set close position
Use + and – to set the “door
closed” position. The door
closes with the – button and
opens with the + button
Press “P” to save
the close setting.
Use + and – to select
step “2” then press “P”.
The “2” begins to flash.