The opener runs a cycle measuring the
force required at each stage. Close the
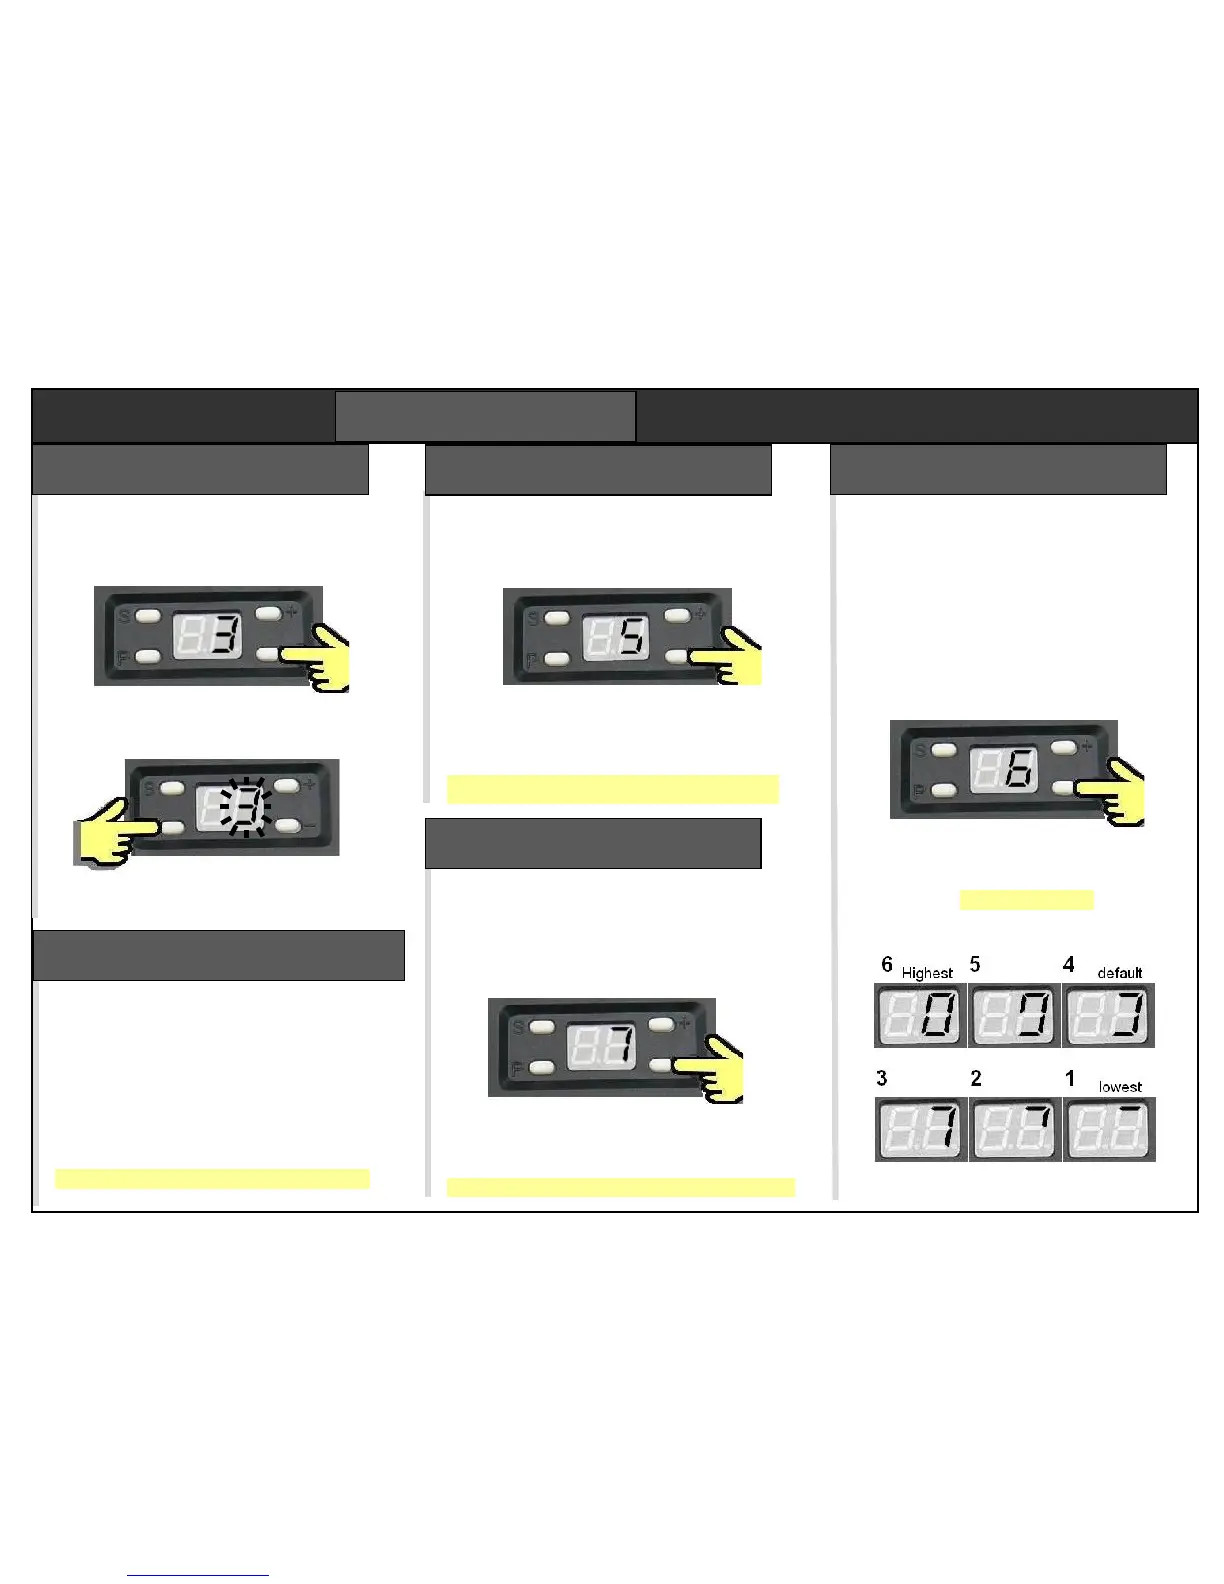
door. Use + – keys to select step 3.
Press “P” to start the test. The 3 flashes
as the door opens. When it has stopped,
press “P” to save the force settings.
Press “P” to run a closing test. When the
door is closed fully, press “P” to save.
Force setting selects the level of
additional force permitted above
minimum force learned in step 3.
There are 6 settings, displayed as
patterns on the display. Examples
are shown below. Setting 4 is the
default force, setting 6 is the
strongest force.
Use + and – keys to select step 6
then press “P” to display the force
setting character. Adjust with +
and – keys. Press “P” to save.
Use + – keys to select step 3
Enables a photobeam. Skip this step if
not fitted. The default setting is off.
Select step “4” then press “P”
Press “+” key to enable (beeps once),
or “-“ key to disable (beeps twice).
Press “P” to save the new setting.
Step 4 – photobeam enable
Used to test the photobeam. Skip this
step if a photobeam is not fitted. Select
step “5” then press “P”
The display shows a flashing “5” and the
door rises. Block the beam. “A” should be
displayed. If not, check wiring.
Press “P” to exit the test
This door “left open” alarm sounds after the
door is open for 10 mins. Default is off.
Select step “7” then press “P”
Press “+” key to enable (displays 1). Press
“-“ key to disable (displays 0).
Press “P” to save the new setting.