Forma Scientific, Inc.________________________________________________Installation
2-3
2.3 Installing the Wall Bumpers
The parts bag contains two (2) 1/4-20 x 5-1/2" bumper bolts and two (2) neoprene
caps. Install the bolts (the holes are pre-tapped) on the back side of the compressor section.
Install a neoprene cap on each bolt.
For proper ventilation and air flow, a minimum of 5" of clear space
is required behind the freezer. An additional 5" (minimum) of clear
space is also required on both sides of the freezer. When locating the
back of the freezer toward a wall or obstacle(s), make sure that the wall
bumpers are installed.
2.4 Location
Locate the freezer on a firm, level surface in an area of minimum ambient
temperature fluctuation.
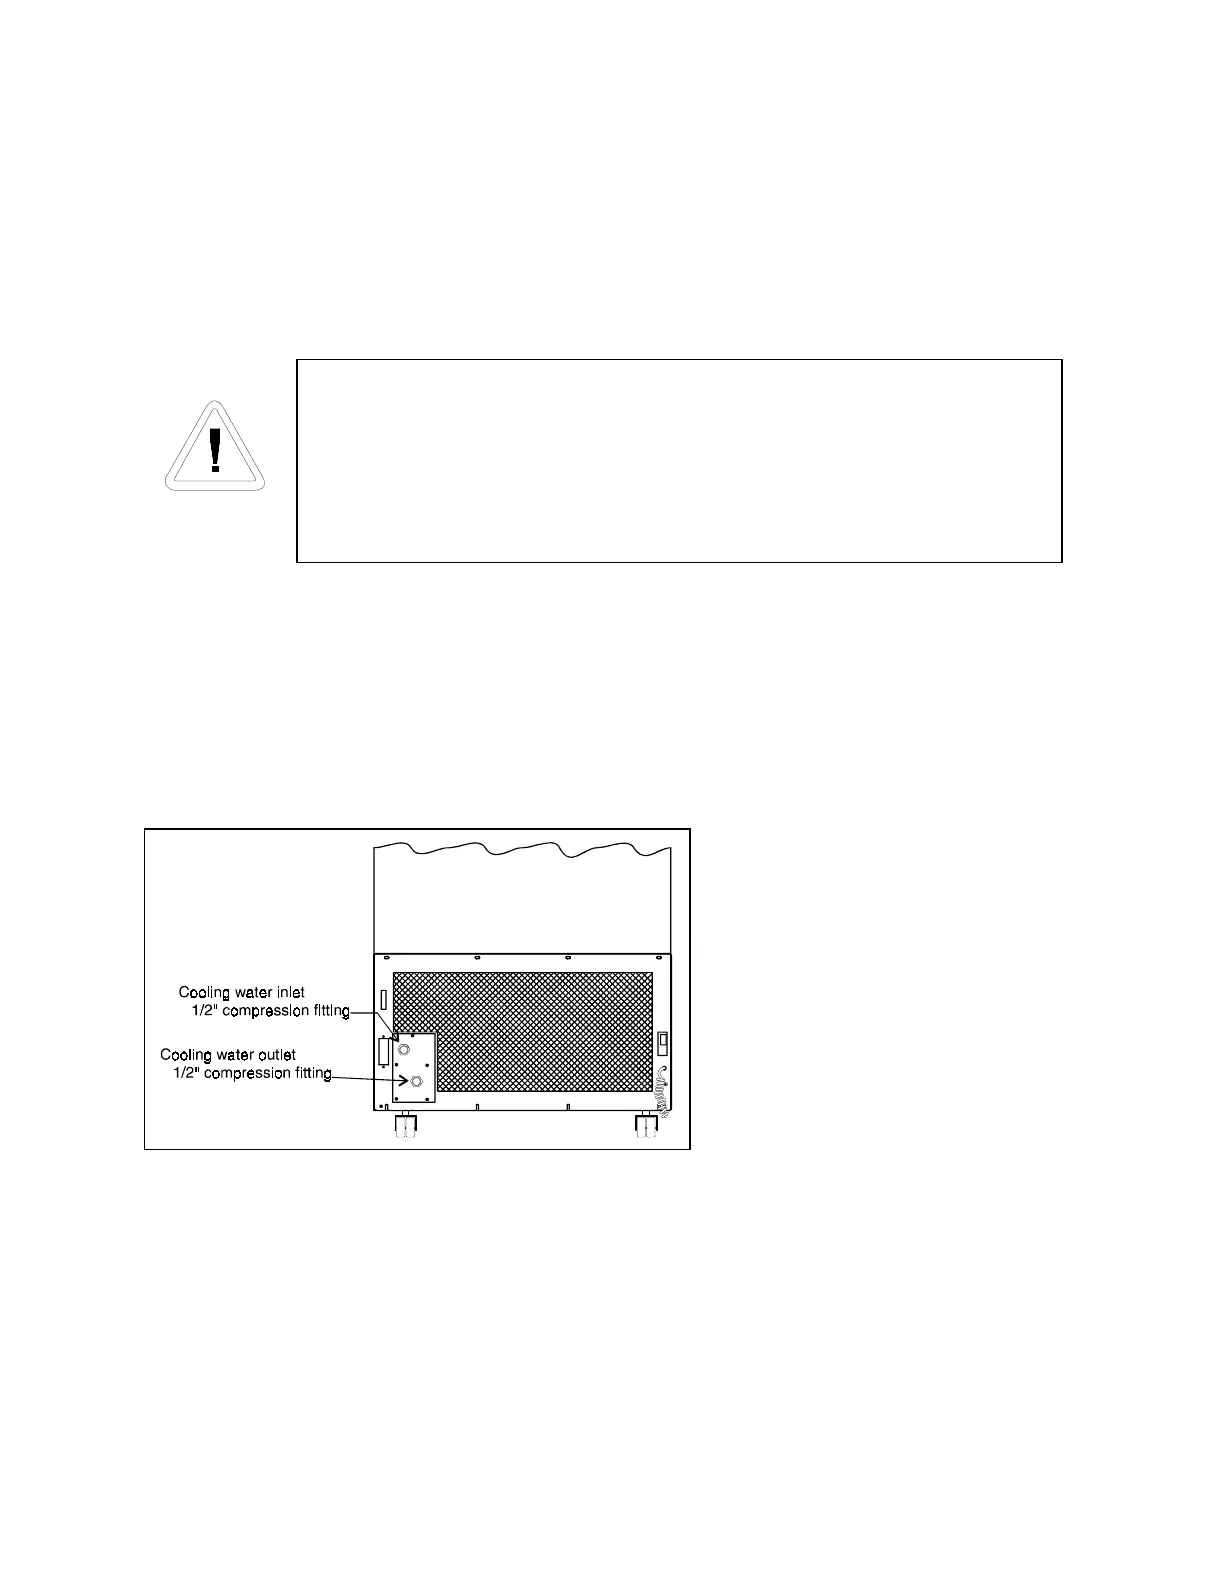
2.5 Connecting the Water Supply to the (optional) Water Cooled Condenser
1. Insert a 1/2” OD copper
water line into the cold
water inlet (top) and tighten
the compression fitting.
2. Insert a 1/2”OD drain line
into the water outlet
(bottom) and tighten the
compression fitting. Direct
the drain line to a suitable
drain.
Note: The condensing units must be provided with enough water for adequate cooling. The
units require approximately 1 GPM of 65°F (18.3°C) of tap water per horsepower, or 3 GPM
of 85°F (29.4°C) water per horsepower.
Figure 2-1