18
WWW.FORNEYIND.COM
• Attach the ground clamp to the bare metal to be welded, making sure of good contact.
• Make sure that the wire-roller groove in the roller corresponds to the diameter and type of wire being used.
• Plug the machine into a suitable outlet.
• Completely open the gas cylinder valve. Adjust the gas pressure regulator to the correct flow rate. (Not applicable to
Stick “SMAW” process).
EXPOSURE TO A WELDING ARC IS EXTREMELY HARMFUL TO THE EYES AND SKIN.
PROLONGED EXPOSURE TO A WELDING ARC CAN CAUSE BLINDNESS AND BURNS. NEVER
STRIKE AN ARC OR BEGIN WELDING UNLESS YOU ARE ADEQUATELY PROTECTED. WEAR
FIRE RESISTANT WELDING GLOVES, HEAVY LONG SLEEVED SHIRT, CUFFLESS PANTS; HIGH
TOPPED SHOES AND A WELDING HELMET.
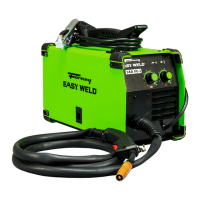
Some experience is required to adjust and use a MIG welder. In MIG welding, two parameters are fundamental: the
welding voltage and the wire feed speed. The resulting welding current is a result of these two settings but is more directly
related to the wire feed speed.
• Set the voltage (LEFT KNOB) and wire feed speed (RIGHT KNOB) to positions suitable for the thickness of the material
to be welded (see “MIG Set-Up Chart”, page 19). Welding current varies in relationship to wire feed speed. For low
wire feed speed (RIGHT KNOB), welding current output will be low. Turning the wire feed speed control clockwise will
result in increased wire feed speed and welding current. Welding voltage should be adjusted to match the wire feed
speed/welding current. Progressively select higher voltage positions when increasing wire speed.
Increasing welding voltage leads to a longer arc (without substantially affecting the current). Conversely, a decreased
welding voltage results in a shorter arc (the current again is not substantially changed). A change in wire diameter results
in changed parameters. A larger diameter wire will draw a higher current than a smaller diameter wire at the same wire
feed speed. If certain limits are exceeded, a satisfactory weld cannot be obtained. These are:
1. Feeding wire too fast (too high speed with regard to the welding voltage) results in pulsing within the gun. This is
because the wire electrode dips into the puddle and cannot be melted off fast enough.
2. Setting welding voltage too high (too high with regard to the wire feed speed), will result in excessive and unstable
arc. Increase the voltage even higher and the contact tip will burn.
3. Excessive wire speed can be corrected through the arc voltage increase. The limit of this adjustment depends on the
thickness of the material to be welded (a certain limit exceeded will result in burn through).
Place the gun on the joint you want to weld: the angle between the gun and the workpiece should be around 45°. The
distance between the gun and the workpiece should be about 1/2” - 5/8”. Lower your face shield and press the gun
trigger to start the arc. When the arc has struck, move the nozzle slowly from left to right along the joint. Adjust the wire
feed speed until the arc makes a “crisp” sound (experience will help you to recognize the right sound).
This welder can work with solid steel wire from 0.023” - 0.035” (0.6 - 0.9mm) diameter; stainless steel wire from 0.023”
- 0.035” (0.6 - 0.9mm) diameter (MIG welding, “GMAW”) and with 0.035” (0.9mm) diameter flux-cored wire (flux-
cored wire welding, “FCAW”).
Factors to Consider for Best MIG Welding Results
Welding Wire Selection