4
48
Delete RAID array
1. Press [3] in the Main Menu to enter the “Delete LD Menu”.
2. Highlight the array you want to delete and press [Del] or [Alt-D] keys.
3. Press [Ctrl-Y] if you are sure to delete the array or other keys to abort.
4-4 Create RAID Driver Disk
If you want to install Windows XP on a hard disk that is congured to RAID mode, a oppy disk with
RAID driver is required during the installation. For Windows Vista, you can also use a USB ash
disk with RAID driver.
Create a RAID Driver Disk in Windows:
1. Boot your computer and start Windows, put the driver CD into DVD-ROM drive.
2. Insert a oppy disk/USB disk into the oppy disk drive/USB port.
3. Depending on which platform your will install, go to CD:\Driver\AMD\RAID\Driver\WinXP
or WinVista, click on RaidTool icon to start the oppy creation or copy all the les in WinXP or
WinVista folder to the USB disk.
4. Follow the succeeding screen prompt to complete the process.
Create a RAID Driver Disk without entering OS:
1. Boot your computer, press [Del] during POST to enter BIOS.
2. Insert the driver CD into the optical drive.
3. Set the “1st Boot Device” to “CD/DVD-ROM”, save changes and exit.
4. Press any key when the screen prompts “Press any key to boot from the optical drive.”.
5. Press [1] to create a RAID driver disk when the prompt menu appears.
6. Insert a formatted oppy disk into the oppy disk drive, press [Enter] to continue.
7. Follow the instructions to complete the process.
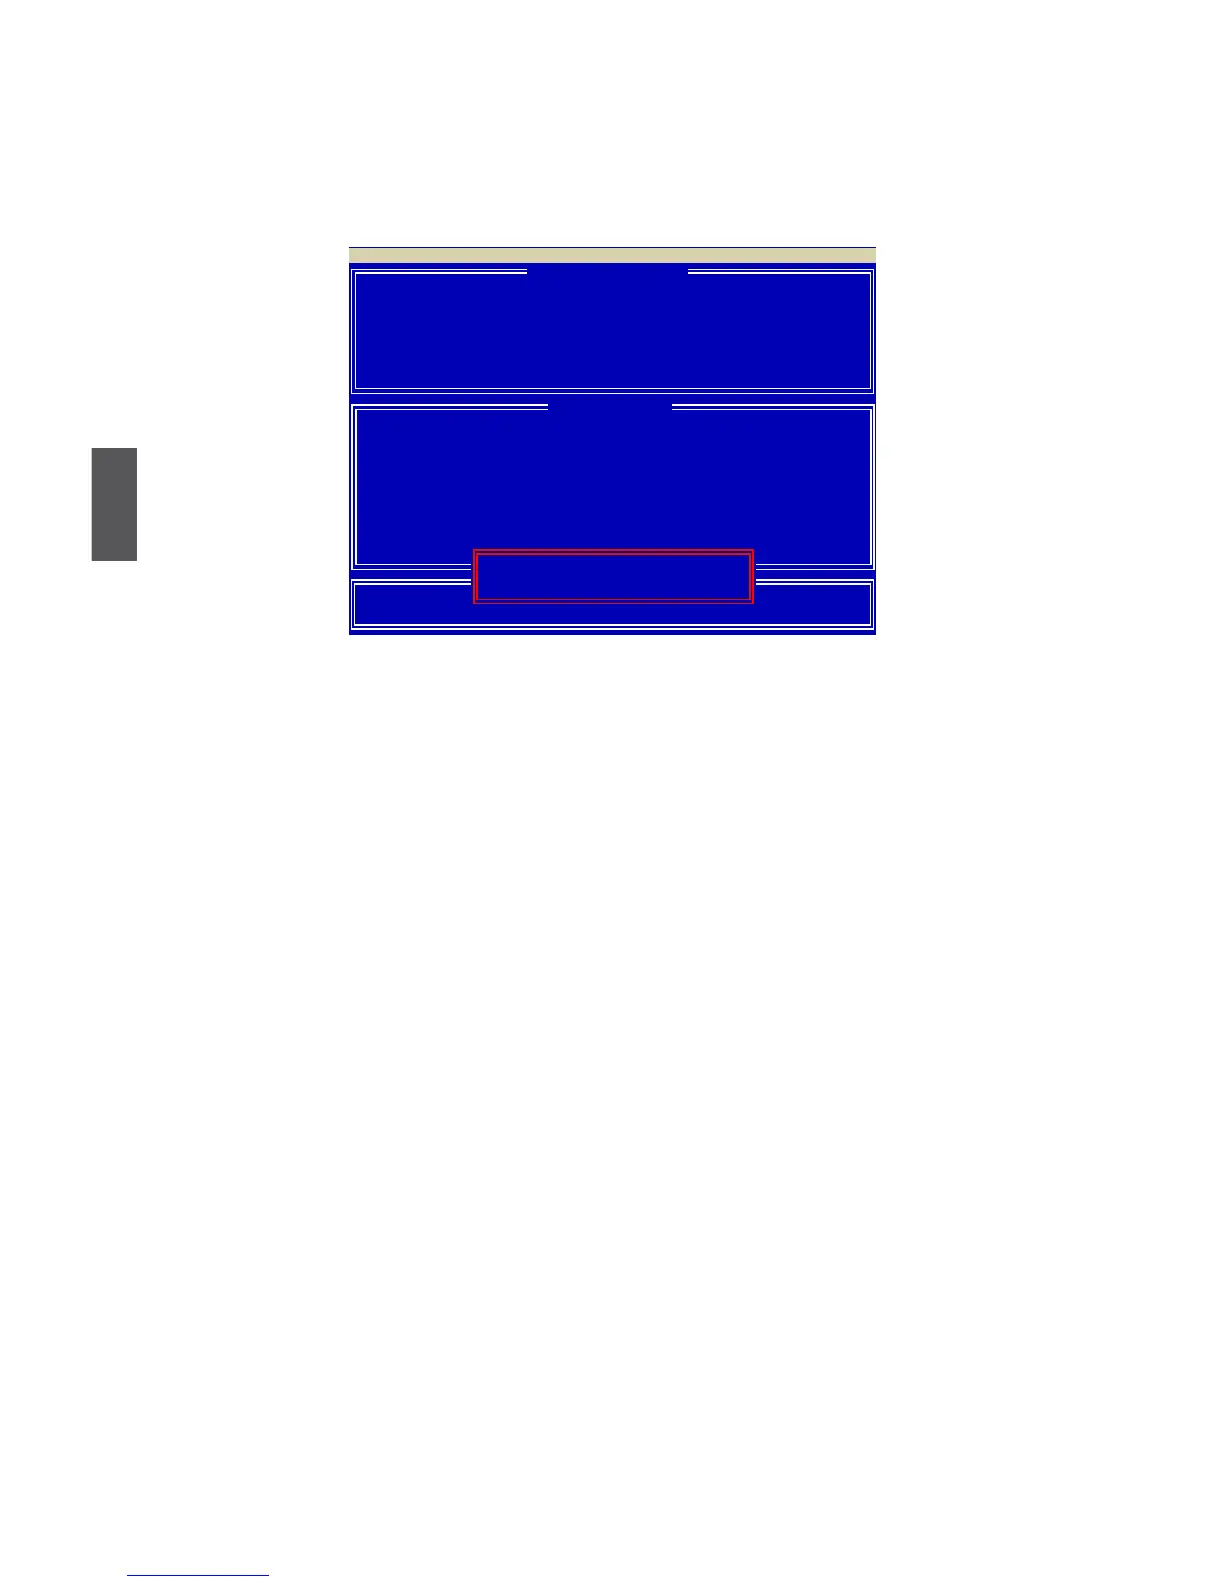
[ Dene LD Menu ]
LD No RAID Mode Total Drv Capacity(MB) Status
LD 1 RAID 0 2 XXXXX Functional
Stripe Block: 64 KB Cache Mode: WriteThru
Channel :ID Drive Model Compatibilities Capacity(GB)
1 :Mas XXXXXXXXXXX SATA XG XX.XX
2 :Mas XXXXXXXXXXX SATA XG XX.XX
Option ROM Utility (c) 2008 Advanced Micro Devices, Inc.
[ View LD Denition Menu ]
[ Drives Assignment ]
Press Ctrl-Y to delete the data in the disk!
or press any other key to abort...
 Loading...