15
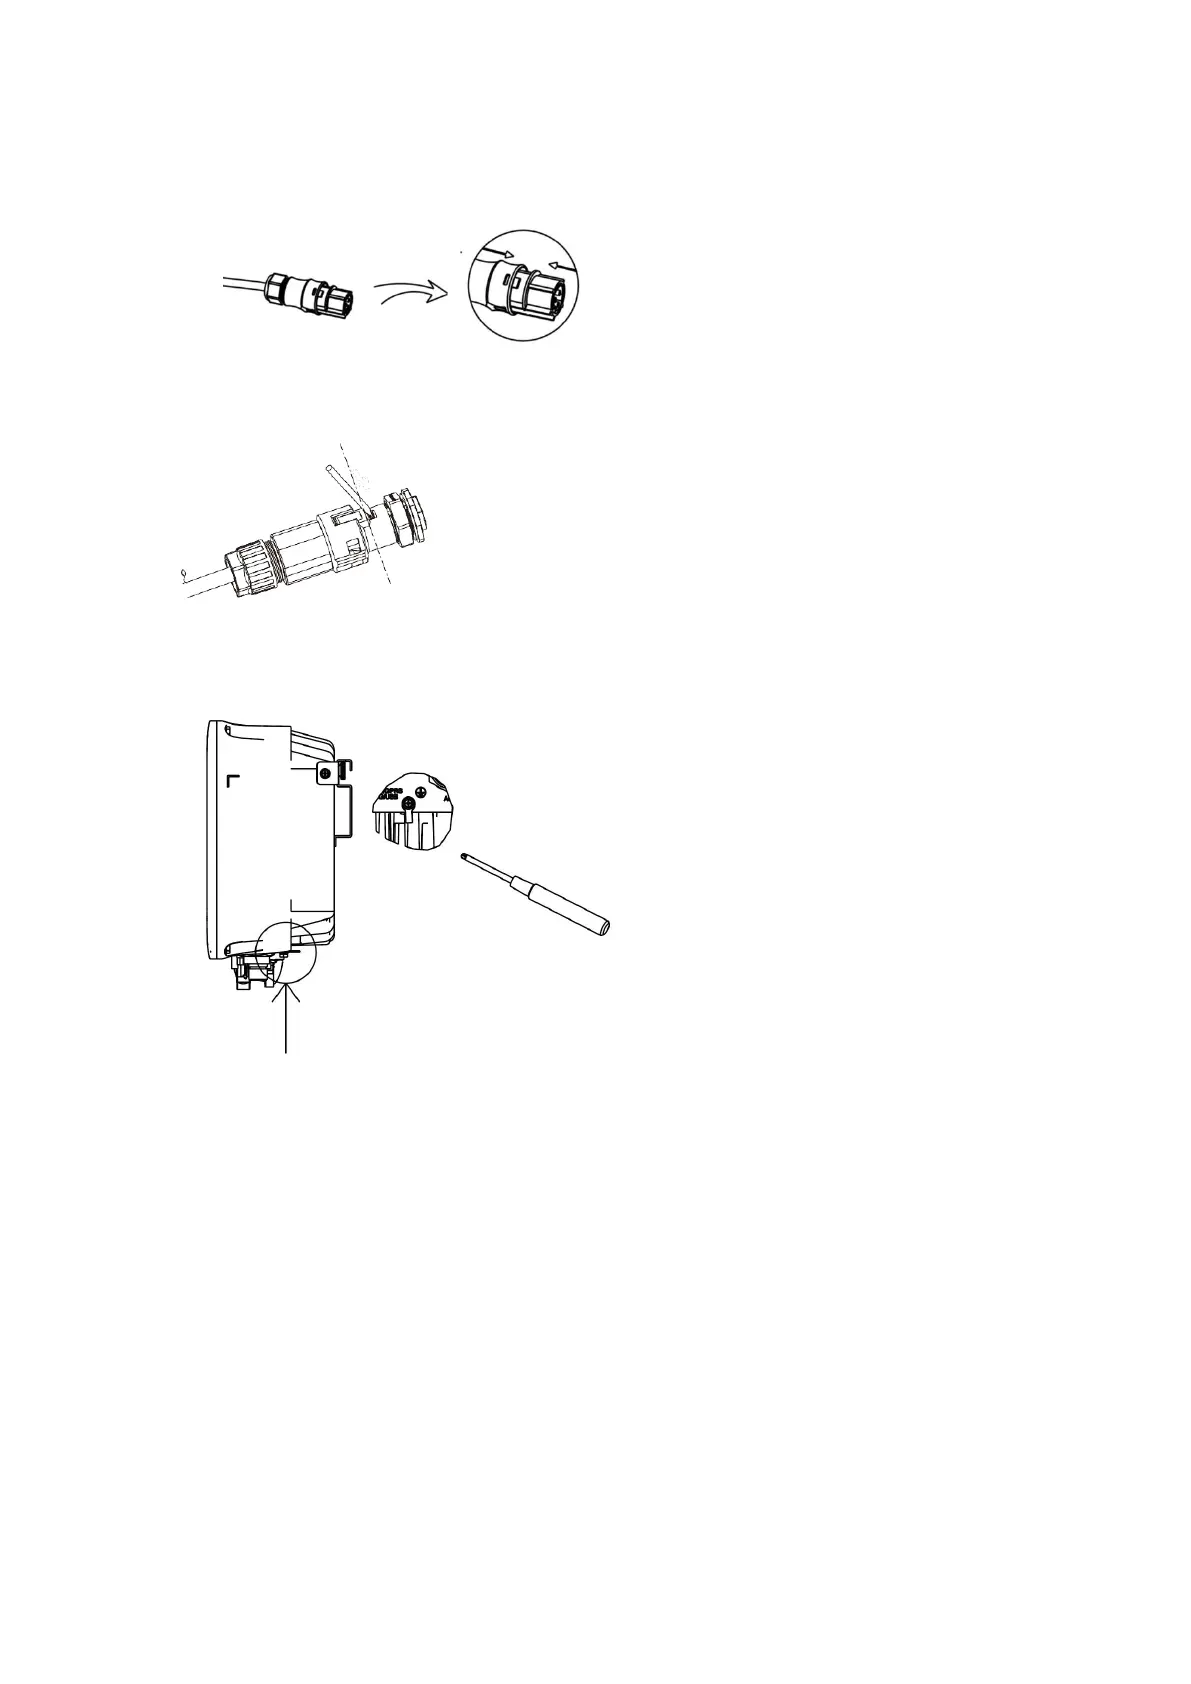
• Push the threaded sleeve to connection terminal until both are locked tightly on the inverter.
• Remove the AC connector, press the bayonet out of the slot with a small screwdriver or the unlock
tool and pull it out, or unscrew the threaded sleeve, then pull it out.
5.7 Earth Connection
Screw the ground screw with screwdriver as shown below:
5.8 Communication Device Installation (Optional)
This S Series (G2) inverter is available with multiple communication options such as WiFi, GPRS, RS485
and Meter with an external device.
Operating information like output voltage, current, frequency, fault information, etc., can be monitored
locally or remotely via these interfaces.
• WiFi/LAN/GPRS (optional)
The inverter has an interface for WiFi/LAN/GPRS devices that allow this device to collect information
from inverter; including inverter working status, performance etc., and update that information to
monitoring platform (the WiFi/LAN/GPRS device is available to purchase from your local supplier).
Connection steps:
1. For GPRS device: Please insert the SIM Card (please refer to the GPRS product manual for more
details).
2. Plug the WiFi/LAN/GPRS device into “WiFi/LAN/GPRS” port at the bottom of the inverter.
3. For WiFi device: Connect the WiFi with the local router, and complete the WiFi configuration (please



 To Next Page