28
4 SETTING UP
Global Settings: Default, but see “Tip” Below Presets: Custom
The Four-Cable Method (“4CM”) setup places the Axe-Fx III in two places at once with two separate processing
chains. The rst goes in front of your amp, where a chain of “pre” effects like wah and drive replace traditional
stompboxes. The second placement is in the effects loop of the same amp, where a chain of “post” effects like
delay and reverb appear. Although a head and separate cab are shown, many combo amps also offer an onboard
effects loop and can be used as well.
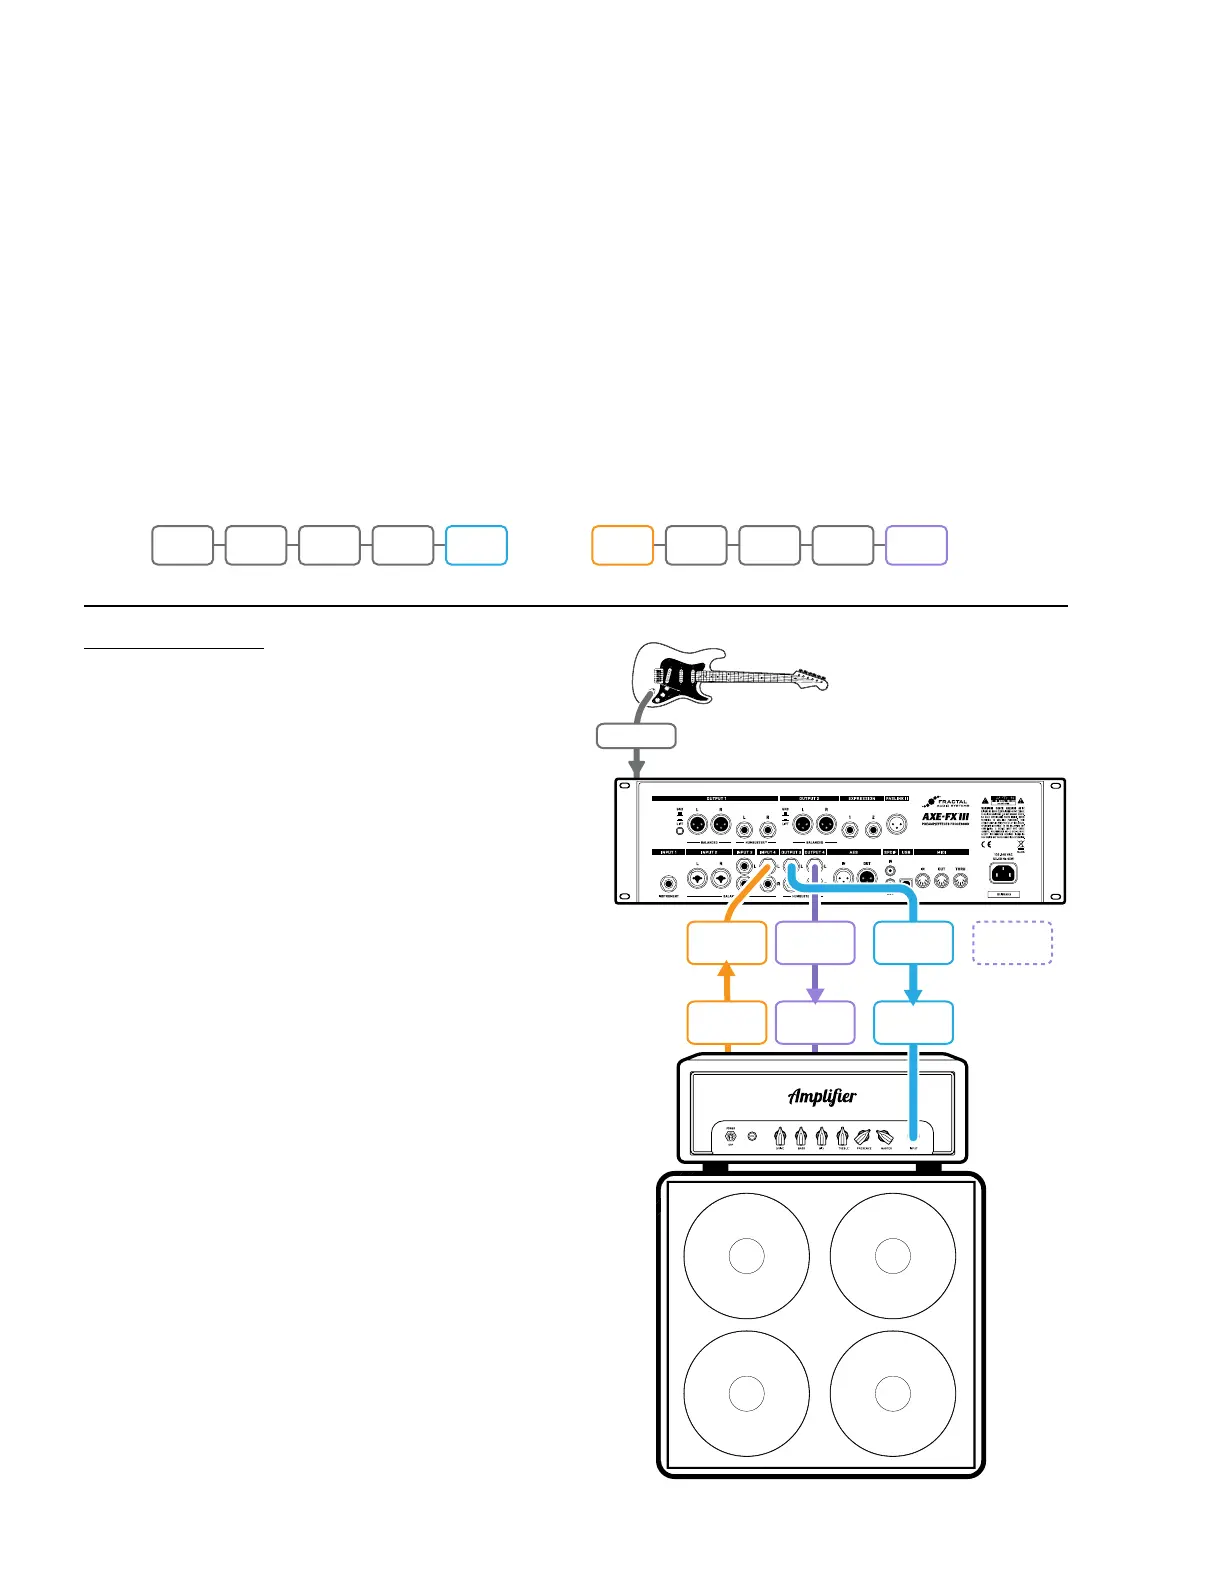
4CM requires special presets with no Amp or Cab blocks. A stylized illustration appears below. Signal hits
the Axe-Fx III rst, where it is processed by pre effects. Output 3 feeds the front of the amplier. A chain of
post effects is run in the amp’s FX loop using Input 4 and Output 4. Note that the pre and post chains are not
connected to each other at all on the grid. In fact, either chain can be as simple or as complex as desired.
FOUR-CABLE METHOD (“4CM”)
INSTR IN
Guitar
Amp
INPUT
4L
FX
SEND
FX
RETURN
Amplifier
Model 50
OUTPUT
4L
OUTPUT
4R
OUTPUT
3L
MAIN
INPUT
Optional
for Stereo.
Front or Rear
IN1 WAH DRV OUT3 IN 4 DLY REV OUT4
etc. etc.
CONNECTIONS
4CM requires custom presets with no Amp or Cab
blocks (see above). A template is included (#382).
Connect your guitar to Input 1 (Instrument).
Connect Output 3 L to the input of your amp.
Set the front panel OUT 3 knob fully clockwise
for unity gain operation. A Humbuster cable is
recommended to reduce hum from ground loops.
Connect your amp’s FX Send to Input 4 L on
the Axe-Fx III. Input levels can be adjusted on
the Input page of the I/O menu under SETUP.
Set Input 4 Mode to “LEFT ONLY” on the
Audio Page of the I/O menu under SETUP.
Connect Output 4 L to the FX Return of your amp.
Set the front panel OUT 4 knob as desired for
appropriate volume. A Humbuster cable is
recommended. To extend this conguration
for optional stereo, connect Output 4 R
to the FX Return of a second amplier,
bypassing that unit’s preamp altogether.
TIP: OPTIMIZE FOR LOW NOISE
The optional Boost/Pad functions on Outputs 3 and
4 are designed to run the D/A converters at boosted
levels, padding their outputs for even lower noise. To
nd the right setting, adjust either of these settings
as high as possible without clipping the outputs, as
indicated by a red LED on the front panel meters. You’ll
actually hear the noise floor drop as you increase
Boost/Pad. Find these options on the Audio page of
the I/O menu under SETUP.