65
9 MODIFIERS
TUTORIAL: SCENE CONTROLLERS
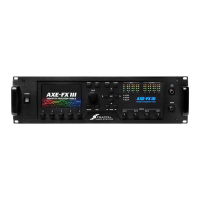
In this tutorial, we will set up a Scene Controller to adjust the Input Drive of an Amp block. While it is easy enough
to achieve different amp sounds within a preset simply by switching the channel, this example provides an
excellent and easy way to understand how Scene Controllers work.
To complete this tutorial, you’ll need a preset with an amp and cab block with four identical scenes. You can
create one on your own, or download the preset “SC Tutorial” from Axe-Change:
https://axechange.fractalaudio.com/detail.php?preset=9221
1. The rst step in using a Scene Controller is to assign it as a Modier Source to the parameter of your choice.
Enter the Layout grid of the preset, navigate to the Amp block, and press EDIT.
2. Use the PAGE buttons to locate the Tone page of the Amp block.
3. NAV to the Drive parameter and notice the open yellow modier “ring” beneath the knob.
4. With the Drive parameter highlighted (blue), press ENTER to display the Modier menu.
5. On the Source 1 page, select Scene Controller 1. We don’t need any custom settings on the Modify page.
6. Press EXIT to return to the Amp menu. Notice that the open yellow modier symbol is now a solid yellow dot.
7. Now let’s set the values for our Scene Controller. Press HOME to show the home page.
8. Press the CONTROLLERS button (Push-knob C).
9. Use the PAGE buttons to locate the Scene Ctrl page of the Controllers menu.
10. The Controller 1 column lists eight different values — one per scene. These will set the value for our target
parameter in each of the eight scenes.
11. Dial in the Scene Controller 1 value for Scene 1. Let’s set it to about 20% for a “cleanish breakup” type of
sound. Use your ears!
12. Change to Scene 2. Double-tap HOME to go to the grid then turn Knob A to change the scene. Push Knob D
(“Controllers”) to return to the Scene Controllers Editor.
13. NAV Down to select the Scene 2 row in the Controller 1 column. Turn VALUE to set the value for Scene 2.
Let’s set it to about 45% for a nice crunch. Again, use your ears.
14. Using the process in the previous steps, set the value for Scene 3 to 75% and Scene 4 to 100% (or as desired).
15. Press HOME to return to the Home page. Test your rst four scenes using the NAV UP/DOWN buttons.
16. Press STORE, ENTER, ENTER to save your work. If desired, enter Scene Names as outlined in “Saving
Changes” on p. 41.
17. Feel free to assign other Scene Controllers to other parameters in your preset as desired.
New to Axe-Change? Download the le from the link above, then use Axe-Change to import it. Select
an available preset location