5
3 SETTING UP
BASICS
This Guide assumes that you are using a single FC-6 or FC-12. For larger setups, see “Daisy Chaining” on p. 8.
CONNECT USING FASLINK II
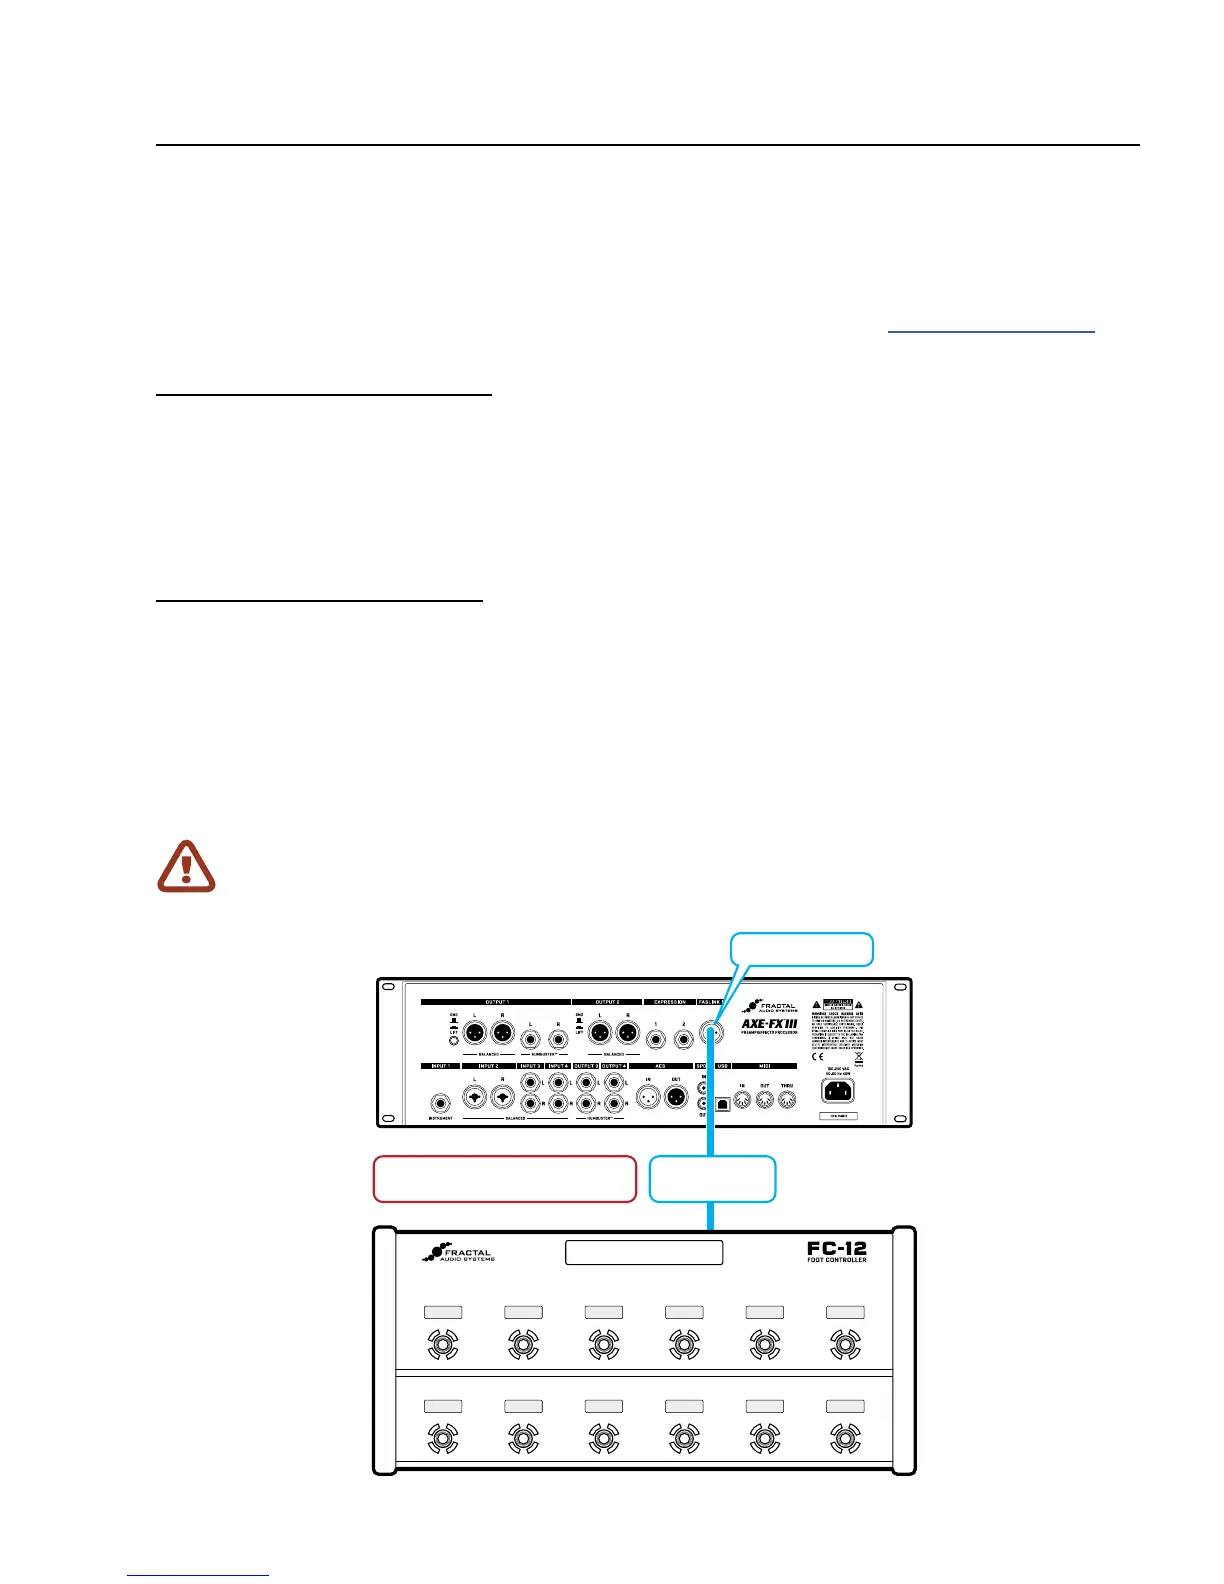
Setting up a single FC unit is simple. Use a generic Male-to-Female XLR cable to connect the FASLINK™
II port of the Axe-Fx III to the FASLINK™ II port of the FC as shown in the diagram below. This connection
provides both power and 2-way communications—sending footswitch and pedal commands to the Axe-
Fx III, and sending the FC all required programming instructions, status updates, mini-display messages,
and more. The FC is even “hot swappable” meaning there is no need to power down the Axe-Fx III.
CONFIGURE THE AXE-FX III
No conguration is needed for the FC to function fully. However, we recommend loading the factory default
layouts and FC Conguration before rst use. To do so, please perform the following simple steps:
Page to the Reset page of the FC Controllers menu under SETUP.
Select the relevant entry for FC-6 or FC-12 and press ENTER.
If you are using a combination of different controllers in a daisy chain, it is probably best to load the
defaults for the unit in the chain, even though you will ultimately want to use custom layouts.
3 SETTING UP
Performing “Reset System Parameters” on the Axe-Fx III will erase ALL of the stored settings for
the FC Controller, setting them to blank. If this happens, you will need to re-load the Factory Default
Layouts & Settings as described above, or restore a backup of your Axe-Fx III System settings.
XLR Cable
Connect Axe-Fx III INs and OUTs
as you normally would (Audio, USB, etc.)
FASLINK II
Port (XLR Male)
FASLINK II Jack