F3Dn Service Manual Parts Replacement / Section 2.16A
For Technical Support, Call 800-537-2653. Copyright 2006 Franke, Inc. All rights reserved.
2.16A Freezer Temperature Controller - Sensor
Cable Replacement [Part No. 19000648] –
Continued…
17) Using the 13 mm hex wrench tighten the four hex nuts
that secure the Hopper Center Support Bracket.
18) Install the two hoppers and ensure they are properly
aligned and parallel. [For help in adjusting hopper
alignment, see Section 3.6.]
19) Using plastic wire ties, secure sensor in place on back of
unit.
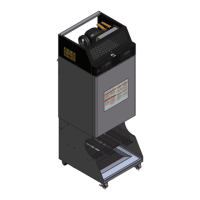
20) Verify the thermostat adjustment knob is set between 4
and 6.
Test the new Sensor Replacement Cable by:
21) Plug in unit power cord to power supply.
22) Switch on Main Power Switch at the front control panel.
23) Allow compressor to draw down unit to its normal
operating temperature range, which should be 0 to -10°
F [-18 to -23° C]. Cool down time of 1-1/2 to two hours is
normal.
24) If F3Dn functions normally, close sloped service access
panel and front control panel, close rear service access
panel and return F3Dn Dispenser to normal operating
location.
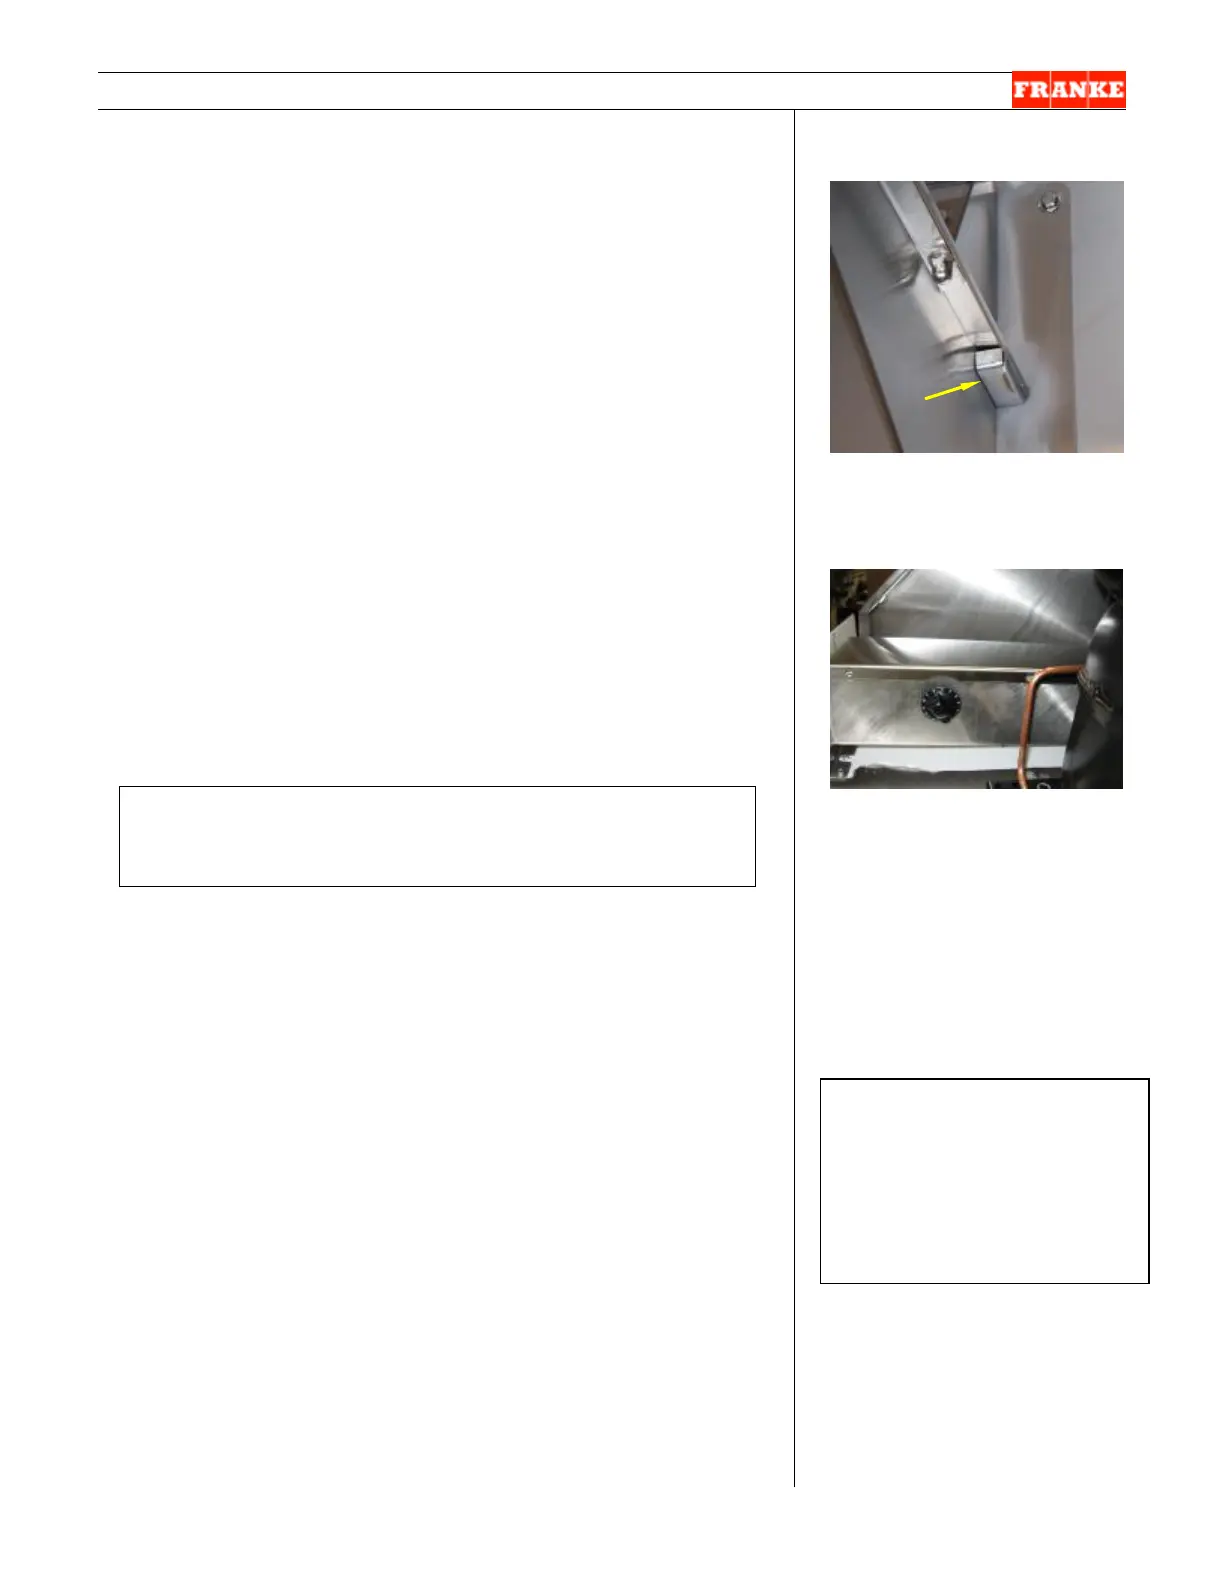
[Photo 5]
Sensor bulb slides into a
protective box mounted on the
Hopper Center Support Bracket.
[Photo 6]
Unit ships from factory with
thermostat set at 5. [Dial range
is from 1-9.]
Rev 1 11/06
If new Temperature Display [Section 2.16] and
new Sensor Cable don’t fix the problem, see Section 4.2
[Thermostat Replacement] for further options.