Installing on wooden deck: Your deck plate must be bolted to the
frame of the deck and not only to the deck planking. You need to fasten 1 or 2 braces between
the deck joists or bearers that form the structural frame of the deck. It is suggested that 2
pieces of wood of 8”W x 2”-4” thick be secured under the deck planking and between the
deck bearers and fasten these braces to the joists/bearers with suitable fastenings. These
may be large galvanized nails, brackets or similar. The Deck Plate should now be set in the
required position and bolted through the deck planking and the fixed braces by using 1/2”x6”
stainless steel bolts and nuts with a large washer on the underside.
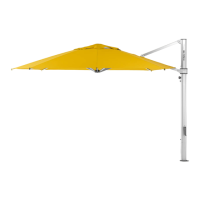
Your umbrella comes with a spigot. Once you have installed the Deck Plate according to
the instructions below, attach the spigot to the Deck Plate using the supplied Allen key and
bolts. Once the Deck Plate is fully secured, lift the umbrella on to the top of the spigot. This
is recommended as a two man operation.
DECK/CONCRETE INSTALLATION OPTIONS
IMPORTANT: Align one of the countersunk holes in the Deck Plate with your desired
12 o’clock position on the umbrella.
TIP: The Deck Plate comes with four “grub-screws” pre-installed in the threaded holes.
Remove the grub-screws with an Allen key.
Installing to a concrete slab: When installing your umbrella on a
concrete surface, fix the Deck Plate to the concrete using 4 concrete screws, ‘Dyna-Bolts’ or
similar fastenings. The diameter of the countersunk holes in the Spigot is .5”, use M10/M12
bolts included with your umbrella. The length of the fastenings will depend on the depth of
the concrete and whether there are any tiles or pavers above the concrete. As a minimum, 3”
of fastening in concrete is required.
DECK PLATE INSTALLATION ALTERNATIVES
17 |