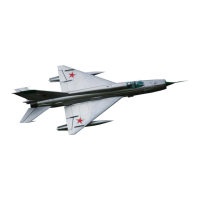
Main Wing Installation
�t
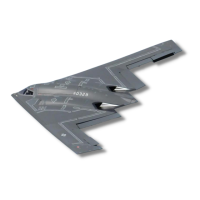
1.
Use a servo tester or radio to center the
servo.
2.
Apply the glue to the servo bays and the
control surfaces to attach the "9g servo
boxes(C)" and "Control horns (D)" to the wings.
3.
Place the servo in the" 9g servo box (C)", and
press the servo cable into the "Trough (F)",
then place the"9g servo cover (B)" over the
servo and secure it with 2 "Screws(A)".
4.
Use "Push rods(E)" to connect the
servo arms and "Control horns (D)".
�
Note:
we have installed all the servo
boxes in the aircraft so when pilots remove
aservo, it will not damage thefoam surface.
If you need to replace a servo, purchase
Freewing servo ,or refer to the following
drawing to choose the correct size.
(2.67 in)
Flap
(2.17 in)
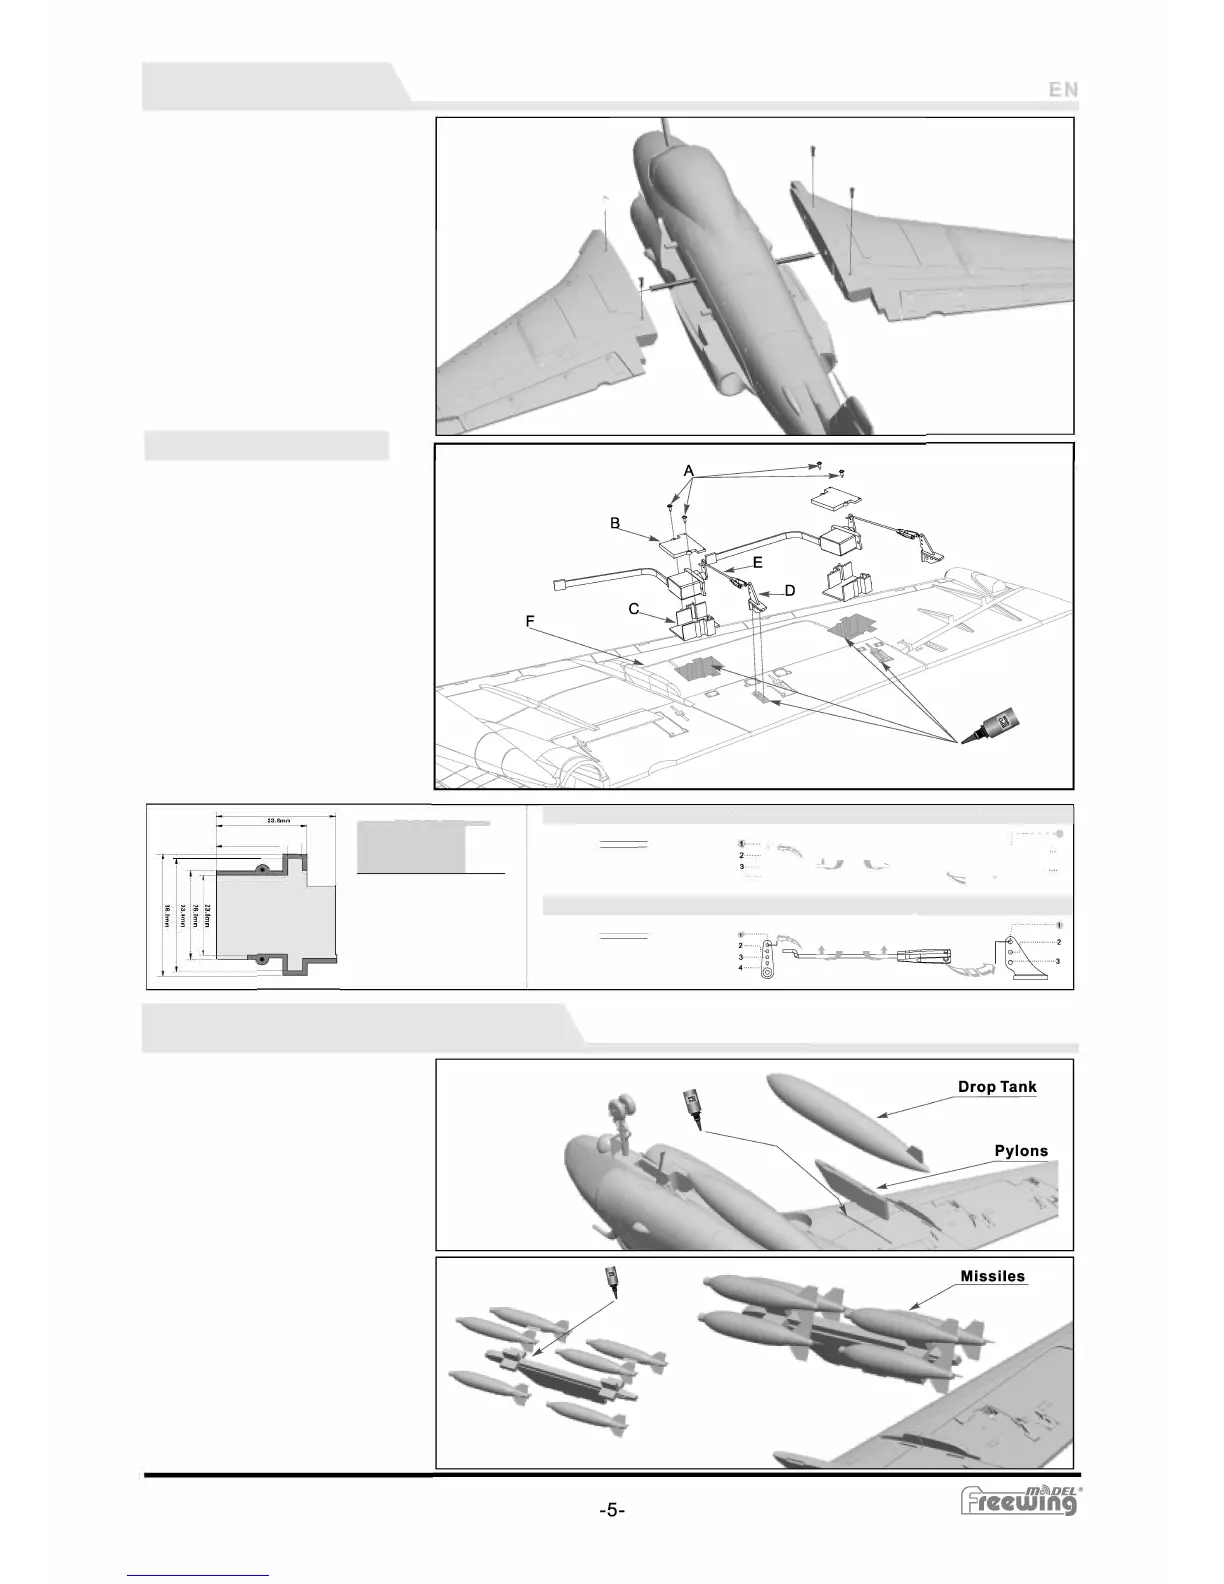
Drop Tanks And
B
o
mb
s Installation
1. Apply glue to attach the drop tank pylons
to the main wing.
2. After the glue sets, the drop tanks are
attached to the pylons magnetically.
3. Use glue to attach the optional bomb
pylons to the wings.
4. After the glue sets, the bombs attach to
the pylons magnetically.
(The kit does not include bombs. If you
wish to purchase them separately,
contact your local distributor)
4
1. Insert the Carbon fiber rod into the
fuselage.
2. Slide the port and starboard wings
onto the Carbon fiber rods.
3. Use the 4 screws to anchor the
wings to the fuselage.
Carbon fiber rod
Wing Servo Installation
(2
)
P
(2
)